June 8, 2010

Double Dark Chocolate Cookies (vegan)

Don't all diets need a little chocolate?  I'm busy working to fit back into my pre-pregnancy jeans but just can't live without a little chocolate now and then...or rather nearly every day.  The question that remains is how to administer said chocolate.  Some of my chocolate cravings are satisfied by very good chocolate from TCHO, a new favorite, but I'm also itching to get back into my baking groove and had cookies in mind.

I started with a basic recipe from Martha Stewart.  I knew it could be tweaked to make a just as satisfying and yet much more nutritionally valuable cookie.  I did have my diet in mind but there also was the soon-to-be 8!! year-old monster, my son Alex, that needed to be kept happy.  It would be cruel to make batches of cookies that were too "healthy" to appeal to his taste buds.  So I tested and tried combinations until I arrived at this recipe.

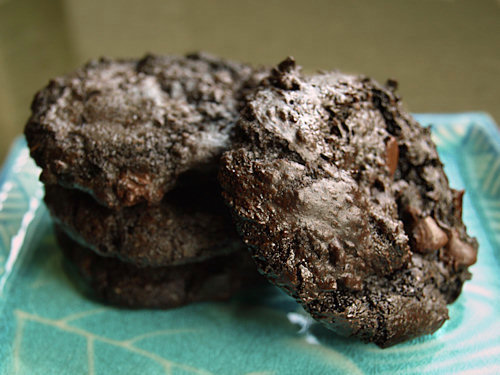
This dairy-free, egg-free, low-soy, whole wheat, lower sugar version of the double chocolate cookie really satisfies my chocolate cravings and yet still manages to stay kid friendly.  They exemplify my ideal cookie texture: crispy on the outside, chewy inside with melty chocolate bits throughout.  And if you just so happen to be counting points with Weight Watchers you can have one for 2 points or two for 3 1/2.  They fit in perfectly with my dieting modus operandi: filling up on vegetables seasoned with good quality protein and skipping the bread/pasta/rice so I can indulge in a sweet--that is if I can get to them before Alex does!

Double Dark Chocolate Cookies
My adaptation of the Double Chocolate Cookie recipe  from Martha Stewart
Makes 3 bakers dozen cookies (39 cookies)

Ingredients:
4 oz (~1/2 cup) unrefined coconut oil*
2/3 cup dark brown sugar
8 oz (~1 1/3 cup) semi-sweet chocolate chips or chunks
3 tablespoons golden flax seed meal
6 tablespoons warm water
2 teaspoons vanilla extract
1 cup whole wheat pastry flour
1/2 cup cocoa powder**
1/2 teaspoon baking soda
1/4 teaspoon salt

Ingredient notes:
*Lately I've been using Tree of Life brand coconut oil which has very mild coconut flavor and is acceptable to Alex's palate.  If you or those you are baking for don't object to coconut then by all means use a more coconutty oil.
**Any baking cocoa you have will work but if you want the darkest cookies use half regular cocoa and half black cocoa (like this one from King Arthur Flour).   You would then be using 1/4 cup of each type of cocoa.

Directions:
-Preheat your oven to 325 degrees F.  Line your baking sheet pans with parchment paper.
-If your coconut oil is liquid it's best to chill it until just firm.  Add your solid coconut oil and brown sugar to a stand mixer and beat until well combined.  Note: this will not cream and become fluffy like margarine or butter.
-Melt half of the chocolate (4 oz) in a double boiler or microwave and set aside.  Mix the flax seed meal and water together and allow to gel.
-Add the gelled flax and the vanilla extract to the coconut oil mixture and beat until combined, at least one minute.  Add the melted chocolate and beat until incorporated, you will need to scrape the sides of the bowl a few times.
-Stir or sift together the flour, cocoa(s), baking soda and salt.  Add to the coconut oil mixture and beat until smooth, scraping the sides several times.
-Add in the remaining chocolate (4oz).  The dough will be thick and gummy at this point and you will have to work to get the chips even throughout.
-Scoop tablespoon sized balls of dough onto the lined cookie sheets leaving at least 1 1/2 inches between each cookie.  To make this easier use a 1 tablespoon disher, see link at the end for an example.
-Bake for 11-12 minutes until puffy.  Remove and allow to cool on the baking sheets.
**These freeze very well as baked cookies.  You can bring them to room temperature or gnaw on them frozen.

Trying something new...
I'm an avid fan of Amazon.com so I'm testing the Amazon Associates function in Blogger. For full disclosure these are links that would give me a kick back if you purchased the item through them.  They are however things I actually do use and like a lot.


June 5, 2010

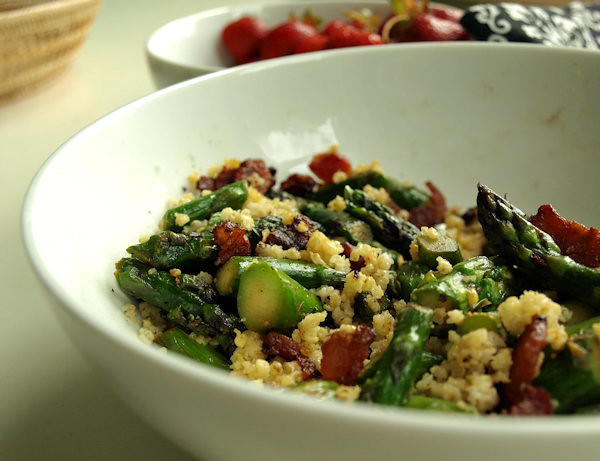
Black Pepper Asparagus with Millet and Bacon

Michigan asparagus soon to be gone for the season and Michigan strawberries just in.  I love the farmer's market in the spring!  Penny was very good at the market and shopping this morning but just refuses to be out in the garden with me.  So I'm inside cooking and blogging instead, the tomato plants will have to wait.

I've been eating a lot of millet lately.  It was one of the grains I made and froze for post baby eating, along with brown rice and quinoa which also freeze well cooked.  I hadn't eaten millet much before but it turned out to be a pleasant surprise when I realized how much I loved the corn-like flavor and fluffy texture.  Now I'm craving it.  Don't they say that thin people eat "like birds"?  My chickadees love millet!  A perfect get off the baby weight food!  Regardless, here's a great combination I made today that also utilizes my new favorite way to make asparagus.

Basic Millet Pilaf
Makes ~3 cups of millet

1 cup whole millet
2 1/2 cups water
1/2 teaspoon salt

-Toast the millet in a dry saucepan until it smells nutty and turns a light golden brown.
-Add the water and salt and bring to a boil.  Turn down to a simmer, cover and cook 30 minutes or until tender.
-Fluff with a fork and serve.  Or...
To store in the freezer for later:  Spread out the cooked millet on a baking sheet, allow to cool to room temperature, freeze and then crumble and bag.  When needed, shake out and warm in the microwave covered with waxed paper or in the oven covered with parchment.

Black Pepper Asparagus with Millet and Bacon
Serves 4 as a side or 2 as a meal

1lb fresh asparagus spears, chopped into 1 inch sections
3 cups prepared millet pilaf
4 slices of bacon, sliced into lardons *or see meat-free variations at end
1 tablespoon lemon juice
salt and freshly ground black pepper

-Heat up a skillet, cast iron is best for this, and add the lardons.  Cook until crispy.
-Remove the crispy lardons to a serving bowl and pour off almost all of the bacon fat.
-Make sure the pan is hot and add the asparagus.  Salt the asparagus lightly and grind on a generous amount of black pepper.
-Cook the asparagus over high heat tossing occasionally until it starts to brown and is hot and cooked through but still slightly crunchy.
-If you are using pre-frozen millet heat it up.
-Toss the heated millet, crispy bacon lardons and asparagus with the lemon juice and more black pepper.  Taste for seasoning and add more lemon juice/salt/pepper to your own taste.
-Serve with a side of Michigan strawberries for the best effect.

Meat-free variations:
-Chop Fakin' Bacon (smoked tempeh) into lardons and fry in 1 tablespoon of oil until crispy. 
-Caramelize 1/2 cup of chopped onion in 1 tablespoon of oil and use in place of bacon.

Fritz our dachshund caught a tomato hornworm moth this week.  John and Alex decided I couldn't kill it to protect my garden and so they relocated it.  My sincere apologies to the tomato gardener this guy finds. 

May 27, 2010

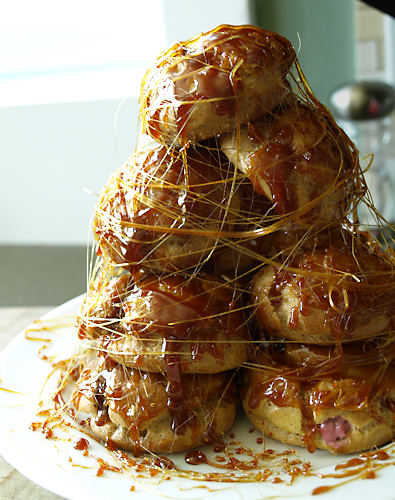
DB Croquembouche

The May 2010 Daring Bakers’ challenge was hosted by Cat of Little Miss Cupcake. Cat challenged everyone to make a piece montée, or croquembouche, based on recipes from Peter Kump’s Baking School in Manhattan and Nick Malgieri.

I lost count of how many times I sat down to post this so it's going to be super short and sweet.  Garden and baby duties are coming first this week.  But I did find time earlier in the month to make a "crack in the mouth" tower, in French croquembouche.  For my modifications, I used half whole wheat flour because I think choux pastry tastes a thousand times better that way and I used extra virgin coconut oil in place of the butter.  My son Alex demanded raspberry filling and so I made the vanilla pastry cream with So Delicious Coconut Milk Creamer French Vanilla and added raspberry puree and a touch more sugar.   I also filled some with homemade lemon curd.  Neither Alex nor I liked the coconut creamer pastry cream.  It wasn't bad but the plastic/artificial flavor of the creamer disappointed me.  Back to the drawing board to find a better dairy-free pastry cream, I just can't seem to make rich dairy-free puddings that I'm truly happy with.  Making the tower, I burned several fingers and got the caramel a tad too dark but it was fun to stack them and cover it with spun sugar.  Nice challenge!

Links:
-View the full recipes at Little Miss Cupcake.
-I highly recommend the choux pastry formula in this Heavenly Baked Crullers with Cherry Glaze recipe. I've used it a ton of times. I halve the recipe, use it make puffs instead of crullers and make my own glazes and fillings. I think the whole wheat flour makes puffs so nutty and tasty.  Though I've tried several other choux recipes, I haven't found one I like better.
-Sorry to say I can't recommend So Delicious Coconut Milk Creamer.  As much as I'd love to have a dairy and soy free heavy cream replacement without a coconut flavor it tastes just as awful as any other coffee creamer.  And seriously, why is the stuff made fat free?!
-Visit the Daring Kitchen and see all the other towers of wonder made this month by browsing the Daring Baker Blogroll.
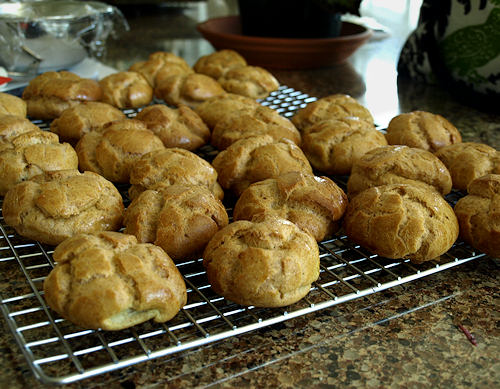
Cooling Puffs
A newer Alex/Penny photo
My favorite shot of Penny from her birth.  Photo credit to Creehan Photography

April 27, 2010

DB Across the Pond Pudding (vegan)

The April 2010 Daring Bakers’ challenge was hosted by Esther of The Lilac Kitchen. She challenged everyone to make a traditional British pudding using, if possible, a very traditional British ingredient: suet.

First off, I'd like to say thanks for all the good wishes! Not withstanding the expected lack of sleep we're all doing well. Of course it would be a grand understatement to say this hasn't been my month for cooking. Since Penny's birth I've been eating reheated meals from the freezer supplemented only by eggs fried by my husband. He's quite good at frying but for heaven's sake don't ask him to poach you one--and definitely don't offer him any advice while he's doing it!

Even though I've been trying to take it easy I still wanted to attempt this month's Daring Baker challenge. I've had steamed sponge (steamed cake) puddings before but not the type with suet crust and filling. Since our household is a dairy-free, meat-eating one I did try to procure some suet. But, since I'm tied down to the couch nursing I had to send my husband out--and the suet never happened. So a vegan pudding was to be.

I chose to swap in extra virgin coconut oil for the suet and the recipe I picked was Sussex Pond Pudding. The citrus and caramel filling sounded like a good bet to please my son, whose favorite flavors are lemon and caramel. To make the recipe more my own I used a small bunch of kumquats in place of the lemon. They have been hiding in the bottom of a fruit drawer for long enough without any purpose. I also halved the recipe since I'm already trying to implement a post-baby diet and don't need copious leftovers tempting me.

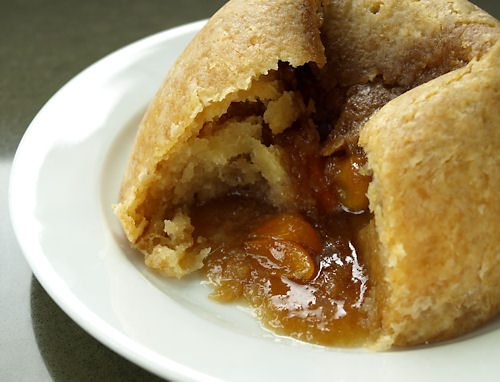
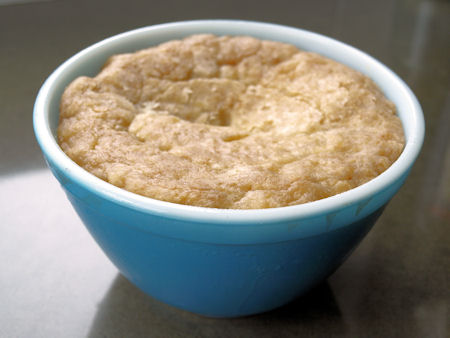
Well I loved the results!! The coconut oil worked very well, giving a flaky exterior crust with a spongy interior that soaked up just enough of the caramel sauce. The kumquats gave everything a beautiful aroma and I liked the bite of sour and bitter as a contrast to the rich and sweet crust and sauce. The best part was Alex couldn't be kept away once he saw the caramel sauce run out. He gobbled up his serving but left his kumquats on the plate. I was pleasantly surprised at how easy this dessert was. I didn't even have to fuss with the steamer! I just set it up and it was fine for the time needed. I can easily see myself playing around with this recipe and making it for dinner parties, when I'm ready for that sort of thing again. You could prep the pudding before guests arrive and have a piping hot dessert without having to run around the kitchen or worrying about anything getting over-baked. And somehow this spring I'll just have to find room in my diet to try the delicious sounding rhubarb version. Thanks Esther for the fun challenge!!

Across the Pond Pudding
Here are my adaptations to the recipe for Sussex Pond Pudding. The original pudding recipe came from Esther of The Lilac Kitchen as part of the April 2010 Daring Bakers Challenge.
Makes 1 (2 cup) pudding, serves 4

6 oz (~3/4 cup) all-purpose flour
1 teaspoon baking powder
1/4 teaspoon salt
3 oz coconut oil, solidified
~1/2 cup soy milk or water
2 1/4 oz Earth Balance Margarine
2 1/4 oz Demerara or Turbinado sugar
8 kumquats or half a lemon

-Find an appropriately sized heat proof bowl and prep a pot big enough to hold it for steaming. The steaming pot must be able accommodate the bowl along with a steamer basket or rack and have a fitted lid.
-Mix together the flour, baking powder and salt in a bowl. With a pastry cutter or fork, cut in the coconut oil until it forms large crumbs. Add enough milk or water to form a dough.
-Take three quarters of the dough and roll it out to a circle large enough to line the inside of the steaming bowl, the 2 cup heat proof bowl. Line the inside of the bowl with the dough.
-Mix together the margarine and sugar and place half in the lined bowl. Add the kumquats or lemon half and cover with the remaining sugar mixture.
-Roll out the remaining quarter of dough to form a lid. Pinch the edges of the lid to the lining and prick a vent in the center.
-Cover the steaming bowl with a layer of waxed paper combined with a layer of aluminum foil. Pleat to make a single expansion fold and tie tightly with string.
-Get your steaming pot going and place the covered bowl inside. Steam for 3 1/2 hours, checking the water level occasionally.
-Remove the bowl from the steaming pot carefully and take off the foil and paper. Invert a rimmed plate on top of the bowl and then quickly flip to unmold the pudding.
-Slice and serve.

Links:
-Our host this month is Esther from The Lilac Kitchen. Visit her site for recipes for Sussex Pond Pudding and other suet-type puddings.
-Esther based the recipes for this month from the following sources: Delia Smith’s Complete Cookery Course, The pudding club (www.puddingclub.com), Mrs Beeton’s Book of Household Management and the Dairy Book of Home Cooking and her own family’s recipe notes!
-I used Tree of Life coconut oil this month and really liked it. It was a lot milder in coconut flavor compared to some of the other brands I've had.
-Visit the Daring Kitchen and see all the other puds made this month by browsing the Daring Baker Blogroll.

Penny and her very proud big brother AlexWrapped up pudding after steaming
Unwrapped finished puddingUnmolded pudding before cutting

March 27, 2010

DB Tangerine Tian

The 2010 March Daring Baker’s challenge was hosted by Jennifer of Chocolate Shavings. She chose Orange Tian as the challenge for this month, a dessert based on a recipe from Alain Ducasse’s Cooking School in Paris.

Well it's a very good thing I had this post set up ahead of time because the newest edition to our family decided to arrive ahead of schedule yesterday. Presenting Penelope Rose....
Labor went very quickly but felt a hell of a lot more painful than with my son Alex--I guess there has to be a trade off. Penny was born yesterday afternoon at 5:06pm in our home (in a birthing tub) and weighed 8lbs 8oz. The Dog Hill dogs are very interested in her, especially Fritz our puppy who is being very good but very inquisitive. The cats couldn't care less. Alex is being a wonderful big brother and was very brave yesterday during the birth, he even got to cut the cord. He'd just love it if she were awake more so he could show her all of his Bakugan.

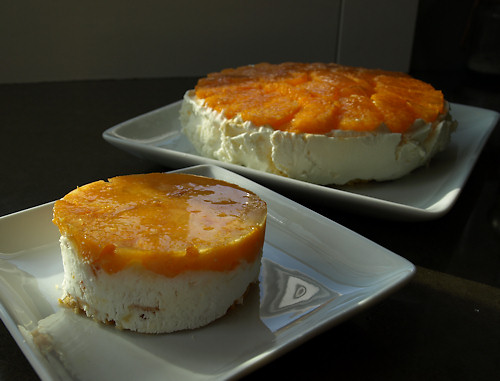
Oh yeah and the tian...not bad as far as my now foggy memory can recall. I liked making the marmalade because I could have eaten the whole batch straight up but I felt the directions overall needed to be better. Alex wasn't a huge fan of the final dish but loved this pate sable recipe made dairy-free. He gobbled up all the extras. His dairy-free tian is the small one in front and the larger one was made using real cow's milk ingredients. With the layers of citrus it was a nice dish for spring.

Links:
-This month's host is Jennifer from www.chocolateshavings.ca
-Recipe Source: Recipe slightly adapted from Alain Ducasse‘s Cooking School in Paris, France (http://www.ecolecuisine-alainducasse.com/).
-Stabilized whipped cream (http://tamsin-cakes.com/2009/06/05/tamsincakes-on-flickr-adventures-in-s...)
-For my dairy-free version I used Soyatoo a dairy-free, soy whipped topping
-The whipped cream layer was made with with local Shetler Dairy heavy cream
-Visit the Daring Kitchen and see all the other tian made this month by browsing the Daring Baker Blogroll.