December 28, 2008

DB Ebony and Ivory French Yule Logs

This month's Daring Baker challenge was a French Yule Log. Different from the rolled cake style yule log, this year's yule log is a layered, frozen confection that includes a cake/biscuit, ganache, creme brulée, and a chocolate crisp (feuillete) all floating in chocolate mousse. I had my doubts about how successful this recipe would be dairy-free so I decided to also make a full-sized log with cow's milk (real dairy) ingredients. With the challenge falling around Christmas, I knew I would have enough dairy eaters to finish it off. So Alex, my son who has a dairy allergy, wouldn't feel left out I also made a smaller log that was dairy-free. For both logs I went with an Ebony and Ivory theme, alternating white and dark chocolate. Here's the breakdown of the components and my thoughts on each:

Element #1 Chocolate Dacquoise (Almond Cake)
The dacquoise was the easiest part because the recipe was originally dairy-free. I made a double batch of the chocolate version given which includes 3 tablespoons of sifted cocoa.
Thoughts: I spread the batter a little too thin. It wasn't quite enough to cover the entire mold and I would have liked the bottom layer thicker. I liked the chocolate flavor a lot. It could have used a pinch of salt, I thought.

Element #2 Dark Chocolate Mousse
For the dairy version I made no changes to the dark chocolate mousse recipe given. For Alex’s dairy-free log I used Rich Whip, a dairy-free whipped cream substitute also know as BCoW (Blue Can of Wonder). I learned about Rich Whip from another blogging mom from Michigan who writes at Speedbump Kitchen. The ingredients in Rich Whip are just short of plastic but it does taste just like Cool-whip and is safe for Alex. Sometimes nutritional compromises must be made. For my small dairy-free log I used ¾ cup of unwhipped Rich’s Whip Topping, 2 teaspoons of cocoa powder, a tiny pinch of salt and ¼ teaspoon of vanilla extract. I whipped the topping, added the vanilla and salt and sifted in the cocoa. Then I whipped it until the cocoa was evenly distributed.
Thoughts: The dairy-free version came out beautifully. It was light with just enough chocolate flavor. The dairy version was good but a little too heavy and rich for me. I would like to try the dairy milk chocolate Chantilly recipe instead.

Element #3 White Chocolate Ganache
For the dairy log I followed the directions for the white chocolate ganache insert with no changes. For Alex’s dairy-free log, I used 2 oz of dairy-free white chocolate chips with 2 teaspoons of soy milk and 1 teaspoon of Earth Balance margarine. I melted the ingredients carefully in the microwave (1.5 minutes), stirred them together until smooth and piped them in.
Thoughts: The dairy version of this is wonderful! I love the caramel flavor and the slight caramel chew to it. I wish I had made Alex's with caramelized sugar and will be trying that soon. I have had trouble finding a reliable dairy-free ganache recipe but this was spot on. I'll be keeping it around to use again.

Element #4 White Chocolate Praline Feuillete (Crisp) with Cocoa Crispy Rice Cereal
To save time, I made a double batch of the crisp with dairy-free white chocolate and used it in both logs. I used homemade praline paste with pecans from the Filbert Gateau recipe, which was part of July’s DB challenge (link at the end of this post). Then I melted dairy-free white chocolate chips and Earth Balance margar+-ine in the yule log recipe proportions in the microwave. I hate the mess of a double boiler and melting chocolate in the microwave is so easy. I had some New Morning Cocoa Crispy Rice Cereal in the house and so used that for my crisp component. Thus the crisp became another expression of the ebony and ivory theme. (I was getting carried away by this point.)
Thoughts: That praline paste is to die for! I wasn't in the mood for another nut-based cake back in July but I loved the recipe for homemade praline paste. Thanks Chris for choosing that recipe, I've used the components several times.

Element #5 Vanilla Crème Brulée
I didn't change anything in the vanilla crème brulée directions for the dairy log. For Alex's dairy-free log I decided to cheat and made a Tofutti ice cream insert. I used Tofutti Vanilla Almond Bark which is one of their best flavors.
Thoughts: I made the creme brulée layer too thin. It was the first component I made and I thought with my size pan I could get a small log and a full-sized log out of the recipe, but it gave me too thin of a layer. Also, creme brulée without that crispy, caramelized sugar top just doesn't seem right. Creme brulée is all about the cracking the top! Alex's ice cream layer was really good.

Element #6 White Chocolate Icing
For the dairy-log I followed the provided recipe for white chocolate icing. For Alex’s dairy-free log I tried using the recipe as written using dairy-free ingredients, which was a big mistake. After letting it cool, it was too runny so I added another ounce of chocolate and warmed it until the chocolate was incorporated. Still too runny, so I tried adding a teaspoon of soy milk powder. This helped a little but by now I was done playing with it and just went ahead and poured it over the log. It didn't coat thickly enough and the mousse showed through. Bah, you can't win them all.
Thoughts: I coated my dairy-free log first and with the different properties of dairy-free white chocolate it just didn't get thick enough to coat well. Then when I made the icing with dairy I was nervous about it not covering well and let it cool too much. This caused the icing to set into drips on the sides which was not the look I was going for. I wasn't a big fan of the gelatin texture of either icing and would have preferred a gelatin-less ganache coating.

Element #7 Decoration
For the dairy log I made a chocolate ganache, again using a component of the Filbert Gateau recipe (link at end). For Alex's log I used the same proportions as in the ganache insert (1 oz of chocolate, 1 teaspoon of soy milk and 1/2 teaspoon of Earth Balance margarine).

Overall impressions: This was a fun recipe with a lot of techniques that I have never used or only used once before. It was a great learning experience and very satisfying to complete. Overall the two logs were interesting to try side by side. My favorite components were the caramel-white chocolate ganache from the dairy log and the mousse from the dairy-free log. And what did Alex think? He pulled the icing and ganache decoration from the top and that was all he wanted to eat. Kids-- you just never know what will please them! My husband was a big fan of the dairy-free log and my family seemed to enjoy the dairy log. I served both on Christmas Eve and the leftovers on the day after Christmas. Here are some more pictures:

The components for my dairy-free yule logI'm never left alone when I'm taking food photosThe finished logs: dairy-free on the left, real dairy on the right
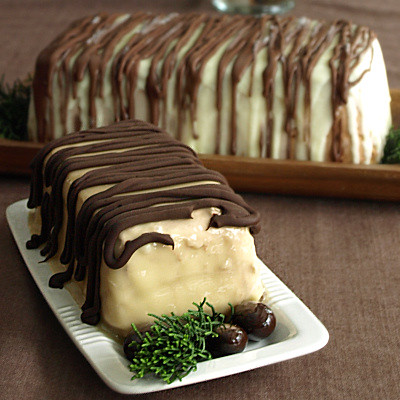
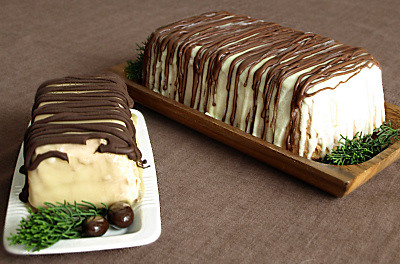
Slices of both logs (dairy on the left, dairy-free on the right)


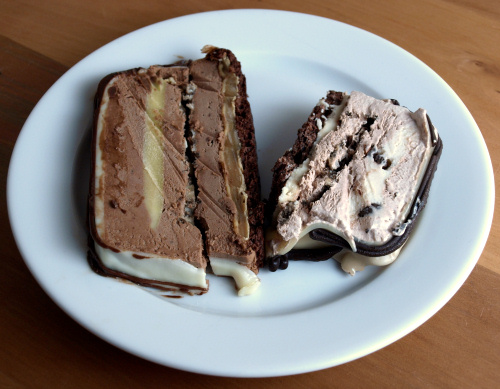
This month's challenge is brought to us by the adventurous Hilda from Saffron and Blueberry and Marion from Il en Faut Peu Pour Etre Heureux.They have chosen a French Yule Log by Flore from Florilege Gourmand.

Recipe Links:
For the complete recipe (Beware, it's huge!) visit Saffron and Blueberry or Il en Faut Peu Pour Etre Heureux.
The original recipe comes from a French recipe site, Florilege Gourmand.
The recipes for the praline paste and chocolate ganache with dairy came from the Filbert Gateau with Praline Buttercream recipe at Mele Cotte.

Dairy-free Ingredients:
Rich's Whip Topping, New Morning Cocoa Crispy Rice Cereal, Tofutti Vanilla Almond Bark, and my source for dairy-free white chocolate Chocolate Emporium

Visit the Daring Baker Blogroll to see more decadent logs.

December 22, 2008

Christmas Traditions

I found a list of Christmas Traditions on another Michigan blog, A2EatWrite, and thought it looked like fun. The topic of traditions brought to mind one of our holiday traditions-- the smashing of the gingerbread house. For several years now I've made a gingerbread house(s) and let my son Alex smash them after Christmas is over. Sometimes he likes helping with the house construction but his eyes really twinkle when he gets that rubber mallet in hand and starts swinging. Most years I only get pictures of the smashing action but this year I managed to remember to take a picture of the house before it's destruction. For the gingerbread this year I used this dark molasses gingerbread recipe from Martha Stewart but I prefer her snowflake gingerbread recipe. This was my first year using the dark gingerbread and after tasting the house extras I made a batch of the snowflakes (I've used that recipe several times in years past). I definitely preferred the gingerbread snowflake recipe. It's spicier and has the perfect amount of molasses. The darker gingerbread looks nice but isn't as tasty.

I really love how the chimney turned out this year, it's just crooked enough.


My Christmas Traditions
*Please let me know if you post a copy of the list, I'd love to read them.

1. Wrapping paper or gift bags?
Mostly paper but I save bags and try to pass them along. This year I found some reusable, magnetic, collapsible boxes that I'm going to try to use in place of cookie tins. If they work, they'll be great because cookie tins take up so much space in storage.

2. Real tree or Artificial?
Real, this year's tree is a concolor fir, which smells like tangerines! I also like getting white pines and balsam firs for their long, soft needles. We've been buying our trees from the same grower for over 9 years now. The have the best shaped trees. I hope to get some seedlings in the spring and plant my own firs and pines on our land. Maybe in 10 years I'll be cutting down a tree from my own backyard!

3. When do you put up the tree decorations?
Little decorations and books come out right after Thanksgiving and the tree usually goes up on my birthday (the 12th). This year because of the ectopic pregnancy and the surgery I put it up a week early. I'm so glad I did because I lost a week to healing and it would have been sad to have the tree so late.

4. When do you take the tree down?
Sometime between the 2nd and 6th. It depends on how wild New Year's Eve was.

5. Do you like eggnog?
Yes, and I really like fruitcake too.

6. Favorite gift received as a child?
I'm drawing a blank. All my Christmas memories are about Christmas Eve at my grandparent's house and about the food.

7. I followed the links back but there seems to be no question number 7...
but I did find a great blog called Proclamations of a Lady Dunbar!

8. Easiest person to buy for?
Alex, he just wants Legos.

9. Do you have a nativity scene?
I set up my Nativity puzzle as a Nativity scene but this year Alex keeps putting it back together.

10. Mail or email Christmas cards?
Mail, with a picture of Alex in red striped pajamas. I think I'm going to let it go this year and send moving announcements instead. I just ran out of time.

11. Worst Christmas gift you ever received?
I can't think of anything that was that bad.

12. Favorite Christmas Movie?
It's a Wonderful Life! It's one of my favorite movies of all time along with Harvey, which has a lot of the same spirit.

13. When do you start shopping for Christmas?
Late November unless I see something that really would be great for someone.

14. Have you ever recycled a Christmas present?
I don't think so but I recycle lots of packaging.

15. Favorite thing to eat at Christmas?
Cookies and pierogi tie.

16. Lights on the tree?
I like all white but as a kid I always had bubble lights. Some of my parents sets were really ancient and I loved them.

17. Favorite Christmas song?
Aspenglow sung by John Denver (This is also a good version, it's the second song.)


MusicPlaylist
Music Playlist at MixPod.com


18. Travel for Christmas or stay home?
We have my husband John's family over at our house for Christmas Eve and then go somewhere for my family on Christmas Day.

19. Can you name all of Santa's reindeer?
Dasher, Dancer, Prancer, Vixen, Comet, Cupid, Donner, Blitzen, and Rudolph.

20. Angel on the tree top or a star?
Gold glitter star.

21. Open the presents Christmas Eve or morning?
Both, we open presents with the family we are with. Santa comes Christmas morning.

22. Most annoying thing about this time of the year?
The traffic. My mind can't quite handle the number of people in metro-Detroit. It's like rush hour all day.

23. Favorite ornament theme or color?
A white plastic reindeer that was from my father's parents.

24. Favorite Christmas dinner?
The traditional Slovak Christmas Eve meal: pierogi, bobalki, split pea soup, sauerkraut and mushroom soup. I eat meat on Christmas Eve now since we're with John's family and I just started the braised beef short ribs for our meal today.

25. What do you want for Christmas this year?
For my family to be healthy and my new house to be completed before March. (I can hope can't I?)

December 21, 2008

Winter Mint Cookies

When I made my Minty Mummy Cookies for Halloween I knew that I wanted to had to make a batch for Christmas as well. I had planned on making snowflake-shaped cookies with piped on royal icing decorations. Then in my browsing on Foodbuzz I came across a wonderful tutorial for glacé icing. Like the author, I've struggled with flooding royal icing (it's so messy and never as easy as Martha Stewart can make it look). I couldn't help but love her beautifully decorated cookies. For my own cookies, I wanted to a generous amount of icing so I added some melted chocolate to the cutout cookie dough to help it stand up to a heavy dose of mint icing. The resulting dough was rich and chocolaty but it does need to warm up a little before you can roll it. I kept the cookies thin and topped the icing with crunchy nonpareils so they remind me of Sno-Caps. Once frosted these received an enthusiastic approval from my son Alex. Happy Winter Solstice!

Chocolate Cutout Cookies
Based on the recipe from Baking Bites
Makes 6 dozen thin 2-inch diameter cookies

3 ounces semi-sweet chocolate (I used Enjoy Life chocolate chips)
1 3/4 cups all-purpose flour
1/2 cup whole wheat flour (or more all-purpose)
1/4 cup cocoa powder
1 tsp baking powder
1/4 teaspoon salt
3/4 cup butter or margarine (Earth Balance is my margarine of choice)
1 cup sugar
1 teaspoon vanilla extract
1 egg

-Melt the semi-sweet chocolate in the microwave or a double boiler and set aside to cool slightly.
-Mix together the flour(s), cocoa, baking powder, and salt and set aside.
-Beat the margarine (or butter) with the sugar until light in color.
-Add the chocolate and vanilla to the butter mixture and mix in. Add the egg and beat until incorporated.
-Add in the flour in three stages until all the ingredients are fully combined. Cover the dough with plastic wrap and refrigerate until fully chilled.
-Preheat oven to 350 degrees F.
-Take the dough out of the refrigerator and allow it to warm up for 15-30 minutes. This will depend on the temperature of your kitchen, but it needs to warm up a little because the chocolate will make the dough too stiff to roll out straight from the fridge.
-When the dough gives a little when pressed roll a portion out to a little less than 1/4 inch thick. For rolling, I like to dust a sheet of parchment with flour and then roll on top. You can just flour your rolling surface or you can roll between two sheets of parchment.
-Cut out your desired shapes, I used 2-inch circles, and place on parchment lined cookie sheets.
-Bake for 7-9 minutes until light brown on the bottom.
-Cool and frost.

Glacé Icing for Winter Mint Cookies
This is an adaption of the recipe from Glace Icing Tutorial and makes enough to frost the above batch of chocolate cutout cookies. Please take a look at the tutorial for more help and ideas.

2 cups powdered sugar, sifted
3 tablespoons milk (soy milk for us)
3 tablespoons light corn syrup
1/2 teaspoon peppermint extract

-Set aside a 1/3 cup of the powdered sugar. Then mix the remaining sugar and milk together until smooth.
-Add the corn syrup and peppermint extract and mix again until smooth. Add as much of the remaining powdered sugar to get a runny consistency that is thick enough to stay on the cookie and make an opaque pool of icing. I made my flooding icing thicker than the example in the tutorial so that no chocolate cookie would show through.
-Spoon on a small amount of icing and spread with the back of a spoon. (Per the tutorial directions I used a baby spoon and it did make a difference.)
-While the icing is still wet add sprinkles as desired. Allow to dry over night or until the icing is hard before storing.

In lieu of an Abbie shot, here is a favorite Christmas decoration of mine, my Nativity puzzle.
All the pieces come out to form a Nativity scene.

This is my second addition to Food Blogga's Eat Christmas Cookies event. This is her second season of collecting Christmas cookie recipes. To see her ever growing collection take a look at:

Eat Christmas Cookies Roundup Part 1 and Part 2

December 20, 2008

Russian Tea Cookies

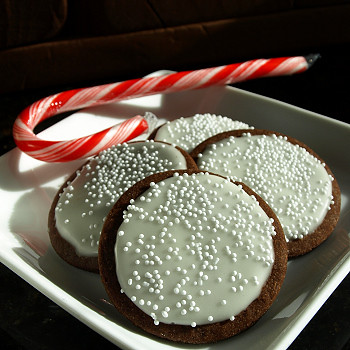
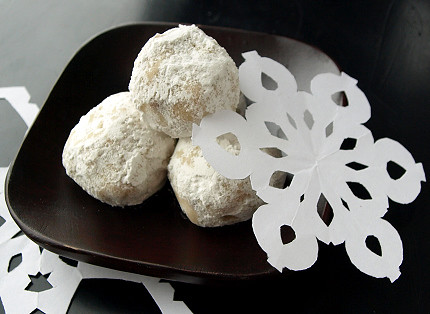
On with more Christmas cookie baking! These next cookies are known by many names: Mexican wedding cookies, Italian wedding cookies, Russian tea cookies, butterballs, pecan balls, nut balls... What ever the name, my idea of Russian tea cookies is a ball of nutty shortbread made lighter and more tender by using powdered sugar in the dough. The balls of shortbread are then heavily coated in more powdered sugar. I've seen recipes with more than one type of nut or different nuts but for me these are always made with all pecans. The recipe I use comes from my grandmother's church cookbook. I had to beg a bit to get a copy of the earlier edition from my mother just so I could have this cookie recipe. The book is battered, cover-less, yellowed and stained and the recipes are not the kind of food I cook on a daily basis but nostalgic special occasion recipes and oddities of the time. An special detail is that the Russian tea cookie recipe was submitted by my great-aunt Ann, my grandmother's twin.

Russian Tea Cookies
Based on a recipe submitted by my great-aunt Ann to the 1964 edition of the Sacred Heart League Cookbook (Sacred Heart Byzantine Catholic Church Livonia, Michigan).
Makes 4 dozen cookies

1 cup butter (I use Earth Balance margarine)
1/2 cup powdered sugar, sifted
1 teaspoon vanilla
2 1/4 cup flour
1/4 teaspoon salt
3/4 cup chopped pecans
~2 cups additional powdered sugar to coat, sifted to remove lumps

-Mix together the butter (or EB), sugar, and vanilla. -Sift the flour and salt together and add to the butter mixture. Stir just until combined. Add in the pecans and again fold in, just until evenly distributed.
-Cover the dough with plastic wrap, form into an even rectangle and chill for at least 4 hours.
-Preheat your oven to 400 degrees F.
-Take half of the dough and cut it into 24 pieces. Gently squeeze the cubes of dough into a ball. This dough crumbles easily and by squeezing instead of rolling you can prevent some of the crumbling. If the cube does crumble, collect all the crumbles and press them together before proceedin' with the squeezin'.
-Place the formed balls onto a cookie sheet. These do not spread and can be placed as close as an inch apart. Do try and leave even space between each cookie so that they cook evenly.
-Bake for 9-11 minutes. The cookie should be set and the bottoms should be very light brown.
-While the cookies are still warm, roll them in the powdered sugar. Allw the cookies to cool completely and roll them a second time.

Abbie once again has to pop in while I'm taking food pictures.

*This is heresy in the making but this year I discovered another Russian tea cookie recipe that I have to try. Once in a blue moon's author posted her grandmother's pecan ball recipe which has more twice the amount of pecans though same amounts of the other ingredients. Could my favorite Russian tea cookie recipe be beat?

December 18, 2008

Chewy Molasses Cookies

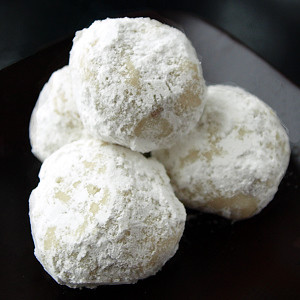
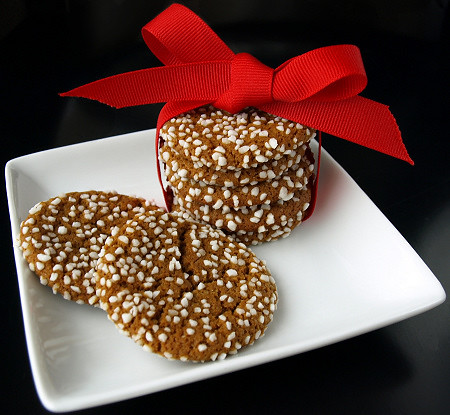
My Christmas cookie baking is in full swing and these chewy molasses cookies are always the first on my list. My parents and I discovered this recipe on a trip to Pennsylvania's
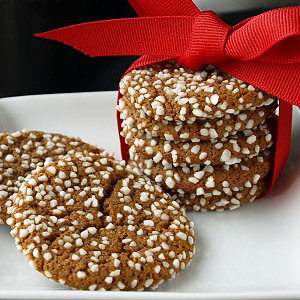
 Fort Necessity National Battlefield. While there we stopped in at the Mount Washington Tavern where we had our first taste of these cookies and snagged a handout with the recipe. This was back in 1980 and I can't remember a Christmas without them since.

These are chewy cookies with a strong molasses flavor and are mildly spiced. I used pearl sugar on them this year but more often we roll them in large crystal sugar. You can use regular granulated sugar but you'll lose the exterior crunch that the larger decorating sugars give. Another change I made this year is to swap the blackstrap molasses for some Muddy Pond sorghum "molasses" I picked up in Tennesse. I couldn't resist the picture of their horse drawn mill. It's tarter but milder in flavor than blackstrap molasses. It was good in the cookies but next year I'm going back to blackstrap, I'm just a strong molasses nut. These cookies are the first on my baking list because they keep so well but they do need to be closed up tightly in a cookie tin or they will get hard and crunchy. They're still good hard and crunchy but it's just not the same. However you make them, I hope these make it into your Christmas cookie collection. (And I hope Alex doesn't find out where I hid the cookie tins. He's eaten nearly a dozen already!)

Chewy Molasses Cookies
Based on a recipe from the Mount Washington Tavern in Farmington, Pennsylvania.
Makes 4 dozen 2-inch diameter cookies

2 cups flour (I use 1 1/2 cups all-purpose and 1/2 cup whole wheat)
2 teaspoons baking soda
1 teaspoon ground cinnamon
1/2 teaspoon ground cloves
1/2 teaspoon ground ginger
1/2 teaspoon salt (1/4 teaspoon if using salted butter or margarine)
3/4 cup unsalted butter (Earth Balance here)
1 cup sugar
1 egg
1/2 cup molasses
~1/2 cup of sanding/decorating sugar, coarse raw sugar, pearl sugar or more granulated sugar for rolling

-Sift together the flour(s), baking soda, cinnamon, cloves, ginger and salt. Set aside.
-Beat the butter (or EB) and sugar together until light in color.
-Add the egg and molasses and beat until encorporated, scraping the bowl 1-2 times. Add the sifted dry ingredients and mix just until combined.
-Cover the dough with plastic wrap and shape into an even rectangle or square. Chill for at least 4 hours.
-After the dough has chilled, preheat your oven to 375 degrees.
-Line two cookie sheets with parchment and fill a bowl with the decorating sugar of your choice.
-Remove half of the block of dough from the refridgerator and cut into 24 equal sized cubes (~1-inch square). Roll each cube into a ball and coat with the decorating sugar. Place on the cookie sheets with plenty of space between each cookie. Give them more than an inch and a half between each ball, these spread a good deal.
-Bake for 7-9 minutes. Cookies will still be very soft and puffy with a lightly browned bottom.
-Allow the cookies to cool on the cookie sheets for 5 minutes and then transfer to a wire rack. Repeat with the remaining dough.
-Store in a tightly closed cookie tin to keep them chewy.


Whiskers on kittens are nice... But one of my favorite things is pink kitten toes.
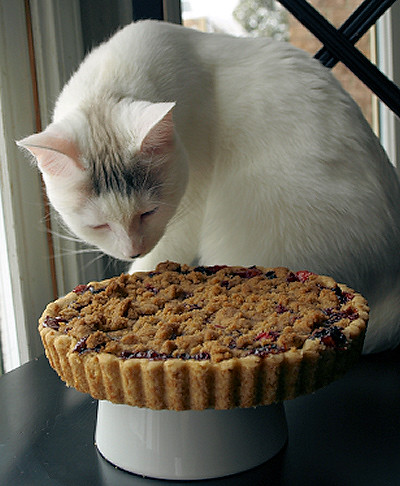
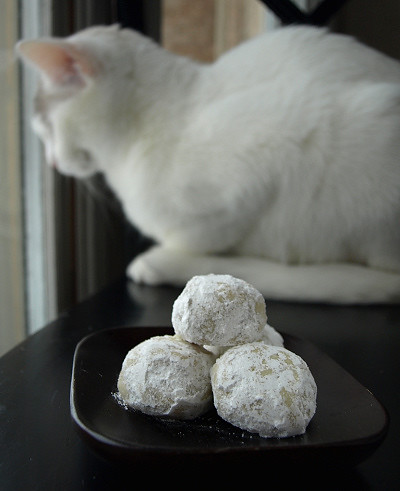
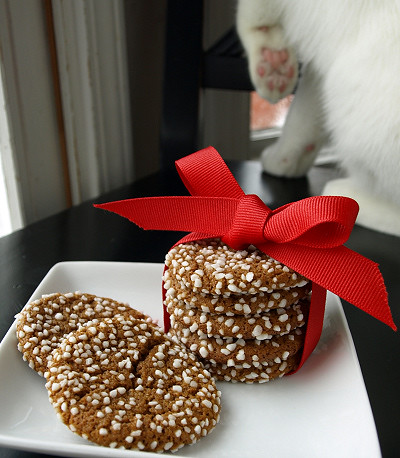
I think I have inadvertently trained Abbie to come to the call of the camera shutter.


I'm adding this to Food Blogga's Eat Christmas Cookies event. This is her second season of collecting Christmas cookie recipes. To see her ever growing collection take a look at:

Eat Christmas Cookies Roundup Part 1 and Part 2

December 17, 2008

Menu For Hope V

I'm feeling much better and wanted to get back into blogging on a positive note. A post about Menu For Hope seemed perfect. Menu For Hope was started by Pim of Chez Pim five years ago after the devastating tsunami in Southeast Asia. The event has continued each year with many other foodbloggers joining in. Last year they raised $91k!! The recent beneficiary of Menu For Hope has been the UN's World Food Program. I really love the Purchase for Progress aspect that is now a part of this hunger relief program. A real effort is being made to not only help the hungry but the local economy and the farmers in the area. Money collected from Menu For Hope goes to the WFP's Lesotho school lunch program. Lesotho is a country severely affected by HIV and TB.

Though I hadn't started blogging last year I was an avid foodblog reader and found the raffle items then too tempting to resist. I don't have a raffle item of my own this year but instead present you with my favorite prizes from food blogs I read regularly.
Here are my picks: (Instructions on how to donate/get a raffle ticket follow)

Chez Pim #UE16: Gourmet Book Club's honorary membership for 2009 and #UW20 Pim's upcoming book The Foodie Handbook

Wild Yeast #UW04: $100 King Arthur Gift Certificate

Sticky, Gooey, Creamy Chewy #UE09: Cupcake Lalapalloza (lots of cupcake goodies!)

Diet, Dessert and Dogs #CA05: Martha Stewart Living Subscription

Smitten Kitchen #UE25 or #UE26: Each number is for a set of 3 RuMe reusable grocery bags

Life in Recipes #UE19: Fresh almond milk kit, 2 pottery mugs and chef Michael Symon’s personalized menu from Lola

Here's how to donate and get a raffle ticket:
1. Choose your desired prize or prizes and jot down the prize code(s).
2. Go to http://www.firstgiving.com/menuforhope5 and make a donation.
3. Each $10 you donate will give you one raffle ticket toward a prize of your choice. Please specify which prize you'd like in the 'Personal Message' section in the donation form when confirming your donation. You must write-in how many tickets per prize, and please use the prize code. For example, a donation of $50 can be 2 tickets for EU01 and 3 tickets for EU02. Please write 2xEU01, 3xEU02.
4. If your company matches your charity donation, please check the box and fill in the information so we can claim the corporate match.
5. Please allow us to see your email address so that we can contact you if you win. Your email address will not be shared with anyone. They promise!

More Links:
More about Menu for Hope
Chez Pim's Master list of raffle prizes
Steamy Kitchen's East coast prize list

December 6, 2008

Cranberry-Cherry Tart with Ginger and Orange

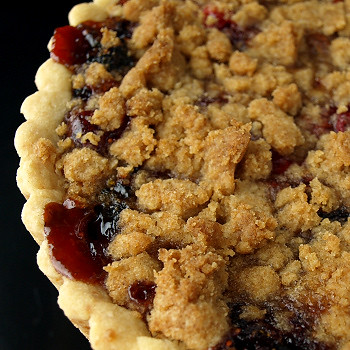
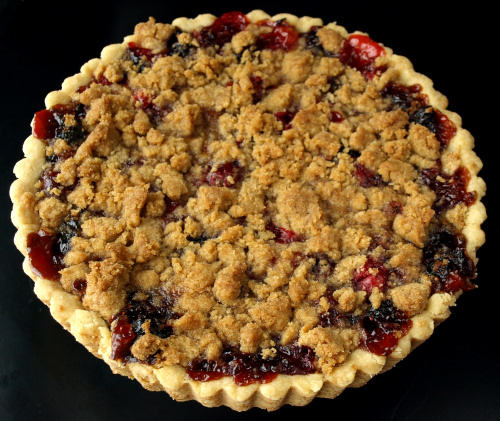
My Thanksgiving didn't go quite as planned and I wasn't able to do all of the cooking I wanted to do. This left me with a glut of fresh Michigan cranberries. Coincidentally, I have had time to catch up on my food magazine reading. The cover recipe for cranberry-cherry lattice pie in the latest free magazine from Whole Foods Market caught my eye as the perfect use for my extra cranberries.

Today we were celebrating my father-in-law's 80th birthday. (Happy Birthday Pappou!) I had already offered to make a chocolate cake but I decided to make a small tart for those who weren't big on cake. (Yes, it may sound crazy but I'd almost always pick pie over cake.) I used the super easy oil crust from Mother's Kitchen, swapped out the lattice for crumb topping, and added fresh ginger and a pinch of cinnamon. I loved the ginger flavor and the sweetness from the dried cherries. Favor the pie lovers in your life and make this!

Just to let you know what's up with my lack of posts:
The past few weeks I've been dealing with an ectopic pregnancy. It's been an emotional and stressful time and I've needed to take a break from a lot of things including my computer. I can't put into words the disappointment, uncertainty and fear I've been feeling. My family and friends have been great support and I can't thank them enough. I hope to be feeling better and cooking and blogging like crazy soon.

Cranberry Cherry Tart
I made my tart with Michigan cranberries and Michigan dried cherries. Both are easy to find this time of year. The recipe fills a 7 1/2 inch tart pan which is one of my favorite baking pans. It's the perfect size to make a small dessert for 4-6 (or 8 when there is cake too). I can't remember where I got mine but you can buy one online at Kitchen Fantasy. To make this recipe in an average pie pan I would suggest doubling the recipe.

Filling
Adapted from Cranberry-Cherry Lattice Pie in Nov/Dec 2008 Whole Foods Market magazine
Makes enough to fill an 7 1/2 inch tart shell
2 cups fresh cranberries
3/4 cup sugar
1/2 teaspoon orange zest
1 teaspoon freshly grated ginger
a pinch of cinnamon
1/2 cup sweetened tart cherries
3 tablespoons orange juice

-Preheat your oven to 350 degrees F and prep your tart shell.
-Process 1 cup of the cranberries with the sugar, orange zest, ginger, cinnamon and cherries until the cranberries are roughly chopped.
-Add the remaining whole cranberries and the orange juice and stir with a spoon/spatula until all the ingredients are well combined.
-Fill the prepared tart crust and top with the crumb topping.
-Bake for 50 minutes, or until the tart crust is golden brown and the filling is bubbling.
-Cool for 5 minutes and then place the tart pan over an inverted bowl or glass to remove the outer ring. Carefully press down on the outer ring so that it drops down. Allow the tart to cool completely and serve. Removing the outer ring while the tart is still warm prevents any bubbled over juice from sealing the crust to the outer ring. It is an optional step but I find it very helpful for creating presentable, easy to slice tarts. Check out the photo of my cat Abbie with the tart on an inverted bowl at the end of this post.

Tart Crust
Adapted from Mother's Kitchen
1 cup all purpose flour
1 tablespoon sugar
1/2 teaspoon salt
1/4 cup neutral oil (I use grape seed)
2 teaspoons milk

-Mix all the ingredients together.
-Press into the tart pan until evenly covered.
-Chill in the fridge while you prepare the filling (~10 minutes, but more is fine).

Crumb topping
1/4 cup all purpose flour
3 tablespoons brown sugar
2 tablespoons butter (Earth Balance margarine in our house)

-Smash the ingredients together with a fork until combined. Then rub the mixture with your hands to get good crumbs. Set aside to top the tart.

Another kitten-approved recipe
I hope my family will still be willing to eat my baked
goods after seeing this. I swear I didn't let her touch it!