Showing posts with label Recipes: preserving. Show all posts

November 12, 2011

"Gremolata" Balls for the Freezer

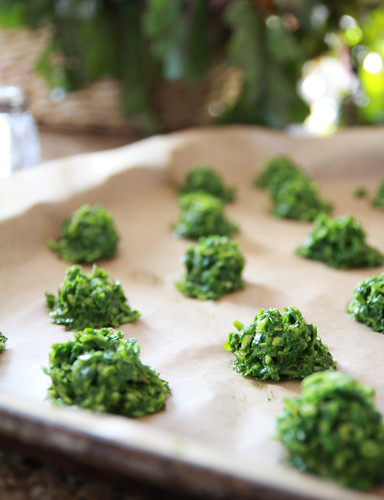
To stash the last of my fresh parsley from my garden I made this. It's only sort of gremolata because I added lemon juice and olive oil in an attempt to have it last better in the freezer.  I tried it out on top of roasted beef marrow bones and it was fantastic!  The verdant and piquant flavor cut through the richness of the marrow.  I plan on using the rest of my stash to garnish stewed meat or soup, similar to the uses for gremolata on osso bucco or like pistou in soup.

"Gremolata" Balls for the Freezer
Take a couple of cups of fresh parsley and pulse in a food processor with a couple cloves of garlic.  Add the zest from one lemon and the juice from 1/2 lemon with enough olive oil to moisten.  Salt and pepper to taste and add more garlic or oil until you like the flavor.  Scoop tablespoons onto a cookie sheet, freeze until solid, then store in an airtight container (zip bag, etc).  Serve on top of stewed meat or as a last minute addition to perk up a bowl of winter soup.  To serve: place a still frozen ball in soup or allow one to defrost slightly and then spread on top of stewed meat.  Also very good in place of parsley salad with roasted marrow bones.

November 7, 2011

Going Whole Hog 2011

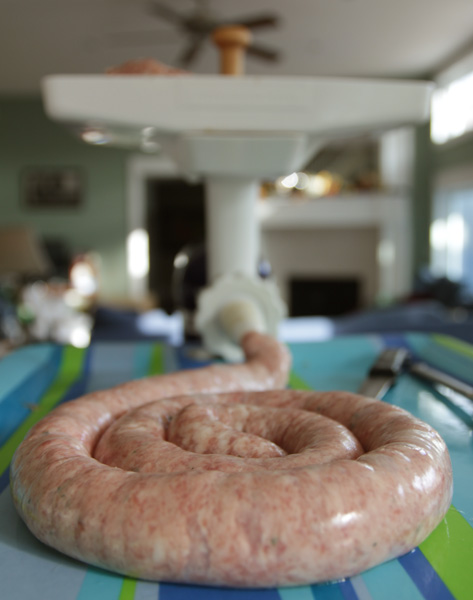
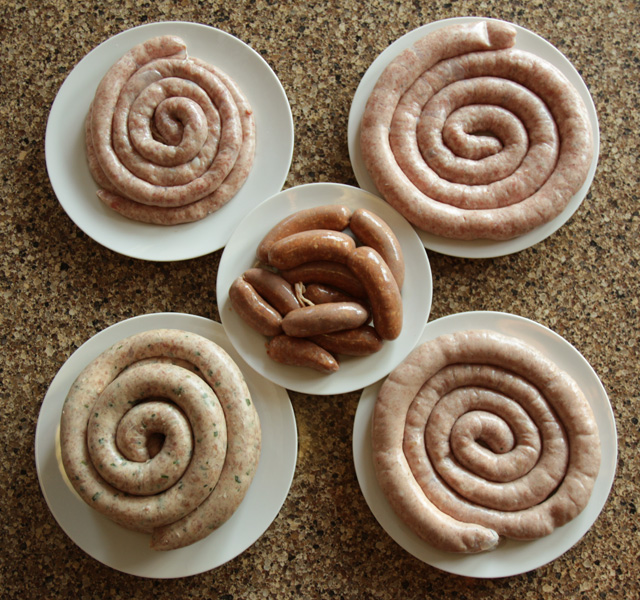
Going whole hog figuratively but half hog literally, this year I purchased a half pig from Bare Knuckle Farm and had it broken up into primal cuts to further process myself.  I cured and smoked bacon and a whole ham and with the help of friends made a bunch of fresh sausages to stash in the freezer.  

Not only has this been a project I've wanted to try for awhile but it's also a way for us to have locally, responsibly raised, pork sausage without the risk of sneaky milk powder, which my son Alex cannot have.  For all my pork preparations I followed the instructions in the book Charcuterie by Brian Polcyn and Michael Ruhlman.   This book is amazing!  The directions are detailed, easy to follow and very helpfully they include a basic ratio for fresh pork sausage.  The tough part was deciding what flavor sausages to make.  

We ended up making a maple breakfast sausage (with my maple syrup), a basic herb garlic sausage (sage and rosemary from my garden), a chorizo-like sausage with smoked paprika, a garlic chive/ginger sausage (similar to the meatballs in this soup), and apple/anise seed.  I already owned the KitchenAid meat grinder attachment but went ahead and bought the sausage stuffer attachment in spite of the bad reviews.  At times burping out the bubbles of air got a little tricky but by creating a raised platform to catch the stuffed sausages I thought it worked decently, worth the space and money saved compared to buying a dedicated sausage stuffer.  You can see my set up in the photos.  I also highly recommend the food tray attachment.  Why didn't I know they had that sooner!
Here are some things I'd like to remember/try for next year:

Sausage
  • Mentally prepare yourself for the lewd *sausage* jokes your husband will make repeatedly, there is no stopping him.
  • Have a pot of soup on for the meat cutting.  We were starving and needed a break from our sausage testing nibbles. 
  • Buy hard cider for the apple sausage 
  • Get some beef to make hot dogs at the same time
  • Don't bother with the breakfast sausage sized casings unless making hot dogs too.  Instead make sliceable logs of breakfast sausage.
  • Don't forget to make a dried cherry sausage
  • Make and hot smoke some kielbasa

Ham

  • Weigh the ham before sticking in brine to accurately get curing time.  I forgot and had to guess.  The ham was still edible (and good) but it was half ham and half pork roast.  
  • Add some cloves, maybe other spices to ham brine.

Bacon
  • Borrow meat slicer from mom and dad
  • Don't wait until next year to get another pork belly, homemade bacon is so awesome!
This year's sausages: maple breakfast, herb/garlic, apple/anise seed, garlic chive/ginger, and chorizo-inspired
My setup for sausage stuffing
The sausages with Charcuterie.
Note the labelled tags for quick reference, I highly recommend doing this.
With my mommy duties, I couldn't participate in most of the recent event in our town, Pigstock TC.  A pork enthusiasts dream, you can read more about Pigstock in this My North article. I did get to go to one of their events open to the public, a breakdown of a half hog, and took a bunch of photos.  It was incredibly helpful and maybe next year I'll do the job myself.

For a description of what is happening in each photo, go to the Flickr set

Created with Admarket's flickrSLiDR.
I added this post to the Make Your Own Mondays 

October 30, 2011

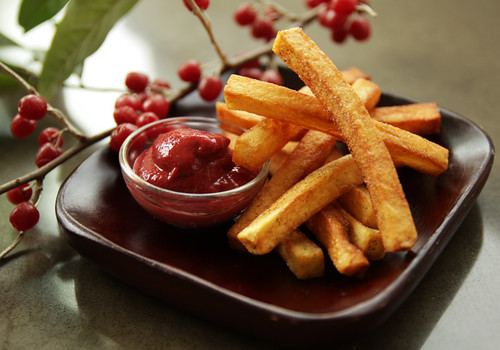
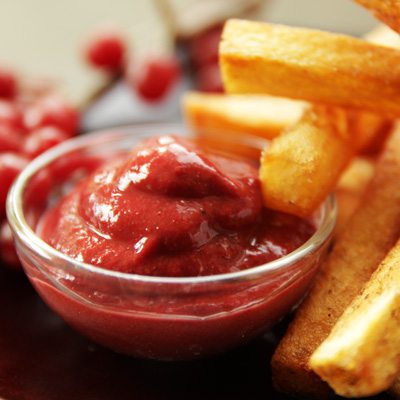
Autumnberry Ketchup

For several years now I've been all talk, claiming that I'd try to make something other than jam and fruit leather with the plentiful autumn olive berries, aka autumnberries, we have around our property.  Well this year the Spice Rack Challenge, mace, gave me a second reason to push myself to make some ketchup.  Mace if you don't know is the outer covering of nutmeg and is similar in flavor.  Though it is sometimes found in sweet recipes I find mace more suited to savory dishes.  Seasoning for pot roast or a pinch added to faux cheese sauce (made with nutritional yeast) are two of my favorite ways to use mace.  And you often find it in the spices in ketchup.  

I based my experimenting on a cherry ketchup recipe I found online from Jose Andres.  After making one batch with the exact same spice amounts I found his recipe a little too assertive and made some adjustments.  I love the resulting milder condiment.  It is very similar in taste to good store bought ketchup though my son Alex still found it too "mustardy".  I guess a few more batches are needed to fit his palate.  This shouldn't be a problem, we have enough berries on our land to fill a pool!
Perfect with homemade fries
(cooked in beef tallow, from my Gallagher Farms steer)
Autumnberry Ketchup
Based on several basic ketchup recipes online and this cherry ketchup from Jose Andres.
Makes ~1 1/2 cups

24 ounces of autumnberry pulp* (~3 cups)
1 teaspoon whole mace (or 1/3 teaspoon ground)
1 teaspoon granulated onion
1 teaspoon whole black peppercorns
1 teaspoon ground dry yellow mustard
1 inch piece of cinnamon stick
1/2 teaspoon whole allspice berries
5 whole cloves
1 teaspoon kosher salt 
1/4 cup apple cider vinegar

-Add your prepared autumnberry pulp and the salt and spices to a saucepan.  Bring to a simmer and simmer for 15 minutes.
-Add the vinegar and cook until thick enough to coat the back of a spoon.
-Strain through a fine mesh strainer to remove the whole spices.  Store in the fridge until use.

*Instructions for autumnberry pulp:
Rinse and drain the berries.  Place in a pot with a tiny amount of water and cook covered over medium heat until the flesh is loose and the seeds squish out easily.  Strain the pulp either with a chinois, mesh strainer or a food mill.  I prefer the food mill.  Chill until use.  Be aware that the pulp may separate into the red skin material and a milky liquid.  If it does, stir it well before measuring for a recipe.

More autumnberry recipes
Autumn Olive Jam and Leather
Spiced Autumnberry Jam
*I also found a good article on mace at the Kitchn.  It has a great photo of mace covering a whole nutmeg.  
**Updated to add some more information about autumnberries/autumn olive:
Autumnberries are also known as autumn olive (scientific name: Elaeagnus umbellata) and are found in various places across the US, most heavily in the mid-west and New England. They are prevalent in my part of Michigan and thrive in nutrient poor, dry, disturbed areas. Here is a good link with pictures and information on how to identify the plants: Information on habitat and identification of autumnberry (aka autumn olive)

I've been busy sewing more this month. I just finished this jacket for Penny. She has a major Hello Kitty addiction.
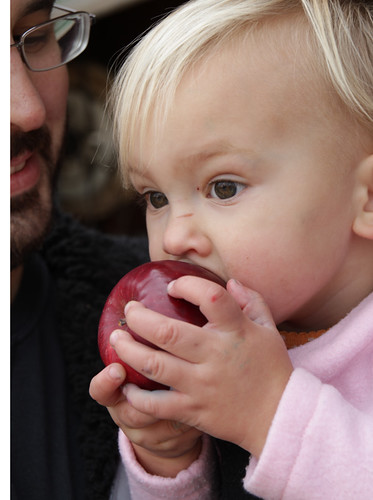
And is also fond of apples.
We went to Rennie Orchards.  The kids loved their teepee.
Any hike means eating a ton of autumnberries off the bushes that are everywhere.
Alex's new photo expression, *maybe* it is a slight improvement over the tongue out and other crazy faces of the past months.
I added this post to the Make Your Own Mondays 

November 13, 2010

Spiced Autumn Berry Jam and Vegan Lemon Yogurt Scones

The wild autumn berries on our land have been ripe for a few weeks now.  Autumn berry is a more attractive common name I found for autumn olive berries, scientifically known as Elaeagnus umbellata.  We have a ton of these invasive shrubs on our property and while they make for tasty snacking on hikes they shine the most in jam and fruit leather.

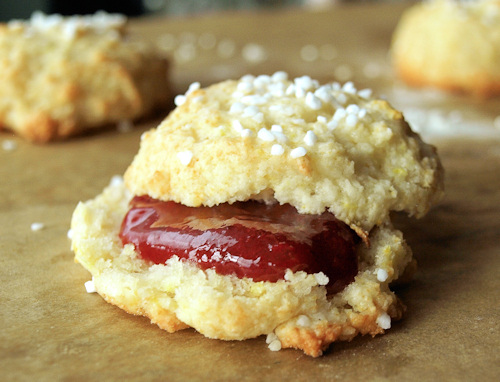
My son Alex and I picked a big load and I decided to spice up, literally, one batch of this year's jam.  Since I find the berry's flavor similar to cranberries, I chose to flavor them like my favorite cranberry relish.  This relish, which I typically make for Thanksgiving, includes oranges, cinnamon and ginger.  I also was craving fruit and black pepper together so I gave the jam a little extra heat with freshly ground black pepper.  To try out some of the jam I made lemon scones with coconut milk yogurt.  The scones were a special request from Alex and a great match for the jam.

For pictures of autumn berry bushes and more information see my first post on autumnberries, Autumn Olive Jam and Fruit Leather or read more about autumn berries and their controversal status.  Don't have access to autumn berries?  Buy some Michigan made jam from Food for Thought.

Spiced Autumn Berry Jam
Makes ~9 cups

5 cups seedless autumn berry pulp*
1 tablespoon freshly grated ginger
2 teaspoons finely grated orange zest
1/2 teaspoon ground cinnamon
1/2 teaspoon fresh ground black pepper
7 cups sugar
1 box SURE.JELL Fruit Pectin

*To make the berry pulp:  Pull the berries from their stems, wash and drain them.  Add them to a pan with 1/2 cup of water for every 4 cups of berries and cook over medium high heat until the seeds are separating from the fruit flesh.  Use a food mill to remove the seeds.  Cool and store the prepared pulp in the fridge until needed.  Note that the pulp will separate into a milky liquid with red particles when cooled in the fridge. You will probably need at least 8 cups of berries to get the required 5 cups of pulp.

-Follow the standard SURE.JELL Directions for Berry Jam but add the ginger, zest, cinnamon and pepper along with the pectin at the start of the recipe.

Lemon Coconut Milk Yogurt Scones
Based on this Orange Yogurt Scone recipe from Taste of Home 
Makes 8-10 mini scones

1 cup flour
1/4 cup sugar
1 teaspoon baking powder
1/4 teaspoon baking soda
1/4 teaspoon salt
1 1/2 teaspoon grated lemon zest
3 tablespoons coconut oil, solid
6 tablespoons plain So Delicious Coconut Milk Yogurt
1-2 tablespoons pearl or coarse sugar, optional

-Preheat your oven to 400 degress F and line a baking sheet with parchment paper.
-Sift or whisk together the flour, sugar, baking powder, baking soda, and salt.  Then after that is whisked or sifted well add in the zest and stir or whisk to evenly distribute.
-Cut in the solid coconut oil with a fork or pastry cutter until there are no pieces of solid oil larger than a pea.
-Add the yogurt and stir in just until the dough comes together.
-Scoop with a medium disher (mini ice cream scoop) onto the lined baking sheet and press down the mounds slightly.  Or you can gather the dough into a flattened circle and cut into wedges.
-Sprinkle over the pearl or coarse sugar.
-Bake for ~12 minutes until light golden brown.

Penny came along for the berry picking.
Later that evening I found a bunch of berries that had fallen in her hood and gotten smashed, eww!
She and Fritz love to look out the doors and windows together.
P.S. Thanks to all those who are rooting for me in the Iron Foodie challenge. I got in! The box of mystery ingredients should be arriving early next week. Alex and I can't wait to see what's inside!

October 20, 2009

Popcorn picking for the Leelanau Conservancy

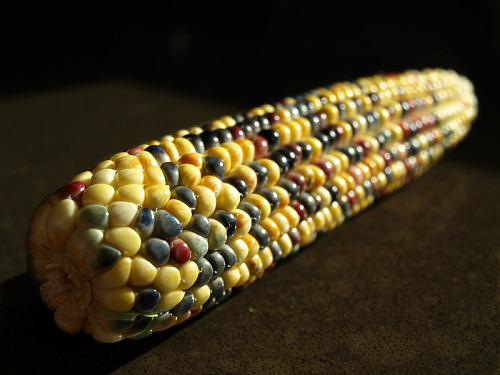
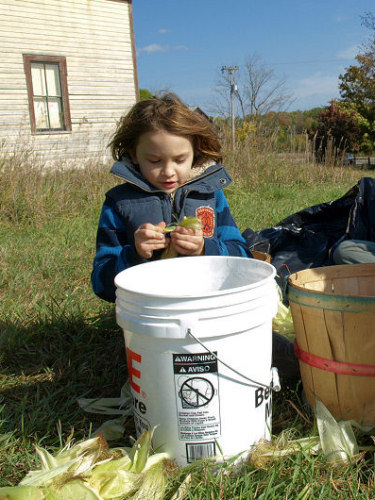
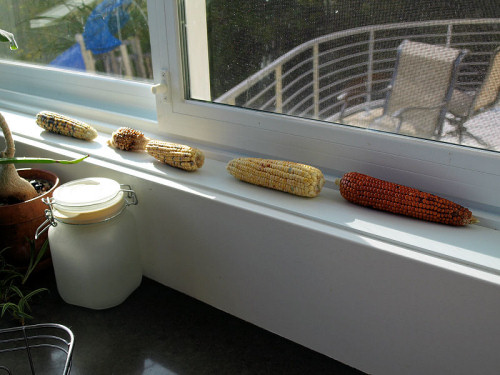
My blogging groove has eluded me all summer so here's an attempt to jump back in. Yesterday we had a fun time picking popcorn for the Leelanau Conservancy. There were several varieties and we got to take a few ears home to cure and pop, including the ear of calico corn pictured to the left. I thought I'd post some more of the pictures from the event.

My vegetable garden is mostly cleaned up. The only things left are the Brussels sprouts, cabbage, kale and some root vegetables. In the freezer are zucchini, peppers and lots of homemade tomato sauce from the final cleanup. I've started working on the squash and pumpkins we grew this year and have some roasted and in the freezer but most of them are forming a decorative pile on the counter for now. My son Alex and I have been picking apples from the many trees on our property. We've been lucky to find some really nice apples despite the neglected state the trees are in. I canned a batch of sauce yesterday after Alex did all the work cutting up the apples. I also canned 9 quarts! of Concord grape juice from my father-in-law's grapes. As usual, this is a mess but the grapes were super sweet. My parents visited us this past weekend and helped collect and husk the husk cherries/ cape gooseberries. The results are waiting for me in the garage. I think I'll make couple batches of jam and one batch of chutney with them. After the husk cherries are dealt with there are plenty of autumn olive berries to harvest as well.

Oh and did I mention we got a new puppy? His name is Fritz.
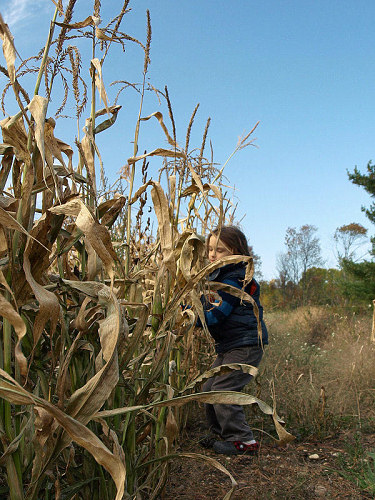
He's a 9 week old long-haired Dachshund and he likes corn stalks.
Eat your heart out.
Alex picking popcorn
Shucking the corn
Some of the different varieties from the cobs we took home
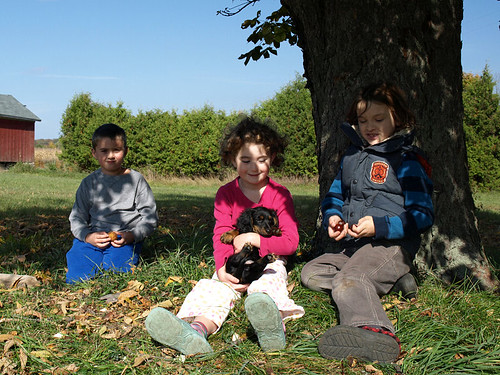
Alex with his friends that came to pick corn, they all loved this horse chestnut tree.
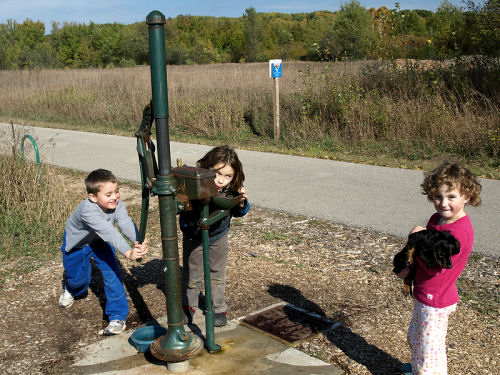
Alex brought home 93!! chestnuts. He counted them all. So far we've planted seven on our land.Pumping a drink of water, Alex's friend Phoebe is fond of Fritz :)

February 1, 2009

Almond Applesauce Bread

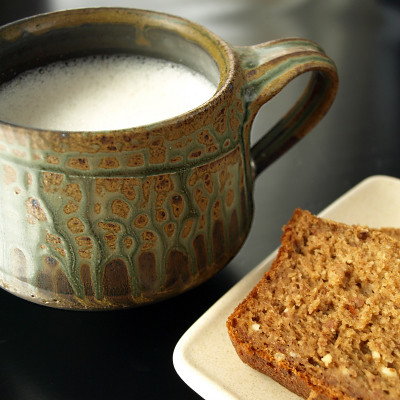
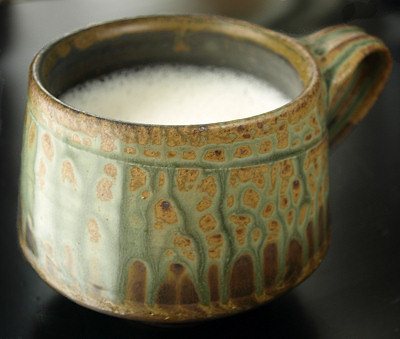
I was lucky enough to win a prize from this year's Menu For Hope and it arrived this past week. The prize I won came from Heidi Robb of Life in Recipes. It included an almond milk making kit, 2 beautiful hand-thrown mugs and an autographed menu from Michael Symon. I've been wanting to make my own nut milk for awhile, so I was excited to try my kit immediately. For my first batch of milk I followed Heidi's recipe. It was so much more flavorful than the boxed and a real treat. The way I liked it best was in my morning hot cereal. I kept the almond pulp as well and wanted to find a way to use it up. Through the convoluted pathways of my brain, an applesauce quick bread was born.

I've been trying to use up the remaining summer stores in our freezer. I had a couple of packages of homemade applesauce from my son Alex's enthusiastic apple picking this past fall. No one in our house will eat applesauce straight up except for me so I needed to repurpose it. In browsing the recent Daring Baker entries I visited a site with a parsnip cake sweetened with dates. Mix together those ideas in my head and out came an applesauce bread with almond milk pulp, sweetened with dates. Wonderfully the experiment was successful! Though the sweetness is much more subtle compared to the often cake-like banana breads it was just sweet enough for me. It also was moist and the almond pulp gave it a little chewiness. The bread was a big hit with my husband as well. I tried the recipe again with pre-ground almond meal and it works well but you do lose the fiber from the almond peels that are included in the milk pulp. I hope to keep making weekly batches of almond milk and more variations on this bread. Thanks Heidi!

More...
Creamy Nut Milk recipe from Life in Recipes
I love Bob's Red Mill High Fiber Hot Cereal. It was fantastic made with homemade almond milk!
My next batch of almond milk will be date sweetened per a recent Raw Comfort Foods Class I attended.

Almond Applesauce Bread
This is subtly sweet and very flavorful. It was developed as a way to use up the pulp leftover from making almond milk but works just as well with other ground almonds or almond meal.
Makes 1 (8-inch x 4-inch) loaf

4 oz (~2/3 cup) pitted dates
1 cup whole wheat pastry flour
1/2 cup all-purpose flour
1 teaspoon baking soda
1/2 teaspoon baking powder
1/2 teaspoon salt
1 teaspoon cinnamon
1/2 teaspoon allspice
1 1/2 cup unsweetened applesauce
1/4 cup Earth Balance margarine
2 eggs
1 cup almond meal (or wrung out pulp from making almond milk)

-Preheat your oven to 350 degrees F.
-Soak the dates in warm water for at least 10 minutes.
-Sift (or whisk) together the flours, baking soda, baking powder, salt, cinnamon and allspice. Set aside.
-Place the applesauce and the dates (with the extra soaking water strained off) in the bowl of a food processor and process until the dates are chopped and evenly distributed. *You could also try doing this step in a blender and then mixing the rest of the recipe by hand but I used the food processor to make fewer dirty dishes.
-Add the margarine and process until combined. Add the eggs and again process until combined. Add the almond meal or almond milk pulp and pulse to combine.
-Add the flour mixture to the food processor in three stages, pulse 1-2 times after each addition. Then pulse until all the flour is combined with the wet ingredients.
-Coat a 8"x4" loaf pan with spray oil and spoon the batter evenly into the pan.
-Bake for 40-45 minutes, or until a toothpick inserted in the loaf comes out clean.
-Cool for 5 minutes and then remove the loaf from the pan and cool thoroughly on a rack before slicing.

These recipes were helpful/inspirational:
Applesauce Nut Bread from Baking Bites
Parsnip, Date & Banana Cake (vegan and gluten-free) from Creative Recipes for Wandering Minds

Isn't this mug fantastic!! See more beautiful pottery at Ellen Shankin Pottery.
(And yes, that's homemade almond milk in the mug.)Bonus Abbie shot

October 27, 2008

Autumn Olive Jam and Leather

Elaeagnus umbellata (autumn olive) is a ubiquitous invasive species in Michigan but up until this year I had no idea it was edible. Then I came across this post on a blog called Tea and Food that mentioned autumn olive fruit leather. I knew immediately that I had to harvest some of the numerous bushes on our land and I've been waiting for them to ripen ever since. Alex has loved knowing there is something to nibble on while walking in the forest and has been taste testing them for me. Unfortunately he's as bad as the birds for spreading the seeds since he spits them out as he walks. I was surprised by how tasty they were the first time I tried them. The berries are tart and vaguely cranberry-like. My husband John thought they tasted like tart grapes. Finally them seemed ripe enough on our last trip so I picked a couple of bags and brought them home.
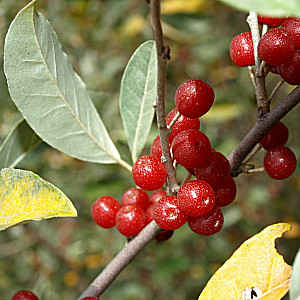
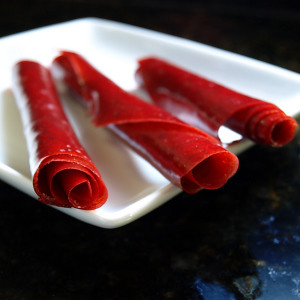
When I got home I looked around online for recipes. There was one blog called Dreams and Bones that had great information about using autumn olive berries. The writer Leslie had recipes for both jam and fruit leather. I rinsed and cooked my berries with a little water per Leslie's instructions. Then I put the pulp through a food mill to separate the seeds. I only had a packet of full sugar sure-jel left from all of my jam and jelly making this fall so I used it and the berry jam instructions included in the package for my jam. For my fruit leather I decided to sweeten the pulp with all honey instead of stevia and honey. I had some local raw honey that was light in flavor so I added just enough to balance the tartness of the berries, about 1/4 cup of honey for 2 cups of pulp. I used my food dehydrator but there is an oven dried method on Dreams and Bones that I'll link to at the end of this post.

The fruit leather is wonderfully chewy, tangy and sweet! I like Leslie's idea to cut up the leather into small bits and use them in place of dried cranberries in salads. I think the same bits would be great in bread or cookies as well. The jam is equally good. It's a beautiful, rich red color. In my reading I found out that autumn olive berries can have as much as 17 times the amount of lycopene as tomatoes and it really shows in the color of the jam. I'd love to pick some more berries and try them in savory recipes. I think they would be great in a barbecue sauce. I should have plenty of time when we move to the new house so it's probably a project for next year. The only problem is that I might get attached to these tasty invasives. I'll have to spend lots of time looking at plant and seed catalogs for natives to replace them with...
A berry laden branch of Elaeagnus umbellata (autumn olive) Washed berries ready to be smashed and cookedFinished rolls of honey sweetened fruit leather

Dreams and Bones for the recipe for fruit leather and a link to a low-sugar jam recipe
Tea and Food
Autumn olive wine recipe
Wikipedia Article on autumn olive

September 22, 2008

The nitty gritty of making grape jelly

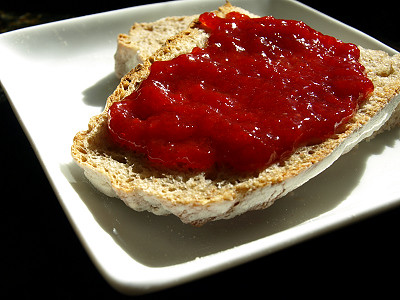
Though it may look like one, this is not your standard PB&J. This is a sandwich with hours of work behind it. The bread is 100% whole wheat from a King Arthur recipe. The butter is organic cashew butter. And the jelly is from Concord grapes growing on chain-link in a suburban garden outside of Detroit, Michigan.

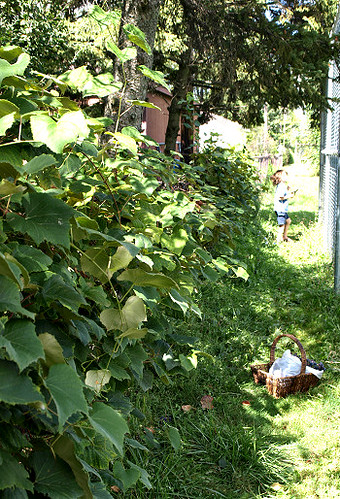
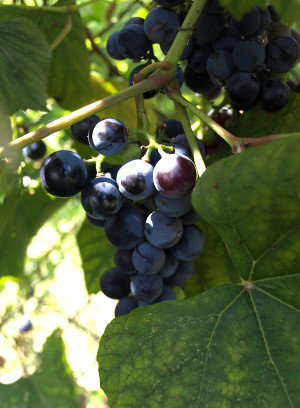
My father in law (Papou, Greek for grandpa) has a prolific garden that he kindly shares. The first fruit of the fall that comes in abundance is his Concord grapes. The grape vines cover the entire back side of their fenced yard. I've skipped making jelly for a few years and instead just made a few small batches of juice but after reading about Pomona's Pectin on Modern Beet I decided it was time to get back on the jelly wagon. Pomona's Pectin is a citrus-derived pectin that uses calcium to jell eliminating the need for excessive sugar. I had to give it a try.

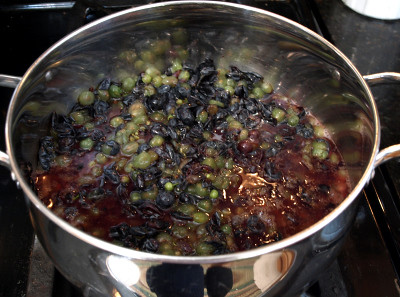
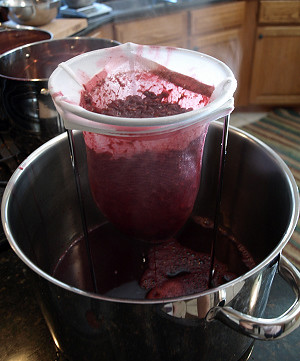
Alex and I got busy picking one sunny afternoon and picked 24lbs of Papou's grapes. Yes, you read that correctly: 24 pounds! I cleaned up my kitchen, scrubbing down the sink and started a juice making assembly line. Grapes get washed in copious amounts of water, drain, stems are removed, they're weighed out (3.5 lbs of grapes + 1/2 cup water for each batch), smashed, brought to a boil, simmered 10 minutes, and then strained. For years I have done the straining with layers of cheesecloth but smartly decided that this was the year to buy the jelly bag and holder. Thank goodness I did! It made an onerous task a lot easier. After straining, I filled the sink with ice water to speed chill the juice. This is the same method you would use if you were cooling off a large batch of hot stock. You set the pot of juice into the ice water and stir until it is cool. The chilled juice went into the fridge to settle. Grape juice has a large amount of tartaric acid. It's where they get cream of tartar. Overnight crystals of tartaric acid form and they will make for crunchy jelly and juice if you don't strain them off. Ideally it should set for 24-48 hours but I had the Epicurean Classic to go to.

The next day I followed Pomona's recipe for honey-sweetened jelly using local star thistle honey. I also made a low sugar batch. Pomona's low sugar recipe calls for 2 cups of sugar per 4 cups of juice maximum, Sur-jel and Certo recipes are both 7 cups!! I also canned (IE bottled in a jar) plain juice. The most interesting experiment for me was an attempt at making Concord grape kombucha. I started drinking GT's Kombucha over a year ago and got John hooked on it too. I've been reading Wild Fermentation, a book about cultured foods, and I wanted to try growing my own kombucha mushroom. I threw a bottle of GT's Kombucha into a large jug of juice. It did ferment nicely but doesn't seem to be forming a mushroom/mother. I guess I'm going to have to buy one online. I've been drinking it watered down over ice and it's wonderful!

To see more of the process scroll through the pictures I took. For the record my 24lbs of grapes equaled 9 quarts of juice with 7.5 pounds of must (skins and seeds) and 1.5 pounds of stems. Recipes for the jelly can be found at Pomona's Pectin. I used the directions from Pick your own for the canned juice. My go-to recipe for whole wheat bread is from King Arthur Flour. My advice if you want to play with Concord grapes: wear gloves and clothes you'd paint in. Your mom was right not to let you drink the stuff on the carpet.
My son Alex picking Concord grapes Mashed grapes ready to cook
The leftovers, they make your compost smell great
Straining the seeds and skins from the juice
The tartaric acid crystals clinging to the pot,
they are beautiful with a refractive quality like mica
Polishing the juice to remove as many crystals as possible
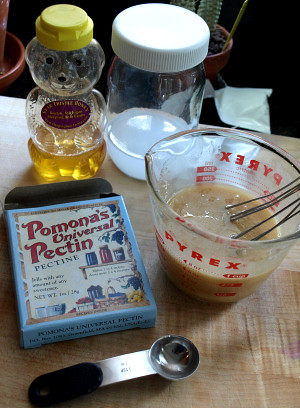
Sleeping Bear Farms star thistle honey, calcium water
and the honey mixed with the Pomona's Pectin
The finished jars, more juice was in the fridge
and on the counter becoming kombucha Abbie thought this was a very dull bit of cooking.
She napped on my chair the entire time.
More to come from Papou's garden, the quince will be ripe in a couple more weeks!!
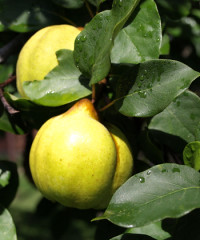
Please share any quince recipes you have.

August 12, 2008

Gingered Sweet Pickled Cauliflower

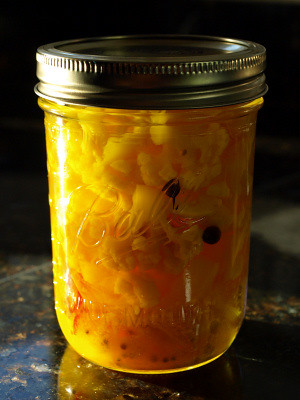
When I was a kid my parents would always have sweet mixed pickled vegetables in our fridge. Eschewing the mundane cucumbers and the kid-unfriendly pearl onions, I would fish around in the jar for every last piece of cauliflower. As an adult I discovered that they sell jars of all cauliflower!! But the flavor is never as complex and appealing as the cauliflower in the mixed sweets. After making a batch of refrigerator pickles, I had pickles on the brain when I made my first shopping trip to the new Whole Foods in Rochester Hills. As promised there was a good selection of local produce. As I first walked in the door a pile of large, beautifully white, local cauliflower caught my eye. I knew immediately that I wanted to try my hand at making a more flavorful sweet pickled cauliflower. I grabbed a head of cauliflower along with a hot chile, some garlic and a good three finger piece of fresh ginger and headed home. Canning is hot, steamy, messy business so the cool, breezy weather this past Sunday was perfect. I took a basic sweet cauliflower recipe and added in my chosen aromatics. The results were delicious! I think I overcooked the cauliflower a little since they weren't as crunchy as I would have liked but I loved the flavors. The ginger and chile were just what I was craving. There was the right amount of heat and a powerful gingery component. If I have time soon, I'm making them again because I know I'm going to snack my way through these jars quickly. This week was a perfect time to make these because it's my father's birthday on Saturday and he should love these hot and sweet pickles. Now, if I can just find some pearl onions for the next batch...

Here is my recipe, along with the original I based it on and links to more information on canning:
Gingered Sweet Pickled Cauliflower
Makes ~5 pints

12 cups cauliflower florets, 1-2 inch pieces
4 cups distilled white vinegar
2 cups sugar
2 cups thinly sliced sweet onion
1 hot red chile pepper, thinly sliced (I think mine was a cayenne)
1 tablespoon yellow mustard seed
1 teaspoon whole black peppercorns
1 teaspoon ground turmeric
2 cloves of garlic, sliced
1 1/2 tablespoons finely grated ginger

The base of this recipe as well as full instructions can be found at the
National Center for Home Canning. Please read Using Boiling Water Canners before beginning. If this is your first time canning, you should also read Principles of Home Canning.

-After trimming and measuring, wash the cauliflower florets and boil in salted water for 3 minutes for cauliflower. Drain and cool.
-Measure out your mustard seed and place in a dry skillet over medium heat. Toast the mustard seeds. You'll know they're done when they start jumping around and popping.
-Add the mustard seeds to a large pot with the other spices, vinegar, sugar, onion, chile, and garlic. Bring to a boil and simmer 5 minutes.
-Distribute the onion and a good spoonful of spices into the bottom of each jar. Then fill the jars with florets and top it off with more pickling solution, leaving 1/2-inch of headspace.
-Follow the boiling water method timing for your altitude shown on Table 1. For those at sea level using pint sized jars they should be processed for 10 minutes.
-They'll be best if you let the flavors to develop for a few days before consuming but go ahead and eat them as soon as they're cooled off.

My aromatics
[sweet onion, ginger, mustard seed, hot red chile, garlic, turmeric (mostly for color)
and Comet's Tail black pepper (I just think they are pretty)]

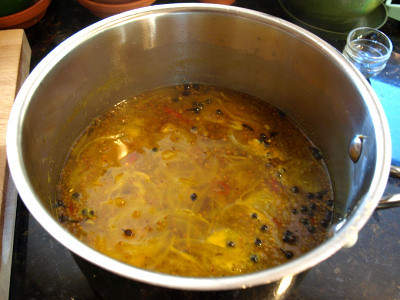
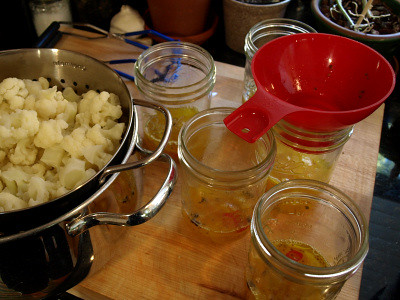
The brine after simmering Filling the jars I love the look of cauliflower closeup!

Other pickling related stuff:
I used this recipe for dan koshansky’s refrigerator pickles from A Way to Garden and they were delicious. The cucumbers and dill came from my father in law's garden. (Thanks Papou!) You have to stop in and see the Chinese Red Noodle beans and other cool plants she's growing.

Cincinnati Locavore has a good article, Killer Canning, or How to Avoid Poisoning Anyone. It gives some rules about how to be careful when trying new canning recipes. My personal opinion is that if you find a recipe that looks good but you don't feel like it's trustworthy then make a smaller batch and refrigerate. Then you can eat within a week or two.