Showing posts with label Recipes: vegetable dishes. Show all posts

February 1, 2012

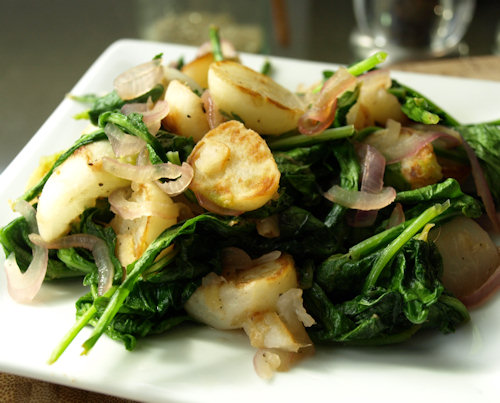
Dark Days Smoked Paprika Turnips and Kale

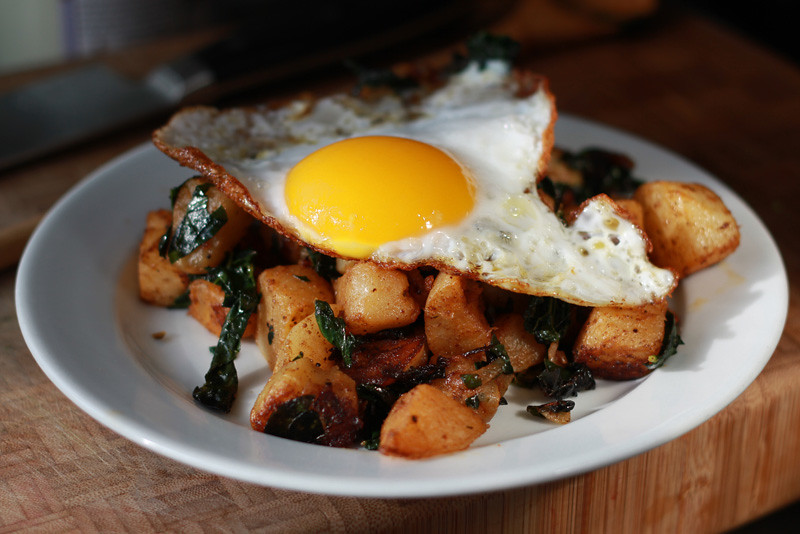
To complete this week's Dark Days challenge I made lunch today using turnips, kale and onions from my 9 Bean Rows winter CSA share.  I saw this recipe for Smoky Roasted Turnips on The Food Lover's Primal Palate but didn't feel like waiting for the oven to heat up. I then started thinking about bubble and squeak and so added kale.  A fried egg from our ducks seemed like a good bump of protein.  I had bacon fat on hand but thought the flavor of olive oil would be good with the pimenton and so I used oil from Higher Grounds.  It was delicious and when Penny noticed me eating she ran over and stole a bunch even though there was enough hot pimenton to give a little burn.  She's my little firecracker!
Smoked Paprika Turnips and Kale (with an egg)
Add peeled and cubed turnips to salted boiling water and cook just until tender.  Drain immediately and allow the extra steam to evaporate off.  Soften some sliced onion in olive oil in a cast iron pan.  Add the turnips and sprinkle hot pimenton (smoked paprika) and cracked black pepper to taste.  Cook over medium/high until the turnips and onions are caramelized.  Add in chopped kale and toss to wilt.  Push the vegetables over to one side and add a little more olive oil to the empty side.  Crack in an egg and cook to your taste, I love crispy edges!  Serve with the egg on top for runny yolk awesomeness.
Visit Not Dabbling In Normal on Sundays for the round up of Dark Days meals. You can also visit our coordinator at Unearthing this Life to see some of our Midwest group entres.  

Penny's rainbow nose
Paint covered hands!
I may regret reading this book to her a few days ago.

December 27, 2011

Dark Days Pumpkin Soup

This week's Dark Days meal is a holiday detox one. Even though I didn't eat huge amounts, the refined sugar and rich food I did eat have me reaching for comforting vegetable dishes. Lots of parsley, arugula and kale salads and for lunch today this soup.

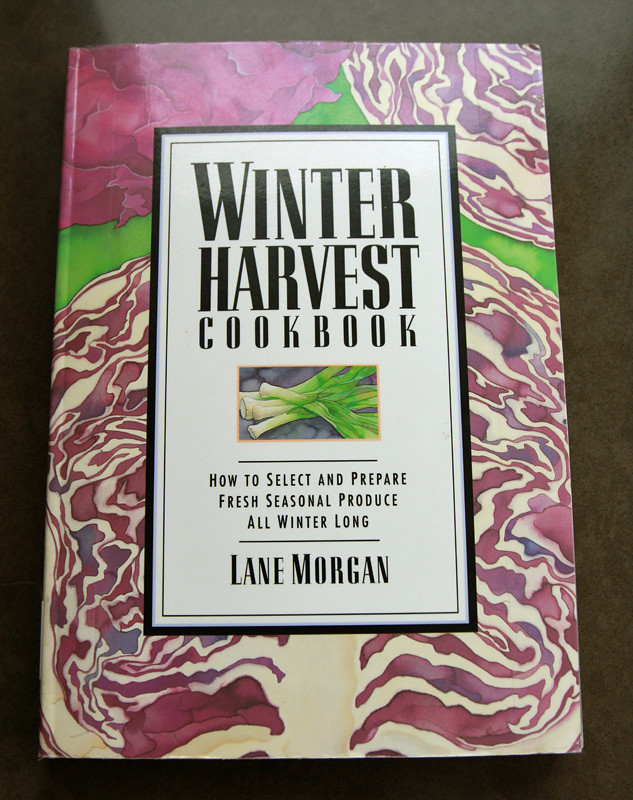
Usually I spice my pumpkin/winter squash soups with curry or warm spices: cinnamon, nutmeg, allspice, etc.  But in a search for "winter" books for Alex I found a gem of a cookbook at our library.  It's called The Winter Harvest Cookbook.  Way ahead of the current locavore movement this 20 year old book was reprinted last year and it is full of ideas on how to cook winter produce.  What I like the most about it is that even though meat, dairy and grains are present in the recipes the focus really is on bringing out the best of the seasonal vegetables.

So this time I made my pumpkin soup a little different by following a recipe in the book that called for juniper berries.  I cooked leeks and onions in turkey shmaltz, added cubed pumpkin and a little ground juniper berries.  These softened together for 10 minutes and then I added chicken stock and cooked it for 30 more minutes.  To finish I pureed the soup and tasted for seasoning.  All the vegetables were local and the chicken stock and turkey shmaltz were from local birds as well.  And the apple is from Rennie Orchards.  A perfect little lunch for a Dark Day.
Visit Not Dabbling In Normal on Sundays for the round up of Dark Days meals. You can also visit our coordinator at Unearthing this Life to see some of our Midwest group entries.  

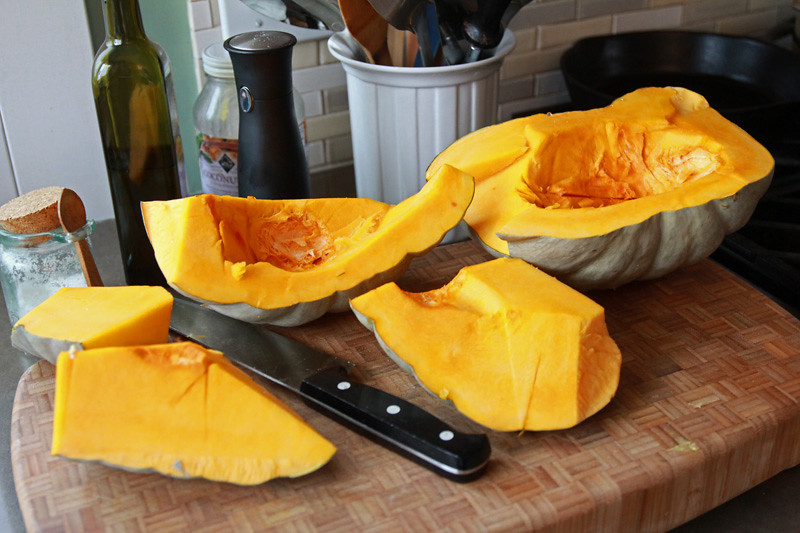
The pumpkin I used was a Jarrahdale pumpkin
The kids on Christmas morning
Alex is showing Penny the gems he got and Penny is holding the doll I made her.  Alex's new rockhound paraphernalia surround them.

December 20, 2011

Dark Days Lamb and Kraut Salad

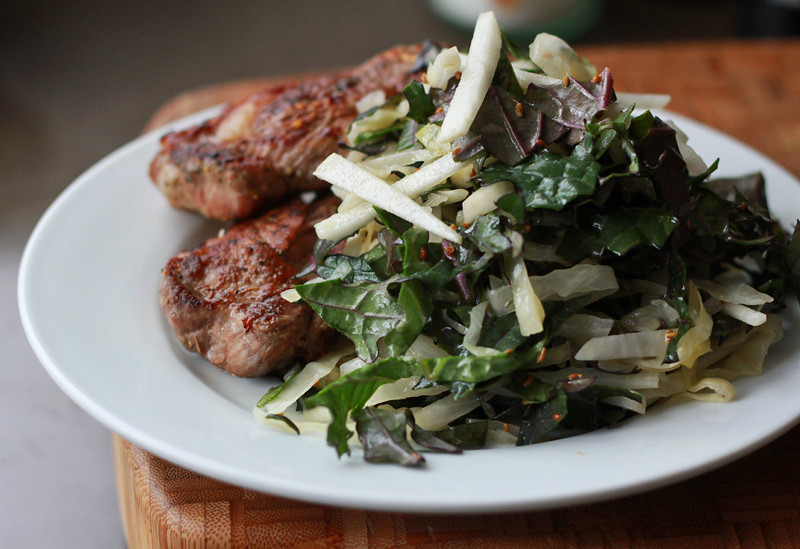
My lamb from Starlight Hill Farms arrived this weekend so for this week's Dark Days meal I made some pan-fried blade chops with kraut and kale salad.  The kraut and kale salad was inspired by Mother's Kitchen's recipe this week. I also used her kraut recipe to make my homemade sauerkraut, made this fall with cabbage bought at the farmer's market.  For the salad, I used Red Russian Kale and the sweetest little white turnips both from Blackbird Gardens, bought at The Village at Grand Traverse Commons' Saturday market.  I skipped the onion and carrot, used organic flax seed oil and added some anise seeds because I have become very fond of them with sauerkraut.  Thanks Cynthia for your Kraut and Kale Salad and Homemade Sauerkraut Instructions.
Visit Not Dabbling In Normal on Sundays for the round up of Dark Days meals. You can also visit our coordinator at Unearthing this Life to see some of our Midwest group entries.  

I noticed today that the star is even more crooked than it was when I first put it up and that we have a Christmas spider in residence.

December 6, 2011

Dark Days Roasted Chicken and Root Vegetables

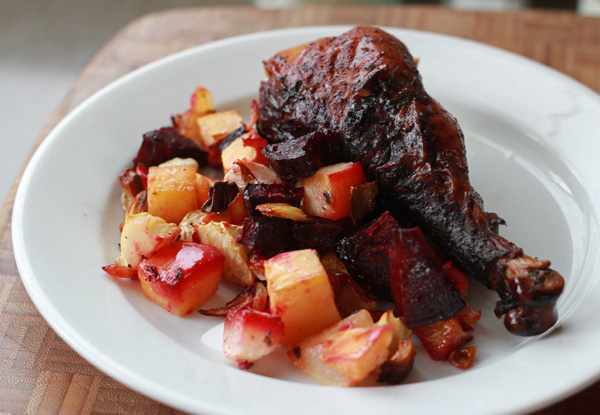
My entry for this week's Dark Days of Winter Challenge is a basic meal for us: roast chicken with roasted vegetables, in this case roasted root vegetables.  The chicken is from Hubbell Farm.  The vegetables were all bought at this past Saturday's farmer's market at The Village at Grand Traverse Commons.  This batch included turnips, beets, onions, rutabaga and celeriac.  They came from Birch Point Farm, Providence Farm, and Blackbird Gardens.  I seasoned the chicken with dried sage from my garden and rubbed it with molasses (not local but organic) and some more of my saved turkey schmaltz from Thanksgiving.  The vegetables were also roasted with sage, salt and turkey schmaltz.
Posts will be recapped starting this Sunday at Not Dabbling In Normal though it won't include my group (the Midwest) until the 18th. Until then you can visit our Midwest coordinator at Unearthing this Life or check out the blogs of the participants.  Here is a list of the other Midwest Dark Days bloggers:
Detroit Cooks
Dee Dee managing via comments and email

November 12, 2011

"Gremolata" Balls for the Freezer

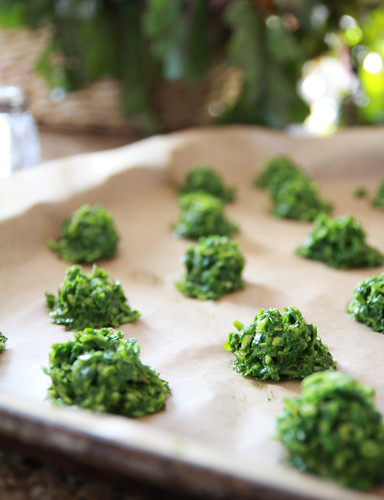
To stash the last of my fresh parsley from my garden I made this. It's only sort of gremolata because I added lemon juice and olive oil in an attempt to have it last better in the freezer.  I tried it out on top of roasted beef marrow bones and it was fantastic!  The verdant and piquant flavor cut through the richness of the marrow.  I plan on using the rest of my stash to garnish stewed meat or soup, similar to the uses for gremolata on osso bucco or like pistou in soup.

"Gremolata" Balls for the Freezer
Take a couple of cups of fresh parsley and pulse in a food processor with a couple cloves of garlic.  Add the zest from one lemon and the juice from 1/2 lemon with enough olive oil to moisten.  Salt and pepper to taste and add more garlic or oil until you like the flavor.  Scoop tablespoons onto a cookie sheet, freeze until solid, then store in an airtight container (zip bag, etc).  Serve on top of stewed meat or as a last minute addition to perk up a bowl of winter soup.  To serve: place a still frozen ball in soup or allow one to defrost slightly and then spread on top of stewed meat.  Also very good in place of parsley salad with roasted marrow bones.

April 22, 2011

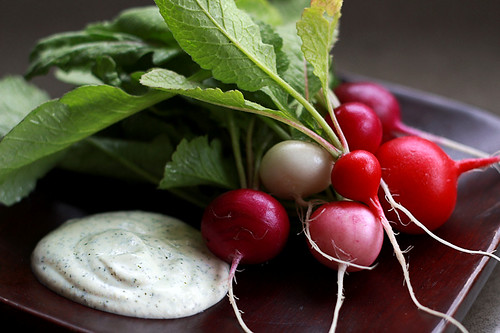
Lemon-Dilly Cashew "Sour Cream" Dip


I've been experimenting with cashew sour cream since Christmas.  It started with a few holiday batches of french onion dip.  This was trouble with a capital T and as you know T rhymes with P and the french onion dip was best enjoyed with Potato chips.  In the new year, I experimented with milkless ranch dressing but none of the recipes I tried wowed me or met with Alex's approval.  I gave up for awhile but then picked up the soaked cashews again in honor of this month's Spice Rack Challenge, dill.  Here is dill in a tasty dip made with cashew "sour cream".

*Note the Easter Egg radishes in the top photo, they are from my 9 Bean Rows CSA box from this week.

Lemon-Dilly Cashew "Sour Cream" Dip
Makes about 2 cups

1/2 cup raw cashews + water for soaking
2/3 cup cold water
juice from 1 lemon
2 teaspoons dried dill weed
1 teaspoon finely grated lemon zest
1/2 teaspoon granulated onion
1/2 teaspoon salt
1/4 teaspoon freshly ground pepper

-Cover your cashews in water and soak on the counter for a few hours, then change the water and soak in the refrigerator overnight.
-Drain the cashews and add to a blender with all the other ingredients.
-Blend until perfectly smooth and creamy.  Adjust seasonings to your taste, adding more lemon or salt and pepper as desired.
-Serve with fresh vegetables or crackers.  Also works well as a salad dressing, thin as needed.

Variation:
Add some grated and drained cucumber along with a small clove of garlic and a little olive oil for a tzatziki style sauce.  This cucumber version is very good on salmon burgers.

And now for the obligatory kid pictures..
Penny being cute talking to her giraffe

Both kids being cute
Alex being a lunatic
I am SO looking forward to next week's Easter vacation!

March 21, 2011

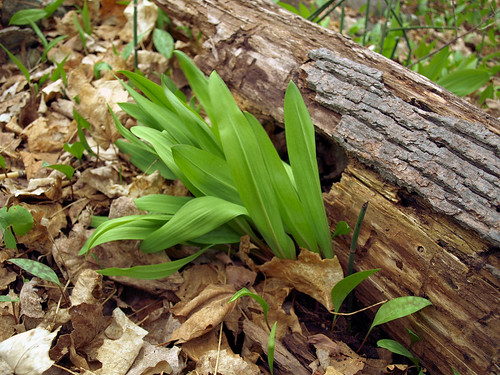
In anticipation of spring-- and Ramps!

Michigan's Spring has just barely poked her toe out from under the blanket of winter.  So when Shayne of fruitcake or nuts asked us to post about our favorite spring food it all had to come from memory.  As much as I'm enjoying tapping our maple trees what I really long for is the first green things sprouting up and one of the first is ramps!

In past years ramps have become something of a foodie cliche because of their rabid fans, but I think most of the adoration is well deserved.  Fresh and green with that pungent combined garlic/onion flavor, who could hate this gift that pops up from under the leaf litter.  My favorite part is the leafy greens.  Like garlic scapes, they have a verdent flavor that I love.  Here is my favorite quick meal to make with them.

Ramps and Beans 

Rinse and spin or pat dry a bunch of ramps.  Chop your ramp stems and bulbs separately from your greens.  Add the chopped bulbs and stems to a pan with a couple of glugs of good olive oil and salt and pepper.  Cook until softened.  Add in about two cups of cooked white beans (navy or cannelini) and cook to warm up the beans.  Add in the ramp greens and cook just until they are tender.  Add a splash of lemon juice, more olive oil and more salt and pepper to taste.  Great served with a fried egg on top or spooned onto crusty bread.

*See the other favorite spring foods on the group blog for Michigan Lady Food Bloggers at the end of this month.
**I'll also be remaking these Buckwheat Crepes with Ramps this year, but this time around I'm going to hunt down a wheat-free all buckwheat crepe recipe. 
***And since I have no pictures of the food, here's a little video of Penny pushing around her toy shopping cart.  (Please ignore the voice over at the end contributed by her annoying older brother.)

March 5, 2011

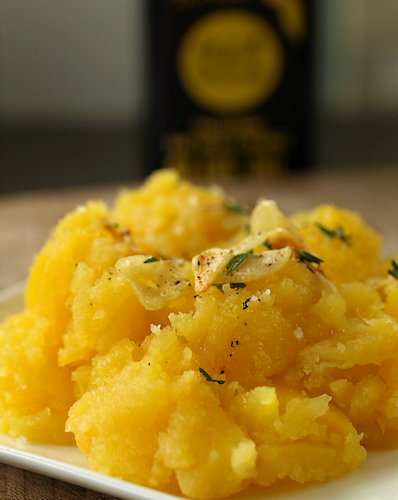
Rutabaga Mash with Crispy Garlic

Rutabagas should not be relegated to the job of unidentifiable cube in soups and pasties, though the latter is not the same without them.  This excellent storage root, also known by the name Swede, is delicious roasted or mashed.  Penny is a big fan of them cooked in beef broth but I wanted something different for myself so I made this.  The rutabagas and thyme both came from my winter 9 Bean Rows CSA.

Rutabaga Mash with Crispy Garlic
Makes 4 side dish servings

4-6 small to medium rutabaga roots*
3 cloves of garlic
2 tablespoons of good extra virgin olive oil
a few sprigs of thyme
flaky salt and freshly ground pepper

*regular grocery rutabagas are usually huge and you might only need one or two, aim for ~3 cups of chopped root

-Bring a large pot of water to a boil.  Peel and chop your rutabagas.  Salt your water like you were cooking pasta in it and add the rutabagas when it comes to a boil.
-Bring the water and rutabagas back to boil and cook until tender throughout.
-While the rutabagas are cooking, peel and thinly slice your garlic.  Add the garlic and olive oil to a cold pan and warm over medium-low heat.  Cook until fragrant and just beginning to get golden brown on the edges.  Pull the leaves off of the thyme and stir it into the hot oil.
-Drain and roughly mash your rutabagas.  Spoon the warm oil and garlic over the top and add flaky salt and pepper to finish.  Serve immediately to enjoy the crunch of the garlic.

Extra: For those of you who partake in dairy try this recipe for rutabaga souffle, Consider the Rutabaga
Dog Hill update: Penny is a full-time walker now
Flamey, Alex's bearded dragon is getting bigger.  I love his thoughtful expressions.
And Perfect is REALLY growing like a weed.
She doesn't sit still for pictures, you have to sneak up on her.

January 20, 2011

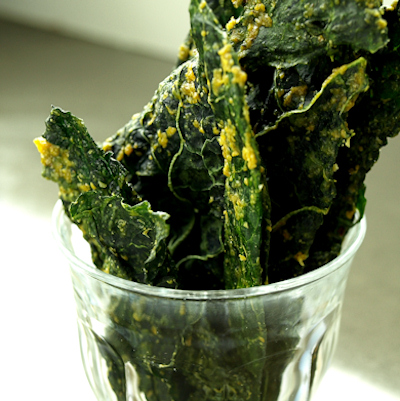
Kale Snackers

Here's my take on Cheezy Earth Chips.  The orginal is great but I knew they could be easy to make and I thought it could use a little less coating and less intense yeast flavor.  I playing with the ingredient list, tweaked and found the flavor I liked best.

I used Coconut Secret Coconut Aminos to make them soy free but soy sauce or wheat-free tamari would work as well.  You may have to adjust the amount because I find the coconut aminos are less salty than even low sodium soy sauce.  Really I suggest tasting the coating before you dress your kale and adjusting to your taste.  This is a guideline recipe nothing hard and fast.  I just wish I had these back in college when I did awful things to industrial sized containers of goldfish crackers.  *shudder*

Kale Snackers
Makes 2-4 servings

2 bunches kale (lacinato/dinosaur works best)
4 tablespoons raw cashew butter
4 tablespoons nutritional yeast flakes
2 tablespoons coconut aminos (or slightly less soy sauce or tamari)
1/4 teaspoon dehydrated garlic powder
1/4 teaspoon ground tumeric
1/4 teaspoon freshly ground black pepper (or a good pinch of cayenne pepper)
1/4 teaspoon flaky sea salt

-Remove the thick part of the stems from the kale and tear into large pieces.  Rinse well and spin or pat as dry as possible.
-In a large mixing bowl stir together the cashew butter, yeast, aminos, garlic, tumeric and pepper.
-Add the dried kale leaves and scrunch around with your hands to get them evenly coated.  Don't worry about crushing the kale too much.  It'll smash down some but dehydrate fine.
-Spread the coated kale on your dehydrator sheets in a fairly thin layer.  If you let it double up it will be fine but produce a thicker chip and take longer to dry.  Sprinkle over the flaky sea salt. 
-Dehydrate at 112 degrees F for 7 hours or 125 degrees F for 2-3 hours.  I haven't yet tried these in the oven, let me know if you do. 

I'm going to try a honey mustard version next.  Or maybe since I have the dehydrator out I'll whip up some BBQ Flax Crackers.

January 18, 2011

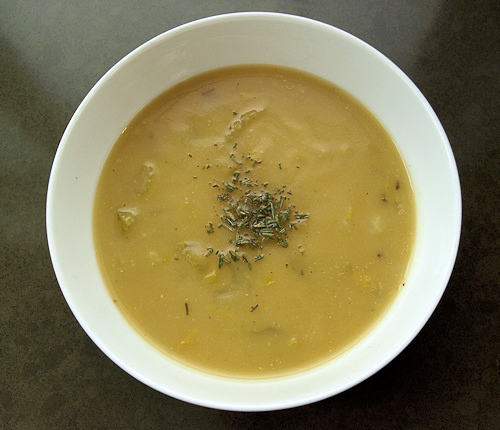
Creamless Celery Soup with Rosemary

I usually kill rosemary plants when I try to overwinter them and have in past few years chosen not to fight it and treat the plant in the garden like an annual.  I do try and remember to dry a big bunch so that it doesn't go to waste so I was all ready for this month's Spice Rack Challenge from Mother's Kitchen.

The weather combined with going lower carb and wheat free has me craving soup.  In addition, the local chickens at our co-op Oryana are HUGE, +7lbs!! and I have been butchering the whole birds I buy myself to make them stretch into at least three meals.  This creates a lot of chicken carcasses that are helping me replenish my freezer stash of stock.

Celery soup with rosemary seemed a great pair since celery is a vegetable that has an assertive enough flavor to stand up to the resinous quality of rosemary.  No real cow's milk cream in our house right now so I "creamed" my soup with celeriac, the tasty root version of celery.  I thought it was fantastic and John (a noted celery hater) liked it a lot, which must be due to the Mediterranean influence of the rosemary.  Penny liked it as well but Alex was on the fence.  He's getting to be quite the picky one lately.

Creamless Celery Soup with Rosemary
Makes 4-6 servings

1 large leek
1 large celery root (celeriac)
1 clove garlic
2 teaspoons crumbled dried rosemary, divided
1 tablespoon olive oil
6-8 cups good stock (chicken or vegetable)
6 stalks celery with leaves, chopped
salt and pepper (white pepper preferably) 

-Remove the greens from the leeks and save for stock making.  Dice the leeks and rinse and drain.  If the leek is especially sandy then repeat the rinsing a few times.  Peel and slice the garlic.  Peel and dice the celeriac into 1/2 inch cubes.
-Cook the leek, garlic and celeriac in the olive oil along with 1 1/2 teaspoons of the rosemary over medium heat in a medium soup pot.  Season with salt and pepper.  Cook until the leeks are limp.
-Add 6 cups of the stock to the vegetables and bring to a strong simmer.  Simmer for around 20 minutes until the celery root is cooked through.
-Transfer the soup to a blender and puree until smooth.  Use caution when pureeing hot liquids, this will probably need to be done in at least two batches.  If you own a immersion blender, you can puree the soup in the pot. 
-Return the soup to the pot and add the chopped celery and celery leaves.   Add more stock if needed to get your desired thickness.   Bring to a simmer and cook for around 10 minutes until the celery is tender. 
-Crumble the final 1/2 teaspoon of dried rosemary into the soup and check for seasoning, add more salt and pepper as needed.  Serve hot.

Anyone else notice that there have been way too many dog pictures here lately?
Abbie is on house arrest after disappearing for 10 days before Thanksgiving.  We were sure she had been gobbled up by a coyote!  So far she hasn't protested too much but will probably give us trouble when the snow is gone.

January 15, 2011

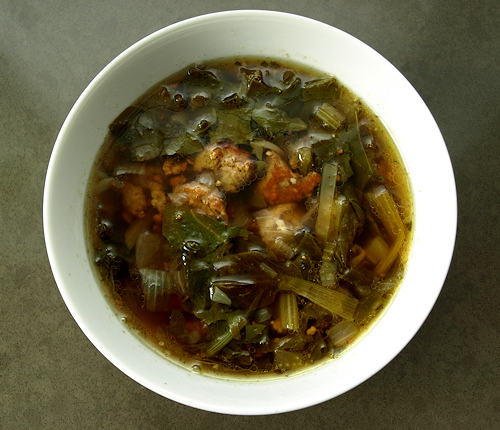
Sausage and Greens Soup


Sausage and Greens Soup
I started making this variation on quick sausage soup last fall. I think it is best with turnip greens but kale, collards, Chinese cabbage and even radish tops all work well.  The key is freshly crushed anise seed that you toast in the fat rendered from the sausage.
Makes 4-6 servings

1 to 1 1/2 pounds pork sausage, I use the links from Gallagher's Centennial Farm
2 teaspoons crushed anise seed
1 1/2 teaspoons dried sage
1 large sweet onion, diced
1 stalk celery, diced
2 bunches (~1/2 pound) greens, chopped
2 quarts vegetable stock (or water and two vegetable bouillon cubes)
salt and freshly ground black pepper

-Heat up a medium soup pot.
-Use a clean pair of kitchen scissors and snip the sausage into 1/2 inch slices directly into the hot pot.  Brown the sausage well.
-Add the anise seed and a few grinds of black pepper, I crush whole seeds in a mortar and pestle right before using. Stir to toast until the anise is fragrant.
-Add the crumbled sage, onion, celery and a good pinch of salt.  Cook until the vegetables have softened.
-Add the greens and stir until they wilt down some.
-Add the stock or water and bouillon and bring to a simmer.  Before you walk away taste for seasoning and add more salt and pepper if needed.  
-Simmer 30-45 minutes and serve.

November 16, 2010

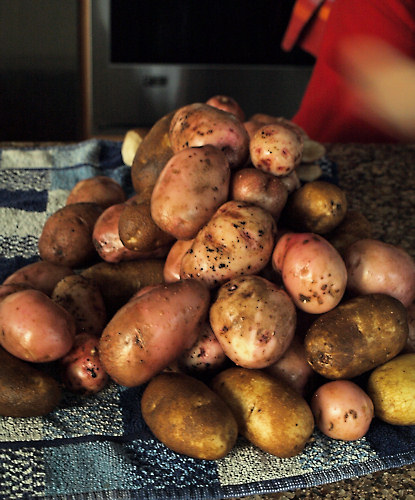
Shovel-cut Mashed Potatoes

Instructions:
  1. In the spring, gather your newborn daughter in a baby carrier and dig a trench.
  2. Have your older son toss the leftover, sprouting potatoes from your farm share and the seed potatoes you saved from last year haphazardly into said trench.
  3. Shovel over dirt hastily because your newborn daughter now wants to go inside and eat.
  4. Allow weeds to take over the garden as you spend your summer lazing on the beach...
  5. Get a bonus sunny day in November and remember that you still haven't dug up the potatoes.
  6. Throw the now 7 month-old daughter in the baby carrier and grab a shovel.
  7. Have a ton of fun with your older son seeing who can find the biggest potatoes and the biggest earthworms.
  8. Get your kitchen sink full of dirt washing the potatoes off.
  9. Have your son peel all the shovel-cut potatoes while you nurse the baby.
  10. Take time out to bandage the peeler cuts.
  11. Place the peeled potatoes into a pot of cold salted water.  Bring to a boil and cook until you "think" they are all tender.  
  12. Realize only after draining and smashing half that some are still underdone.  Kick yourself for not thinking about how the different varieties you grew are going to cook at different times.  
  13. Throw everything into a glass dish and microwave for 4 minutes. Mutter curse words to yourself in your head.  Retrieve exploring baby from the bathroom.
  14. Remove the potatoes from the microwave and toss them back into the pan along with unsweetened plain almond milk and Earth Balance margarine.  Smash the heck out of them.
  15. Serve with salt and pepper praying that no one will not notice the minuscule amount of still crunchy potatoes.
  16. While eating make grand plans with your son for next year's garden. 
Alex contemplating the meaning of life, or the meaning of potatoes?

October 12, 2010

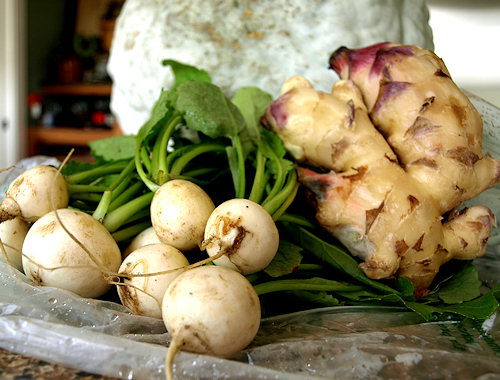
Gingery Turnips


My fall CSA shares from 9 Bean Rows started the same week I scored some locally grown fresh young ginger.  So I did a quicker take on this Food and Wine recipe.   I quickly blanched the halved roots and then fried them in olive oil with shallots, finely julienned ginger, the turnip tops and finished with a splash of umeboshi vinegar.  Yum!  


And Penny is tasting solid foods, here she is with some baked apple.

June 5, 2010

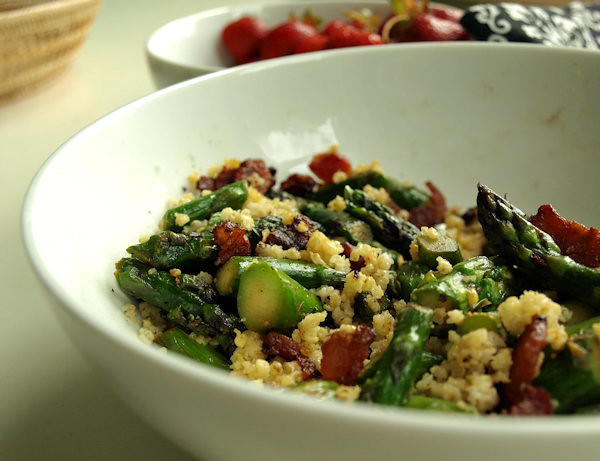
Black Pepper Asparagus with Millet and Bacon

Michigan asparagus soon to be gone for the season and Michigan strawberries just in.  I love the farmer's market in the spring!  Penny was very good at the market and shopping this morning but just refuses to be out in the garden with me.  So I'm inside cooking and blogging instead, the tomato plants will have to wait.

I've been eating a lot of millet lately.  It was one of the grains I made and froze for post baby eating, along with brown rice and quinoa which also freeze well cooked.  I hadn't eaten millet much before but it turned out to be a pleasant surprise when I realized how much I loved the corn-like flavor and fluffy texture.  Now I'm craving it.  Don't they say that thin people eat "like birds"?  My chickadees love millet!  A perfect get off the baby weight food!  Regardless, here's a great combination I made today that also utilizes my new favorite way to make asparagus.

Basic Millet Pilaf
Makes ~3 cups of millet

1 cup whole millet
2 1/2 cups water
1/2 teaspoon salt

-Toast the millet in a dry saucepan until it smells nutty and turns a light golden brown.
-Add the water and salt and bring to a boil.  Turn down to a simmer, cover and cook 30 minutes or until tender.
-Fluff with a fork and serve.  Or...
To store in the freezer for later:  Spread out the cooked millet on a baking sheet, allow to cool to room temperature, freeze and then crumble and bag.  When needed, shake out and warm in the microwave covered with waxed paper or in the oven covered with parchment.

Black Pepper Asparagus with Millet and Bacon
Serves 4 as a side or 2 as a meal

1lb fresh asparagus spears, chopped into 1 inch sections
3 cups prepared millet pilaf
4 slices of bacon, sliced into lardons *or see meat-free variations at end
1 tablespoon lemon juice
salt and freshly ground black pepper

-Heat up a skillet, cast iron is best for this, and add the lardons.  Cook until crispy.
-Remove the crispy lardons to a serving bowl and pour off almost all of the bacon fat.
-Make sure the pan is hot and add the asparagus.  Salt the asparagus lightly and grind on a generous amount of black pepper.
-Cook the asparagus over high heat tossing occasionally until it starts to brown and is hot and cooked through but still slightly crunchy.
-If you are using pre-frozen millet heat it up.
-Toss the heated millet, crispy bacon lardons and asparagus with the lemon juice and more black pepper.  Taste for seasoning and add more lemon juice/salt/pepper to your own taste.
-Serve with a side of Michigan strawberries for the best effect.

Meat-free variations:
-Chop Fakin' Bacon (smoked tempeh) into lardons and fry in 1 tablespoon of oil until crispy. 
-Caramelize 1/2 cup of chopped onion in 1 tablespoon of oil and use in place of bacon.

Fritz our dachshund caught a tomato hornworm moth this week.  John and Alex decided I couldn't kill it to protect my garden and so they relocated it.  My sincere apologies to the tomato gardener this guy finds. 

January 10, 2010

Pak Choi and Squash Hot Pot

Ah my beloved DVR, how I love that you allow me to catch the five to ten minutes of valuable information left in the hour long debacle known as the Martha Stewart Show. Without you, I wouldn't have been able to sift through the product plugs and celebrity prattle and I would have missed the segment featuring Japanese hot pot meals from this week.

This gave me a new way to use up the pak choi I've been struggling with from my farm share. Plus, I used up local shiitake mushrooms that I dried this fall and butternut squash left from my garden. Hot, comforting and ridiculously fast and easy to make, this hot pot has me adding yet another cookbook to my Amazon wish list.

Pak Choi and Squash Hot Pot
Serves 3-4
Based on the recipe for Kabocha Pumpkin Hot Pot from "Japanese Hot Pots: Comforting One-Pot Meals" by Tadashi Ono (Note: these adaptions are made to fit what's in my pantry and what needs to get used up)

8-10 dried shiitake mushrooms
1-2 pieces of kombu*
1/2 cup soy sauce or tamari*
1/2 cup mirin*
8 oz (~2 cups) diced, peeled winter squash (butternut, kambocha, etc)
6 oz cubed firm tofu
3-4 cups pak choi, chopped into 1-inch pieces
4-5 green onions, chopped into 1-inch
1 (1.6 oz package) of rice noodles or raman noodles, like these from Thai Kitchen
1 cup boiling water + 4 cups water

*These ingredients are available from the Michigan-based company, Eden Foods, though of course no one is harvesting kombu anywhere near here.

-Cover the mushrooms with a cup of boiling water and let set for 5-10 minutes. You could soak them in all of the cold water overnight but who thinks ahead like that?
-Remove the mushrooms from the hot water, trim the stems and cut any large mushrooms in half. Add the mushroom water to 4 more cups of water, the kombu, soy sauce and mirin in a heavy soup pot, like an enameled cast iron pot. Bring to a boil.
-When the broth is boiling, add the squash and mushrooms and return to a boil. Turn the heat to medium-low and cook covered for 5-6 minutes.
-Uncover and add the tofu, pak choi, green onions and noodles. Push the ingredients into the broth, cover and turn the heat up to medium-high. Cook for ~3 more minutes or until the noodles are done. Remove the kombu before serving (or see how long your dinner companions will chew on it, LOL!)

Notable variation:
When I made this earlier this week I didn't feel like noodles so I made some sticky rice, IE unseasoned sushi rice. Then I poured the finished soup with the vegetables over a pile of the rice in a large bowl. It was as good or better, depending on your mood.

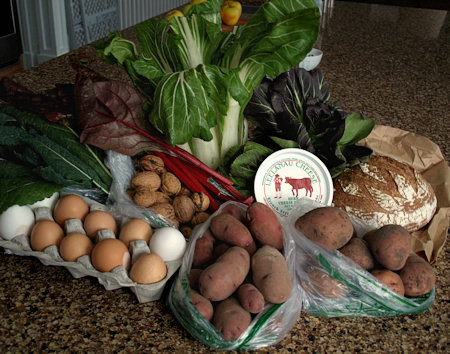
This week's 9 Bean Rows winter farm share: (clockwise from top middle)
white pak choi, purple pak choi, Leelanau Cheese fromage blanc, wheat boule, potatoes, more potatoes, eggs, lacinato kale, walnuts and Swiss chard
Extra link: You can watch the Martha Stewart Show segments on hot pots, HERE

November 29, 2009

Butternut Squash and Brown Rice Porridge (congee-style)

Before diving into making Christmas sweets I needed some detox food to recover from my Thanksgiving indulgences. My mother made a wonderfully simple squash and rice soup for our Black Friday brunch and I couldn't resist playing with the idea when I got home. I used up one of my smaller butternut squash with short grain brown rice. After they cooked together to make a creamy porridge I topped it with green onions, fresh ginger, soy sauce and fried locally-grown shiitake mushrooms. It was savory and comforting and was the perfect stomach healing food I craved. I also tried out a variation with brown sugar and Earth Balance margarine for my son. Alas, he objected to the squash, which is usually a favorite vegetable of him. I thought it was pretty tasty myself but not as appealing as the savory version. Here is what I did:

Butternut Squash and Brown Rice Porridge
Based on this recipe for Yum Yum Brown Rice Congee
Makes 4 servings

1/2 cup short brown rice
4 cups water
1/2 teaspoon salt
1 1/2 cup peeled and diced (1/2 inch dice) butternut squash, other squash or pumpkin
toppings (suggestions listed at the end)

-Add the brown rice, salt and water to a small soup pot. Bring to a boil, stir and then reduce the heat to a strong simmer. Cook covered for 1 to 1 1/2 hours, stirring occasionally.
-Add in the squash and bring back to a strong simmer. Cook covered for another 30-45 minutes until the squash is tender.
-Top with your desired toppings and serve warm.

Optional toppings:
-sliced green onion, fried shiitake mushrooms, freshly grated ginger, soy sauce, chili oil
-brown sugar and butter (or EB)
-if I had some I would have tried some kim chee and a poached egg or maybe

Another variation with brown sugar and Earth Balance margarine
(real butter or a splash of cream would be even better if you can have them)
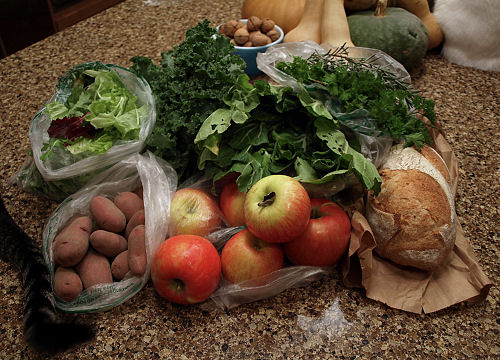
This week's 9 Bean Rows share: (clockwise from top)
bok choi, parsley and rosemary, rye bread (my favorite), apples, potatoes, salad greens and kale
*note the cat tail and rear, they were eager to be fed
It's been ages since I posted a shot of Abbie.
She likes to annoy me by sitting on the counter, where she isn't supposed to be, and chewing on the squash stems.

November 5, 2009

Smoky Collard Greens (no meat version)

No rain for trick-or-treating, sun peeking out from behind the clouds all week long and bearable temperatures even though we saw a few snowflakes. I'm a happy girl.

So between tests of every pumpkin cake/bread recipe I can find, to use up some of my squash-load from the garden, I made some greens today and thought I'd share my recipe. Now, I have no moral problem with pork and I love when someone else makes a big pot of collard greens with ham hocks. My mouth waters just thinking about driving through South Carolina and finding a really good BBQ joint. But, since I'm the only green lover in my house I've learned to make do with small batches, that means a slice of bacon or this version which has no meat at all. Smoked paprika (pimenton) is one of my most beloved of spices and can give a slice of bacon some competition.

Smoky Collard Greens
Makes ~1 1/2 cups of cooked collards

1 bunch collard greens (~8 leaves)
1 medium onion, diced
1/4 teaspoon pimenton (Spanish smoked paprika)
1 tablespoon apple cider vinegar
olive oil
salt and freshly ground black pepper
Frank's RedHot, optional*

*Note that my bottle is nearly empty, I go through the stuff like my son goes through ketchup. It's killer on buttered (or EBed - Earth Balanced) popcorn.

-Sweat the diced onions in a tablespoon or so of olive oil, the pimenton, a few grinds of pepper and a pinch of salt until translucent.
-Remove the collard stems, roll and chop the leaves and then wash them well in a lot of water. Do several changes of water for dirty greens.
-When the onions are soft, add the greens, vinegar and a splash or two of water. Cover and let the greens wilt over medium heat. In a minute or two check the greens and give them a stir. Add more water if needed to keep the greens moist, you want some liquid in the pot but not a soupy mess since we aren't cooking these very long. Cover and reduce the heat to low.
-Cook for 20 minutes or until the greens are tender enough for you.
-Taste for seasoning and serve with Frank's RedHot on the side.

Other collard recipes:
Gina Neely's Best Collard Greens
Crock Pot Collards from Mother's Kitchen
Braised Collard Greens from The Kitchn
Veganized Southern-style Collard Greens, with shiitakes

My son Alex was happy to find the milkweed pods are finally ripe.

April 5, 2009

Savory Pumpkin-Caramelized Onion Muffins

Even though the sardine cupcakes weren't really savory (or real sardines for that matter), I *have* wanted to make a savory cupcake/muffin for awhile. A giant butternut squash I acquired this weekend prompted me to try making the flavors of this pizza into savory muffins. These are subtly sweet and moist with the intoxicating aroma of caramelized onions. The smell reminds me of the good Jewish onion rolls my parents used to buy. I really like the salt and crunch the pepitas give to the tops, analogous to a sweet muffin's crumb topping. I'm sure they would be good with butter (Earth Balance margarine) or some cream cheese but today I preferred nibbling on them plain. I plan on having one for breakfast tomorrow with some Fakin' Bacon or maybe a slice of ham if I'm in the mood for the real stuff. I also would love to try this with some other flours like quinoa or some soy flour for higher protein.

I'm submitting this recipe to the Virtual Great American Bake Sale hosted by Kate of Cooking During Stolen Moments. Kate just so happens to be another Michigan foodblogger and I'm all for mitten state solidarity! On April 13th, the recipes submitted will be collected together in an ebook for sale with all the proceeds going to Share Our Strength.

Savory Pumpkin-Caramelized Onion Muffins
Makes 12 muffins

1 1/2 cups diced cooking onion
1 tablespoon Earth Balance Margarine (or butter)
1 teaspoon dried thyme
2/3 cup milk (we use soy)
1 teaspoon vinegar
3 tablespoons shelled pumpkin seeds (pepitas)
1 cup whole wheat pastry flour
1 cup all-purpose flour
1 1/2 teaspoons baking powder
1/2 teaspoon baking soda
1/4 teaspoon salt
1 cup pumpkin or squash puree
1/4 cup oil
1/4 cup maple syrup

-Preheat your oven to 350 degrees F.
-Cook the diced onion with the margarine, thyme and a pinch of salt in a pan over medium high heat until caramelized. To get good color stir often and cook for at least 15 minutes. Set aside to cool in a medium bowl.
-Mix together the milk and vinegar and set aside while the onions cool.
-Spray another skillet with oil and add the pepitas (pumpkin seeds). Carefully toast the pepitas over medium heat until a few begin to make popping sounds and color a light golden brown. Remove and toss with a pinch of salt.
-In a large bowl, stir together the two flours, baking powder, baking soda and 1/4 teaspoon of salt.
-Add the soy milk mixture, the pumpkin, the oil and the maple syrup to the caramelized onions. Stir until combined.
-Dump the wet ingredients on top of the dry ingredients and mix just until combined.
-Spray a muffin pan with oil and spoon the batter in, filling each compartment 2/3 of the way full. Sprinkle the toasted pepitas on top.
-Bake for 18-20 minutes, until a toothpick inserted in the center comes out clean. Cool for 5 minutes and then remove from the muffin pan and cool the rest of the way on a baking rack.
-Good for breakfast, a snack or serve like rolls for a meal.

March 27, 2009

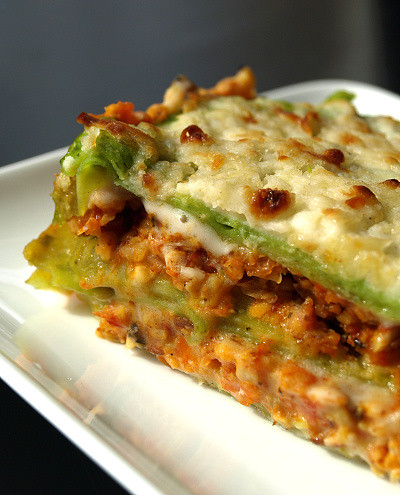
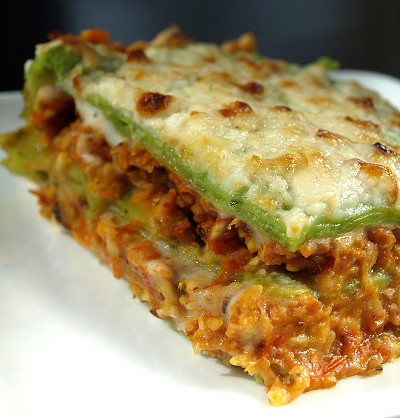
DB Lasagna with Tempeh and Celeriac

The March 2009 challenge is hosted by Mary of Beans and Caviar, Melinda of Melbourne Larder and Enza of Io Da Grande. They have chosen Lasagne of Emilia-Romagna from The Splendid Table by Lynne Rossetto Kasper as the challenge.

I was surprised to learn this month's Daring Baker challenge. Baking to me means cookies, cakes, bread, and pie--I guess sweets just naturally dominate my brain. Making lasagna seems more like cooking than baking and it's one of those dishes that relies on cheese to make it so delicious. I've made a few dairy-free lasagnas for my son but they were bare bones dishes: layers of meat with sauce, a layer of broccoli (one of the two green vegetables he deems edible) thrown together with dairy-free soy cheese and noodles from a box. Certainly nothing exciting enough to post.

However the challenge of making my own spinach lasagna noodles kept me motivated. I've made a lot of pasta for homemade ravioli and pierogi and occasionally for hand cut noodles but have never attempted spinach pasta or making the large sheets needed for lasagna. So I took that spark of excitement and decided to wing the rest.

A look at my mostly bare fridge gave me the idea to replace the meat ragu with a tempeh version. This I spiced with a secret ingredient of mine, Italian sausage seasoning. The fennel and pepper taste is great with green vegetables and in homemade meatballs for soup. Poking further I found a forgotten celery root and had another bright idea. Typically vegans and those who eat dairy-free replace soy milk in the milk-based bechamel sauce found in lasagna, but the taste has never been top on my list. The flavor of celery goes so well with tomatoes and I knew it can be made into a super smooth puree. So I spiced it up bechamel-style with nutmeg and white pepper to use in my lasagna.

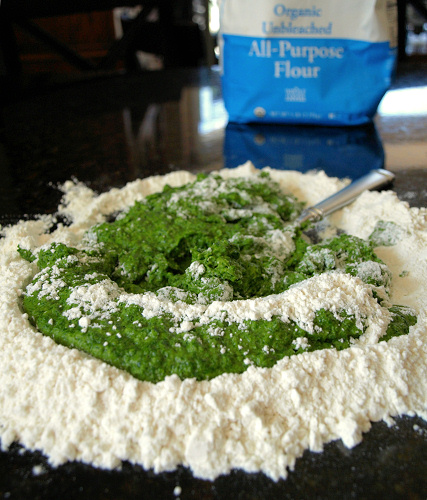
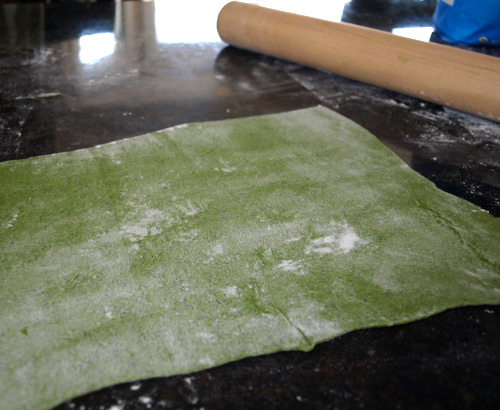
The spinach pasta wasn't the walk in the park I expected. I'm not sure if I chopped my spinach too fine or if I just had very juicy spinach but I needed a lot of bench flour to get the pasta dough workable. It was really sticky! Eventually it worked out and I was really happy with how thin I got my sheets of lasagna noodles. The color on the cooked noodles was impressive too. It has me ready to try again and make spinach tagliatelle with basil pesto.

I thought about replacing the Parmesan called for in the recipe with oil and garlic toasted breadcrumbs, something I'd seen on Kalofagas recently, but laziness won out and I used some Follow Your Heart vegan mozzarella cheese. The melded taste of the spinach pasta, rich tempeh sauce with the creamy cheese and celeriac puree was wonderful. Everything was gooey and the flavors mingled so well. The celeriac bechamel has renewed my interest in making dairy-free lasagna. Once again, I'm happy the Daring Bakers pushed me in a new direction.

Links:
-For the complete original recipe visit this month's hosts: Enza of da grande, Melinda of Melbourne Larder and Mary of Beans and Caviar.
-The author of the original recipe is Lynne Rossetto Kasper, you can find her online at The Splendid Table.
-See more lasagna creations by visiting the Daring Bakers' Blogroll.
-If you'd like to join in or learn more about the group, come see the gorgeous new site: The Daring Kitchen.
My Instructions for Lasagna
This is my adaptation of Lasagne of Emilia-Romagna (Lasagne Verdi al Forno) from The Splendid Table: Recipes from Emilia-Romagna, the Heartland of Northern Italian Food by Lynne Rossetto Kasper.
Makes one 8-inch square lasagna that will serve 4

Ingredients:
1 half-recipe of Spinach Egg Pasta or one full recipe of Vegan Pasta, spinach variation, see links for recipes*
1 recipe of Celeriac Puree for Lasagna, see below for recipe (increase amount as desired)
1 recipe Tempeh Ragu, recipe below
5 ounces Follow Your Heart vegan mozzarella cheese

*You can begin by making your pasta and letting it dry while you make the fillings or by making the fillings and then setting them aside or refrigerating and reheating them while you make the pasta. I made the pasta first and allowed it to dry only slightly. That is how these directions are written so I can remember what I did for next time.

1. Prepare your lasagna noodles. I used half of the provided recipe for Spinach Egg Pasta (Pasta Verde). You can see the complete recipe with instructions here. The ingredient amounts for a half recipe are: 1 egg, 5 ounces of fresh spinach, and 1 3/4 cups (7 ounces) of all-purpose flour. I needed more flour to make the dough workable and not crazy sticky. There will be a little dough leftover. You can cut it into noodles and save it for later or just cook it, throw some butter/EB on it and have a snack. For a vegan/egg-free option, try this Vegan Pasta Recipe, scroll down for the spinach version. This should give you more than enough and some extra pasta as well.
2. After your pasta is made and set aside to dry a little, make your fillings. My recipes are included below. Set the finished fillings aside.
3. Preheat your oven to 350 degrees F and bring a large pot of salted water to a boil. When the water comes to a boil, prepare a large bowl of ice water and spray an 8-inch square baking pan with spray oil.
4. Grate 5 ounces of Follow Your Heart vegan mozzarella cheese and set aside.
5. Boil the lasagna noodles for 2 minutes. *If you dried the noodles overnight or longer, then you should boil them for 4 minutes. Cook just 3-4 noodles at a time, transfering them with a handled strainer to the ice water when done.
6. When your noodles are ready, lay a thin layer of the celeriac puree onto the bottom of the baking pan and cover it with a few layers of noodles. If you get your noodles very thin use 2-3 layers of noodles. If they didn't come out as thin, use just 1-2. I recommend straining and patting the noodles a little with a clean dish towel or paper towel to avoid making your lasagna watery.
7. Add another layer of puree and top it with a layer of ragu then sprinkle on 1/3 of the cheese. Add another couple layers of noodles and repeat the puree, ragu, and 1/3 of the cheese. Top with a final layer of noodles. Spread the remaining celeriac puree on to the top of the lasagna and sprinkle over the rest of the cheese.
8. Cover with aluminum foil, making sure the foil doesn't touch the surface of the lasagna. Bake in the center of the oven for 40 minutes. Remove the foil and bake for another 10 minutes.
9. Turn on your broiler and raise the lasagna to the top rack. Broil for 1-3 minutes to brown the vegan mozzarella, checking every minute so that it doesn't burn.
10. Remove the lasagna from the oven and cool for 5-10 minutes. Cut and serve.

Celeriac Puree for Lasagna
For use as a dairy-free bechamel sauce replacement in a 8-inch square lasagna. I plan to make this again and use a slightly larger celeriac or two roots because I think more would be good in the lasagna. This amount melded in nicely though.
Makes ~1 1/4 cups

8 ounces of peeled celery root (celeriac), from ~12 ounces unpeeled root
1 clove of garlic, whole and peeled
2 tablespoons Earth Balance margarine (or butter if you want/can)
1/4 teaspoon freshly grated nutmeg
1/4 teaspoon freshly ground white pepper

-Chop the peeled celeriac into a 3/4 - 1 inch dice. Place in a pot with the garlic clove and add enough water to cover. Season the water with salt until it tastes as salty as tears.
-Bring the pot to a boil and boil ~7-9 minutes, until the celery root is tender all the way through. You can check this by stabbing a piece with the tip of a knife.
-Remove the pot from the heat and drain the water off. Save 1/4 cup of the cooking water.
-Place the drained celeriac and garlic into a food processor and add the margarine (or butter) and 2 tablespoons of the cooking liquid. Process until smooth. This could be done in a blender as well.
-Check the puree to see that it is the consistency of soft mashed potatoes, add more cooking water if needed. Add the nutmeg and pepper and process to distribute. Taste for seasoning and add salt, more nutmeg or pepper if desired.
-Store for assembly later in the fridge or use shortly. The puree should be warm when added to the lasagna.

Tempeh Ragu for Lasagna
Makes ~2 cups, enough for one 8-inch square lasagna

8 ounces of tempeh (I used LightLife 3 grain but I really like their flax and wild rice versions too)
1 teaspoon olive oil
1 clove of garlic, grated on a microplane or smashed into a paste with a knife or garlic press
1/2 teaspoon Penzey's Italian Sausage Seasoning*
1 1/2 cups pasta sauce (I used my homemade sauce, look for a sauce that isn't very chunky and is fairly thick)
*This is a mixture of ground fennel seed, salt, pepper and a little sugar. You can replace it with a home mixed version of those ingredients or just use whatever pasta herb/spice seasoning you prefer, just add to taste.

-Pulse the tempeh in a food processor until it forms a coarse meal, think Grape Nut size. You can also grate the tempeh on the large holed side of a grater.
-Heat the oil in a skillet until a crumb of tempeh sizzles a little when added. Add all the ground tempeh and cook over medium-high heat until at least half is golden brown, stir often. This should take 2-3 minutes.
-Turn the heat down to medium-low and add the garlic and sausage seasoning. Stir to distribute and heat just until the garlic becomes fragrant.
-Add the pasta sauce. Cook on medium high until bubbling and hot, cook and additional 2 minutes, stirring occasionally.
-Remove from heat and allow to cool slightly or store in the fridge for use later. Like the celery root puree this should be added to the lasagna warm.
Making the spinach pastaRolling out the lasagna noodlesA slice of finished lasagna