Showing posts with label Recipes: sweets. Show all posts

February 14, 2012

Chocolate Pots de Creme (dairy free and date sweetened)

My foray into non-Whole 30 foods didn't go quite as well as I previously reported.  A few days after my "cheating" I had a few break outs and gained back a little weight.  I felt even worse after tasting frosting (very little) I made for potluck cupcakes, obviously a dumb idea.  Feeling fuzzy-headed and sluggish were my main complaints. I detoxed by eating tons of raw vegetables for a few days and that has made me feel much better. I just need to figure out what starchy/sweet foods agree with me and which ones don't.  It's all a big crazy experiment anyway since I really don't have any confidence that anyone knows what we should eat.  Sometimes I think about all the people that seem to be thriving on fast food and vending machine fodder and wonder what in the world is the difference between me and them.  Is body chemistry, self control, portion sizes, nurture, nature...?

Anyway, it's Valentine's Day and I knew I would never get through the whole day without something chocolate.  I let Alex stay up late last night because he was thoroughly engrossed in a book, Mousenet, and Penny had fallen asleep super early so I was wasting time reading blogs.  I came across a recipe for Pots de Creme on Pioneer Woman. I usually read her blog only for the photography and homeschooling ideas because the delicious-looking real butter and cheese in her food torture me; but something made me check out this recipe.  I was thrilled to find out that it was already dairy free and so simple!

The amount of sugar in the original recipe is relatively low, coming only from the semi-sweet chocolate, but I wanted to try and make these a little more nutritionally dense.  I took inspiration from the white chocolate both my children love from Organic Nectars.  They use cashews in place of milk powder so I used some cashews to lighten my unsweetened chocolate.  I added my favorite natural sweetener, dates, and changed the flavorings to suit my mood.  Probably these should now have a different name but I have had the real thing and these are better than quite a few that bore that name honestly with real cream.  Be sure to take your time and fully blend the mixture so you get the creamiest texture possible with your blender.  And don't be surprised if you want to eat them all at room temperature once you take a taste.

Happy Valentine's Day!

Pots de Creme
Based on Pioneer Woman's Pots de Creme a L'orange recipe
Makes 6-8 servings, halves easily but requires more scraping while blending

6 oz unsweetened chocolate, chopped fine
3 oz (1/2 cup) raw cashews
6 oz dates or date paste, (~1 cup packed, pitted dates)
4 eggs
1 tablespoon vanilla extract
pinch of salt
1 cup very hot water

-Add the chocolate, cashews, dates, eggs, salt and vanilla to a blender and blend until everything is combined and the cashews and dates are mostly smooth.  You may need to stop and scrape down the sides a few times to get everything together.
-With the blender running, slowly add the hot water through the hole in the lid.  After all the water is added, stop the blender and scrape down the sides.  Blend again until very smooth, scraping more as needed.
-Spoon into cups or jars.  Serve either right away because it is pudding-like warm from the blender or chill and eat cold, chilled it is very rich and almost like frosting.

Variations:
You could replace the hot water with hot coffee and/or replace the vanilla extract with Grand Marnier, Chambord or other liquor

After nearly 10 years of product loyalty, I gave up using Paint Shop Pro last fall and have been slowly learning my way around Adobe Photo Shop.  I figured I was finally ready to try using some actions.  Here is Penny with PW's Old West action.  You can download her action sets here.  

January 22, 2012

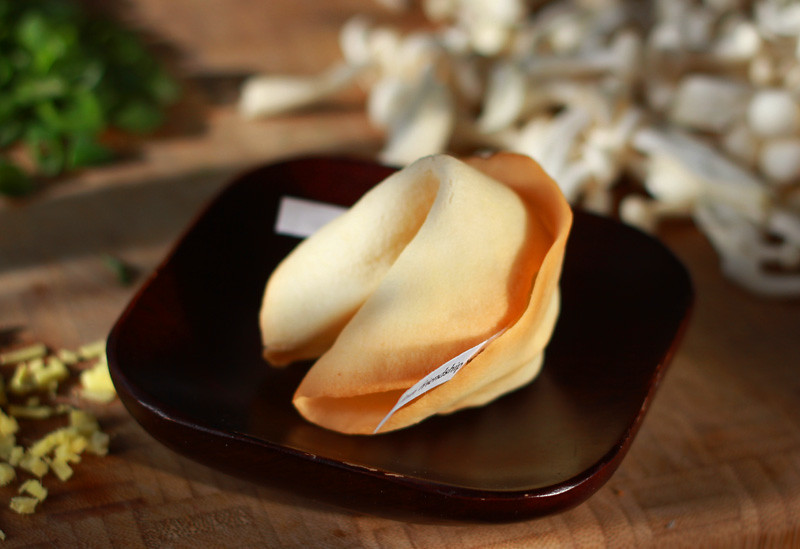
Fortune Cookies (gluten and dairy free)

We were invited to a Chinese New Year celebration yesterday and I was determined to bring fortune cookies that Alex could safely have.  Friday night I fought with three different recipes: two that were gluten free by design and one wheat flour recipe with gluten free flour blend as replacement.  All of them were flops and I was fairly discouraged and a bit angry about wasting some of the last of our eggs.  Our chickens and ducks have mostly stopped laying now.  :(   But the next morning I screwed by courage to the sticking place and gave it one more try.  This time I altered a recipe I already knew worked and success was mine!  I was even happier with how my stir fried pork with mushrooms served with sesame cabbage came out.  I will have to make that again since it was Whole 30 compliant and I'd like to post it.  The pork and cabbage helped me survive the challenge of not eating even the smallest taste of fortune cookie.  Thank goodness the kids make great taste testers!

Fortune Cookies (gluten and dairy free)
Adapted from this recipe which came from this recipe
Makes ~18 cookies

57g coconut oil
57g powdered sugar
2 egg whites, room temperature
48g tapioca flour
17g corn starch
pinch of salt
1/2 teaspoon vanilla extract
1/4 teaspoon almond extract

-Preheat your oven to 375 degrees F.  
-Line a couple of baking pans with parchment paper. If your pans are rimmed I suggest flipping them over and working on the back side so that spreading the batter is easier.  Set out a muffin tin to use while forming cookies and print and cut out your fortunes.  I used a lot from  this list of fortune cookie messages but my favorite is "Your fortune lies in another cookie".
-In a stand mixer, cream the coconut oil and sugar until light in color and smooth.  Add the egg whites and extracts and beat until incorporated.   This will be extra tricky if you don't have your egg whites at room temperature.  
-Add the tapioca starch, corn starch and salt and beat until a smooth batter forms, you will probably need to scrape down the bowl a few times.
-Oil your parchment with spray oil or a little melted coconut oil.  On one half of the parchment take a little less than a tablespoon of batter and spread it evenly with an offset spatula into an ~4 inch diameter circle.  Repeat on the other side of the baking sheet.  If you don't feel confident about this step you can trace a circle in pencil on the reverse side of your parchment paper to use as a guide or you can make a circle stencil out of thin cardboard (think cereal box) and then spread the batter just inside the template.
-Bake for 4-5 minutes until  light golden brown on edges, bake only 2 cookies at a time.
-Immediately after removing from the oven take a fortune and place it on the center line.  Then fold the cookie in half keeping the folded edge flat and not squashed.  Then bend in the two corners and place the cookie inside a muffin tin cup to keep it from unfolding as it cools.  This does some practice and hands that can take some heat.  This image was helpful for me to learn the fold though if you Google other recipes you'll see a lot of people using coffee cups to help fold.  The coffee cup technique wasn't helpful to me but you may be different.
-Repeat with the remaining batter. Be sure to cool off your cookie sheet and reoil your parchment after each batch.  Do not add fresh batter to a warm cookie sheet.  
-After the cookies have cooled store them in an airtight container.  
Gong Xi Fa Cai!

December 5, 2011

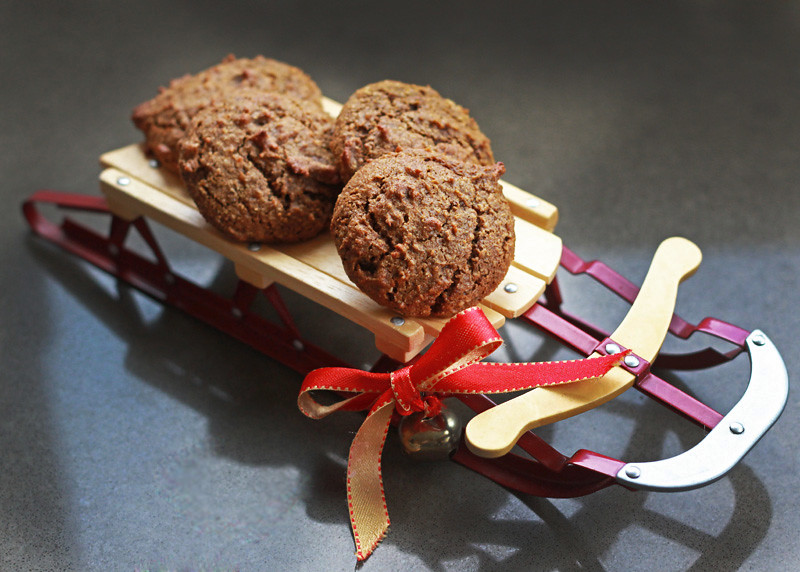
Chewy Molasses Cookies (redone grain free)

When I was younger I teased my mother for eating dried dates by saying they look like cockroaches. It had something to do with the translucence and papery skin, which I still find a little eerie, but recently dates have come to my rescue.  In this year's attempt to tackle wheat free baking I have found that dates, and date paste, are my favorite secret weapon for making good grain-free cookies.  This recipe is the first of two cookies that make use of my current favorite method. Using my ever evolving baking strategies I updated a favorite Christmas cookie of ours, the Chewy Molasses Cookie.  The flavor is still there though the sweetness is toned down to match our current tastes.  In my opinion this allows the zing of the spices and molasses to shine brighter.  I suppose I could still compromise and coat the outside of these in sugar but since they were so well received by both kids I think I'll keep them as is.   One experiment I would like to try is to double bake them at a low temperature like biscotti to see if I can get a crisp version as well as this chewy one.

Chewy Molasses Date Cookies 
Makes ~3 dozen small cookies, made using a 1 tablespoon scoop

7 ounces date paste (or ~1 1/3 cup packed pitted dates)*
3 ounces coconut oil (~1/3 cup + 1 tablespoon)*
2 large eggs
1 tablespoon molasses
1/2 cup almond meal*
2 tablespoons coconut flour
1 teaspoon baking soda
1/2 teaspoon baking powder
1/4 teaspoon fine sea salt
1 1/2 teaspoons ground ginger
1 teaspoon ground cinnamon
1/4 teaspoon ground cloves

-Preheat your oven to 350 degrees F and line your baking sheets with parchment.
-It is best to have all your ingredients at room temperature.  Add your dates, coconut oil, eggs and molasses to a food processor and pulse until you have a smooth paste.  If you are using pitted dates double check them for pits and expect this to take a little longer.
-In a small bowl whisk together all your dry ingredients.  Add the dry ingredients to the date mixture and process until combined, scraping the bowl as needed.
-Spoon tablespoons of dough onto your lined baking sheets leaving at least an inch and a half of spreading room.
-Bake for 8-10 minutes until puffy.  Cool the cookies on the baking sheets before removing.  It's best to release the cookies with an offset spatula before removing.  
-Baked cookies freeze well but I have found that coconut flour baked goods like these tend to not store well for long periods at room temperature.

*Ingredient information:  I get my date paste from Country Life Natural Foods.  It is relatively dry compared to most homemade versions I've seen but it's great for baking.  My kids prefer no coconut flavor and so we use the expeller pressed oil from Wilderness Family Naturals.  I've used both Bob's Red Mill and Honeyville almond flour/meal in these and both work fine.

November 4, 2011

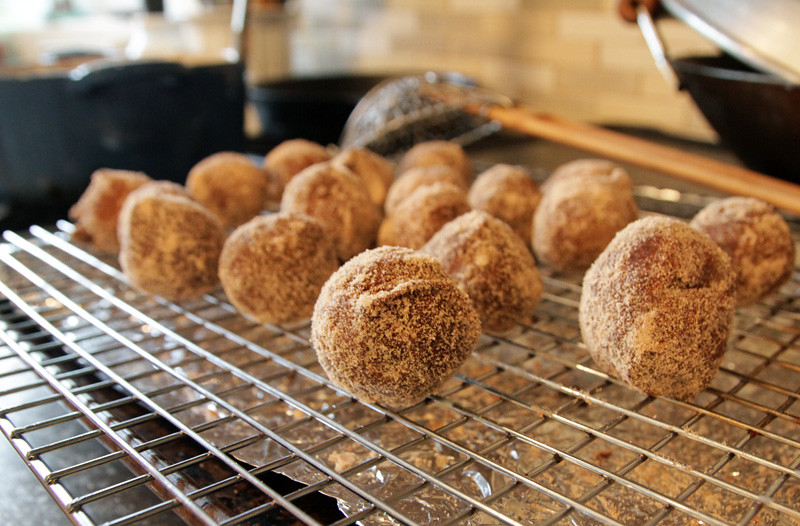
Pumpkin Donut Holes (redone GF/DF)

I made these last week to bring to our orchard trip because even though the place we visited doesn't sell donuts it is ingrained in me that cider must equal donuts.  Besides, it had officially been at least 3 months since my last donut frying and four times a year seems reasonable to me.  These are a work in progress because the batter is too loose to make into rings and can only be scooped into donut holes but that doesn't stop them from being delicious!

GF Pumpkin Donut Holes
Thanks to Comfy Belly's Pumpkin Muffin recipe for giving me a starting point.
Makes ~ 3 dozen holes

1/2 cup roasted pumpkin puree (or use canned pumpkin)
3/4 cup maple syrup
4 eggs
1/2 cup sweet rice flour
6 tablespoons arrowroot starch
6 tablespoons coconut flour
1/4 teaspoon baking soda
1/4 teaspoon baking powder
1/2 teaspoon salt
1 teaspoon ground cinnamon
1/2 teaspoon grated nutmeg
1/2 teaspoon allspice
1/2 cup fine maple sugar + 1 teaspoon cinnamon, optional for coating the finished donuts
+Fat to fry in, I used rendered beef tallow but of course you could use another high heat fat/oil.

-Warm your fat/oil, you will need at least an inch but preferably two inches in a heavy pot.  I use a enameled cast iron dutch oven to fry in.
-Mix the pumpkin, syrup and eggs by hand or in a food processor.
-Whisk together the dry ingredients and add to the wet.  Process or stir until combined.
-When the fat reaches 350 degrees F, scoop tablespoon sized blobs of batter carefully into the hot fat.  Add more blobs but do not overcrowd.
-Turn the holes gently with a wire spider or slotted spoon.  Fry until dark golden brown, ~ 1 1/2 minutes.   For the best results time a sacrificial hole and cut it open at one minute to see if the interior is cakey and cooked through.  Then judge how much more than one minute you may need of frying time.
-Remove the donuts and drain on a wire cooling rack set over a baking sheet to catch any dripping grease.
-After they have cooled enough to handle quickly, roll them in maple sugar and cinnamon mixture.  They are also good with a chocolate glaze.

*In search of a vegan pumpkin donut made with wheat flour?  Here is my recipe from a few years ago.  For a gluten-free and vegan option, I am fairly certain that these recent donuts would work well with flax eggs (1 tablespoon flaxseed meal + 2 tablespoons water = 1 egg) but I haven't tried it yet.

Some Halloween pictures to share as well, one of the family
Me and my little devil, Alex
Angel Penny and John the dark wizard

August 28, 2011

DB Candylicious! (Honey-sweetened Confections)

The August 2011 Daring Bakers’ Challenge was hosted by Lisa of Parsley, Sage, Desserts and Line Drive and Mandy of What the Fruitcake?!. These two sugar mavens challenged us to make sinfully delicious candies! This was a special challenge for the Daring Bakers because the good folks at http://www.chocoley.com offered an amazing prize for the winner of the most creative and delicious candy!

Tempering chocolate is something I can't quite master but when the Daring Bakers ask I have to give it a whole-hearted try.  This month we were given the task of making candies and one at least had to be a chocolate confection.  So I attempted to recreate a favorite in our house, Heavenly Organics Honey Mint Patties.  Made with raw honey and unsweetened chocolate they are fantastic, and dairy and gluten free to boot!  Though I didn't do a perfect job tempering, the homemade version was fairly easy and just as tasty.  I also am submitting some delicious brittle I've been making for a travel snack lately.  The whole family is ecstatic when we have this in the house.  Thanks for the challenge Lisa and Mandy! 

Honey Sunflower Brittle
Inspired by Greek Pasteli. Roasting your own sunflower seeds makes all the difference!
Makes about a pound and a half of candy

3 cups raw sunflower seeds
1 cup honey
1/8 teaspoon baking soda
flaky sea salt or kosher salt

-Preheat your oven to 375 degrees F.
-Spread your sunflower seeds in an even layer on a large baking sheet.  Roast in the preheated oven checking and stiring the seeds every 5 minutes until dark golden brown and nutty.  This should take 15-20 minutes.
-Set the seeds aside and line the baking sheet with parchment paper or grease well with oil.
-In a saucepan, heat the honey to soft crack stage, ~290 degrees F.  Be careful to watch for scorching and stir to prevent.  Don't be like me and walk away from cooking sugar, it will always bite you in the rear if you do!
-When the honey has reached the correct temperature add the baking soda and stir to mix.  Then dump in all the sunflower seeds and mix well to coat.  If your seeds have cooled a lot you may need some low heat to get the honey to distribute evenly.
-Spread the brittle mixture on your prepared baking sheet in as even a layer as possible.  Sprinkle on salt to taste.
-Allow the brittle to cool and then snap into serving pieces.  Store in an airtight container, ideally in between layers of parchment paper to keep the pieces from sticking together. 

Honey Mint Dominoes
My homemade version of the Heavenly Organics Honey Mint Patties
Make as much as you'd like

Unsweetened chocolate (aka baking chocolate, see links for my source)
Honey, ideally a thick raw honey with a light flavor
Peppermint oil
Shallow chocolate mold

-Temper your chocolate, directions here, and line your molds.  Chill.
-Mix your honey and peppermint oil to taste.  Fill the chilled molds and chill again.
-Top the filled molds and chill once more.
-Pop out and enjoy!  They are very good eaten right from in the freezer. 

Links:
-The challenge candy recipes can be found on this download pdf or visit our hosts Lisa at Parsley, Sage, Desserts and Line Drive or Mandy at What the Fruitcake?!.
-I buy my unsweetened chocolate from Santa Barbara Chocolate Co. Their Pure Cacao Medallions are perfect for chopping up as a chocolate chip replacement or melting to drizzle/coat things.
-I used Champion Hill Farm star thistle honey in the brittle and tupelo honey from the Savannah Bee Company in the dominoes.
-Find more candy creations submitted for this challenge by browsing the sites listed in the Daring Baker Blogroll.
And now back to the garden harvest

June 27, 2011

DB Baklava (gluten-free and wheat versions)

Erica of Erica’s Edibles was our host for the Daring Baker’s June  challenge.  Erica challenged us to be truly DARING by making homemade  phyllo dough and then to use that homemade dough to make Baklava.

It was just my luck that I'd still be avoiding wheat when the Daring Bakers decided to make homemade phyllo.  It's been on my To Try list for a long time and so I couldn't resist making both a wheat flour and a gluten-free version of this dessert.  The wheat phyllo wasn't as hard as I thought it would be though I think I made it a lot less challenging by baking a small batch, small sheets are much easier to roll out.  The gluten-free recipe we were offered required a specific brand of flour mix and so I just chose to make a mini batch and wing it.  I used a combination of tapioca flour, sorghum flour and cornstarch but it really wasn't much of a success. It couldn't be rolled thin enough, was too tough in the finished product and didn't brown properly.  Apologies for the top picture, I just never got around to getting a shot of the cut slices.  But you can see the gluten-free phyllo is in the smaller pan and clearly not the golden brown I intended.  It was still edible and the honeyed nut filling was delicious.  For both of my baklava, I left out the sugar in the nuts and used a combination of almonds and walnuts.  I spiced them with cinnamon and cardamom and made the syrup with honey, lemon juice and a splash of orange flower water.  My wheat baklava went to friends we had over for dinner and for my first try at homemade phyllo I thought it was alright.  I did notice that it needed more syrup because it wasn't as sticky as I would have liked.  But there is always room for improvement and now I can check off an attempt at homemade phyllo, what next?

Lately we're busy trying to make the most of the sunny days we get.  My vegetable garden is coming along nicely and our new ducks and chickens are getting all grown up.  Alex had a fun birthday and loves being free from school.  Penny is growing like a weed and learning to climb up on everything-- couches, beds, chairs, tables!!  I try to give her lots of time outside so we can avoid that.  She and Alex are kept busy picking strawberries, fighting over the hose and hunting for frogs around our pond.  Right now we have over a dozen green frogs, 5 or 6 painted turtles and several generations of tadpoles in the pond John had dug last fall.  What Alex really wants to find is a salamander so we've been poking under all the rotting logs in our woods.  Summer is grand!  I hope yours is going as well as ours.

Links:
-For the full recipe visit our host Erica at her site,Erica’s Edibles.   Or view the recipes HERE in a PDF version.
-Erica based her recipe on those found in the book Kaffeehaus: Exquisite Desserts from the Classic Cafés of Vienna, Budapest, and Prague and the Baklava recipe from Alton Brown.
-I think if I'm ever eating gluten-free and crave baklava these Baked Apples "Baklava" would be a better choice than trying gf phyllo.
-Other participants for this challenge are listed in the Daring Baker Blogroll.

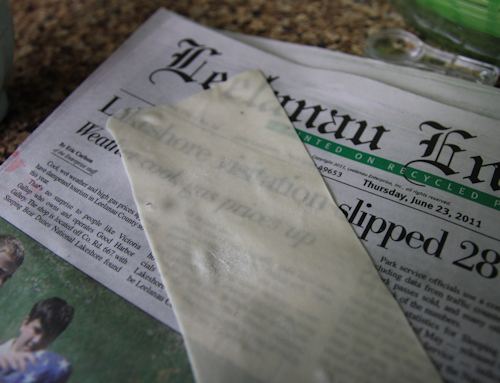
The wheat phyllo, see how you can read the paper through it.
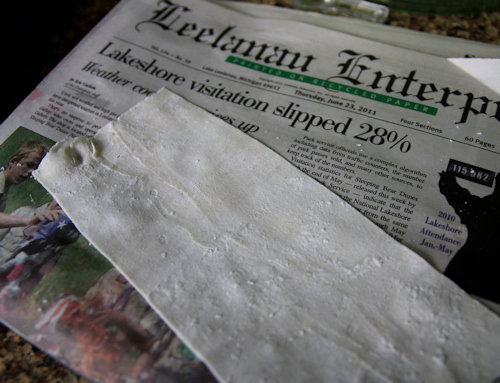
My attempt at gluten-free phyllo, thin but I couldn't get it transparent.
My big NINE year old boy
Penny on a salamander hunt

May 27, 2011

DB Chocolate Marquise (done dairy-free and honey sweetened)

 The May 2011 Daring Bakers’ challenge was hosted by Emma of CookCraftGrow and Jenny of Purple House Dirt. They chose to challenge everyone to make a Chocolate Marquise. The inspiration for this recipe comes from a dessert they prepared at a restaurant in Seattle.

This month I've been far too busy to do much blogging.  There has been gardening, Alex's school, houseguests and trips downstate, 15 new birds (9 new ducks and 6 chickens), lots of poking around outside looking for morels-- plus I seem to be terribly accident prone this month.  I usually rack up a number of burns, cuts and bruises but this month I've added a smashed shower door, a sunburn and a punctured foot to my list.   Let's hope I piled all of this into May and will have a pleasently uneventful, productive and relaxing summer.

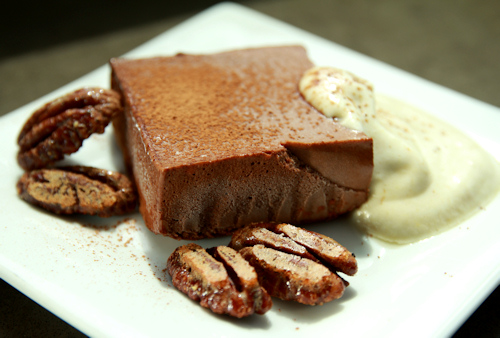
Somehow I did manage to whip up this month's Daring Baker challenge.  Looking at the recipe I initally was annoyed and frustrated.  Recipes for mousse are so tough to do dairy-free, especially if you are also mostly soy-free as well like us and don't have the option of using silken tofu.  Then I went through a pouty phase where I complained in my head that the hosts chose a recipe that didn't even have a mandatory baked item.  It's supposed to be Daring *Bakers* not Daring Desserts!  But eventually I came up with a game plan and forged ahead.  I've been eating almost no refined sugar since the beginning of the year so the first change I made was to use honey to sweeten all the components.  I also substituted unsweetened baking chocolate for the bittersweet and swapped carob powder for the cocoa.  For that tricky heavy cream I gave extra chilled coconut cream a try and I spiced my mousse and nuts with ginger and black pepper.

The changes ended up being fairly simple and the result was pretty decent.   The ginger and pepper went well with the honey flavor and yet dark chocolate was still the star.  The mousse texture was a little grainy when still hard but smoothed nicely when I let the squares warm up a little more.  With all the egg and yolks they still were light and creamy.  But the best part was the nuts--they are fantastic!!  I'll be making batches (and batches and batches) of them again.  So thanks for the challenge Emma and Jenny, as always I'm happy to be a Daring Baker and give something I would never try to make a chance.

Here are my altered ingredient lists. All of these are scaled to make 1/4 of the original recipes or 6 servings each with 1 (2"x2") cube of marquise.  Instructions and original ingredient lists found here on the Daring Kitchen.
Chocolate Marquise
3 large egg yolks at room temperature
1 large egg
3 tablespoons honey
Chocolate Base, barely warm (ingredients follow)
½ cup coconut cream*
½ cup carob powder (for rolling or dusting)
*By coconut cream I mean I took can of coconut milk and placed it in the fridge unopened overnight. I then scooped out only the thick cream and left the watery liquid to be used in another application. I chilled the measured amount of cream in the fridge and whipped it like heavy cream using chilled beaters and a chilled bowl. It doesn't get the volume of heavy cream but does get fluffier. I then combined the whipped coconut cream with the chocolate base before folding it into the egg/yolk mixture.  This is the opposite of the instructions which have you mix the base with teh yolk mix first.  This way the egg mixture is able to transfer as much volume and air as possible to the finished dish.

Chocolate Base
3 oz (85 grams/ 6 tablespoons) unsweetened chocolate
1/3 cup + 2 teaspoons coconut cream
1/8 teaspoon salt
1/2 teaspoon black pepper
1 teaspoon ground ginger
1 tablespoon tequila
2 tablespoons honey
1/4 teaspoon vanilla
1 tablespoon carob powder
1/4 oz (1/2 tablespoon/8 grams) coconut oil, softened

Torched Meringue
3 large egg whites
3 tablespoons honey
Splash of apple cider vinegar
1/8 teaspoon ground ginger

Honeyed Spiced Pecans
2 tablespoons honey
1 teaspoon ground ginger
1/2 teaspoon black pepper
1/4 teaspoon salt
1/2 large egg white
1/2 cup pecans, ideally soaked and dehydrated first

Links:
-For the instructions to go with my ingredient lists, or the original recipes, visit our hosts Emma of CookCraftGrow and Jenny of Purple House Dirt.  Or see the complete recipe here on the Daring Kitchen site.
-Emma and Jenny learned how to make this marquise dessert when they worked together at a Seattle restaurant. The recipe is adapted from one developed by Bennie Sata, a Seattle-area pastry chef who introduced the city to one of its iconic chocolate desserts. They also included vegan recipes which were created by Ashlae of Ladycakes.
-Visit the Daring Kitchen to see the baker blogroll and other treats made this month.

My favorite Instagram shot from this month
Alex and Penny drawing together
Penny sitting in a patch of ramps.  She was stealing cooked ramp greens from my plate just yesterday.
I'm adding this to Simply Sugar and Gluten Free's Slightly Indulgent Tuesdays

April 4, 2011

Easter Ideas

Since we are all still fighting off our latest cold I declared today Easter craft day. I also consolidated some of my Easter treat plans.  This year I think an assortment of filled eggs might be fun to attempt and I plan on trying to use less or unrefined sweeteners.  Here are some more ideas I want to keep track of:

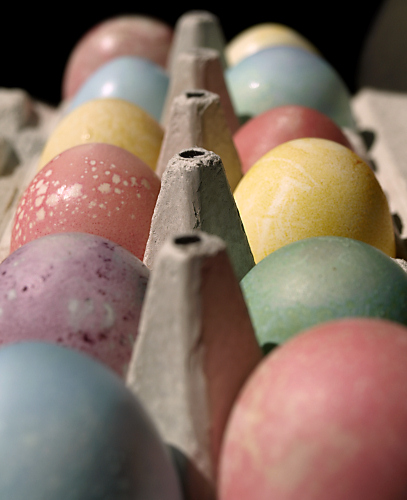
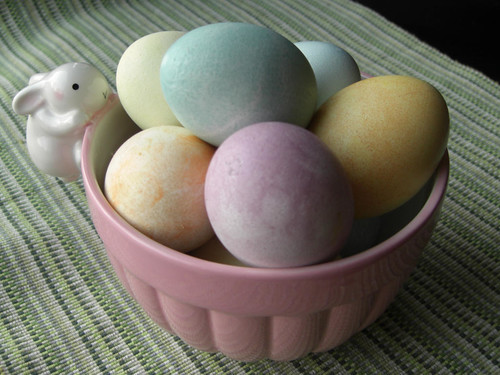
Egg Coloring
With Penny just born, I did eggs the easy way last year and used a kit for my Easter egg colors.  I want to try some new food dyes this year.  Green has been especially elusive but I have a new idea up my sleeve to try that came about because Alex has been studying pond water microorganisms. Here are my previous eggs dyed with food, the links have the ingredients I used for the dyes but no instructions.  I just play mad scientist cooking up potions until I get colors I like. 
from 2009
and 2008
Chocolate Bunnies
There are almost too many choices in this year's Go Dairy Free's Chocolate Bunny Roundup. We've purchased bunnies from both Chocolate Emporium and Premium Chocolatiers.  Alex loves Emporium's white chocolate and the truffle eggs from Premium but really didn't like the bunnies from either.  I'd be happy with a Grocer's Daughter bunny, which is a local company, but Alex isn't a big fan of their dark chocolate. No Whey! Chocolates looks like a promising new choice, with dairy-free milk, dark AND white bunnies!  Or maybe Sjaaks, who make the awesome mint windmill chocolates.

Update:  I went ahead and bought No Whey! bunnies and they look great.  We also tried out some Sjaak's vegan almond butter bunnies because they were available at our local co-op but Alex had a reaction to them.  It's not their fault, they do state "shared equipment".  We had hoped for the best but it didn't work out.

Savory
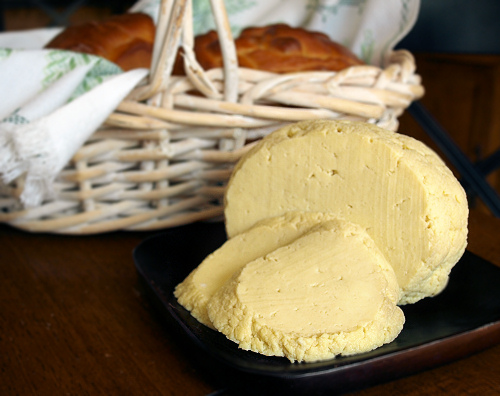
For this year's Hrudka (Slovak egg cheese) I'm going to try using rice milk so that Penny can give it a try. 
My hrudka is featured with eleven other savory Easter recipes from around the world, maybe you'll get some ideas from there. Easter bread will be the big challenge but I think I might just skip it and hope no one, by which I mean Alex, notices.  I would like to make some dairy-free Bagna Cauda to enjoy with some spring vegetables.  It would have been perfect with the baby radishes we got last week in our 9 Bean Rows share. I just gotta stock up on anchoives.

Candy Basket Fillings
I've been collected recipes to try something different for filled candy eggs.  I've made the egg-free fake Cadbury eggs from Speedbump Kitchen but would like to try a less refined sugar version this year.  This recipe for Healthy Homemade Creme Eggs sounds promising but I'm not sure I want to use the stevia or xylitol.  I thought maybe I could fill them with some maple-sweetened Marshmallow Fluff instead.  If there is time I'd like to try either Homemade Maple Marshmallows or Honey Marshmallows as Peeps.

Crafts
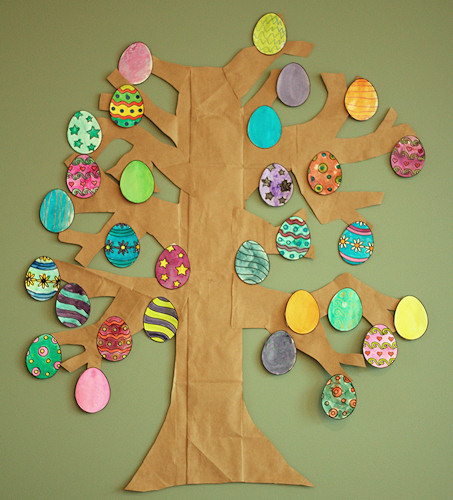
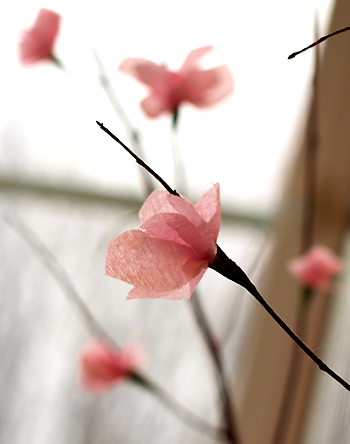
Today we used these Easter Egg Printables to make the eggs for our paper egg tree pictured at the top.  I printed them on cardstock, we painted them and then I made the tree from a grocery bag. I also made some faux cherry blossom branches, which are sorta like these from Martha Stewart.  I used crepe streamer for the paper because I think it looks nicer and is easier to work with.  I also pruned autumn olive branches instead of cherry or apple because I wanted them tall and straight to fill up space on my mantle.  Of course this tortures me somewhat because they now look botanically inaccurate.  John would find that funny. 
*More Easter Ideas from two years ago

March 26, 2011

Penny is One! (gluten-free chiffon cake)

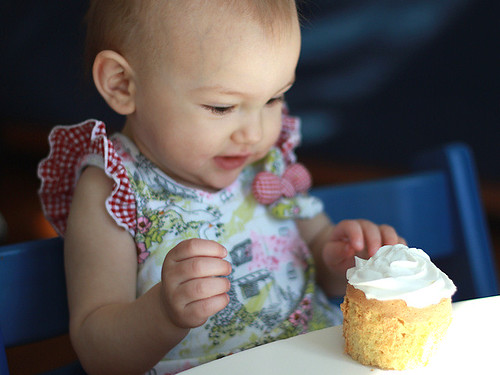
Today was all about Penny.  We woke up in bed together and almost immediately Alex, her older brother, came bounding in.  After a little snuggling Alex snuck off to help John/daddy wrap a present.  Once her gift was opened we rounded out our day with a lot of play time, some picture taking, dress-up, a little baking, a nap (which I also took) and of course singing and the cake ceremony.  Penny was eager to have tastes of frosting and nibbles of cake all morning.  After the actual singing she carefully tasted icing and a little more cake but wanted out of the chair so that she could play once more.  The rest of the cupcake fell to the ground and was quickly devoured by Karmal, our beagle mutt. 
I struggled with choosing a cake to make today but in the end decided to go ahead and give her a little white sugar.  The frosting was decent but nothing to write home about but this chiffon cake came out perfectly.  Ethereally light, just sweet enough and by no means compromised by not having wheat flour in it.  It is a keeper recipe. I plan on making them again for strawberry shortcakes when Michigan finally gets fresh strawberries.  Or maybe I don't have to wait that long and could serve them with rhubarb instead!

Gluten-free Chiffon Cake
This was good frosted but I think it would be best with a fruit compote or sauce or even plain.  Based on the recipe from Chocolate and Zucchini, please take a look there for a wheat flour version.
 Makes 7 cupcakes

4 tablespoons brown rice flour
2 tablespoons potato starch, not flour
2 tablespoons tapioca starch
1/4 teaspoon gluten-free baking powder
a pinch of fine salt
3 eggs
6 tablespoons sugar
1 teaspoon vanilla extract
4 tablespoons coconut oil, melted but not hot*
2 tablespoons water

*Many coconut oils will give a strong flavor.  I like the expeller pressed oils from Tree of Life and Wilderness Family Naturals, both will give you richness but no strong coconut flavor.

-Preheat your oven to 350 degrees F.  Set 7 cups on a baking sheet.  You can choose to use oven-safe mugs lined with parchment or unwaxed paper cups to tear away.
-Sift the brown rice flour, potato starch, tapioca starch, baking powder and salt.  Sift twice more and set aside.
-Separate your eggs.  The yolks should go into a stand mixer bowl with a whisk attachment and the whites into a clean medium-sized mixing bowl.
-Add three tablespoons of sugar to the yolks and beat with the mixer until pale yellow in color, scrape the sides as needed.
-Beat the whites until they reach soft peaks and then start adding your remaining sugar (3T) bit by bit whisking in between each addition.  This can be done by hand with a balloon whisk or with an electric hand mixer.
-Add the vanilla, water and oil to your beaten yolks and sugar and beat to blend together.  Then add in your sifted dry ingredients and mix until smooth.
-Fold in a third of the beaten egg whites and then after they are incorporated fold in the rest of the whites.  Carefully pour the batter into your prepared cups. 
-Bake for 25-30 minutes, until they pass the toothpick test.  Cooking time may vary depending on your choice of cup.
-After removing the cups from the oven invert them on a cooling rack.  When they are cool run a knife around the inside of the cup and give them a shake to release the cakes.

Penny's perfect lips
Lots of attention from Big Bro today

*More 1st birthday photos on this Flickr set
**To see my chiffon cake history check out these Mead Chiffon Cupcakes. I missed the honey flavor but liked the richer cake that the above recipe had. Perhaps a combination of the two is in order?

March 17, 2011

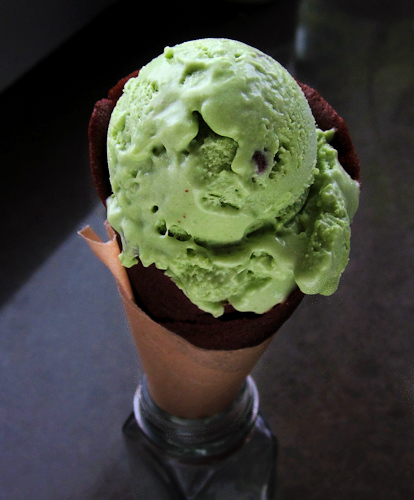
Mint Coconut Milk Ice Cream and Gluten-free Chocolate Cones

Despite our lack of Irish blood, Alex seems to think St Patrick's Day is the holiday that can't be beat.  He has been full of requests for a Shamrock shake like this one from last year.  However we've tried to make "improvements" in our diet that made that version obsolete.  So I got up early, was sneaky with the vegetables and while our corned beef was boiling away fulfilled a desire to make chocolate ice cream cones too.  Alex flipped head over heels over both and declared it a definite "happy day"-- even if he did still have to do spelling.  Oh and you really can't taste the spinach, really.

Chocolate Ice Cream Cones (gluten-free)
Based on the decor paste recipe from accro
Makes  ~10 cones

57g coconut oil
57g  maple sugar (or substitute standard powdered sugar)
2 egg whites
48g tapioca starch/flour
17g cocoa powder
pinch of salt

-Preheat your oven to 375 degrees F.  Line a couple of baking pans with parchment paper.
-If you don't own cream horn molds, and really how many people do, make a couple of paper cones slightly smaller than a standard ice cream cone.  Cardstock works the best and I recommend taping them with masking tape because it is less likely to loosen with the absorbed grease from the cookies.
-In a stand mixer, cream the coconut oil and sugar until light in color and smooth.  Add the egg whites and beat until smooth.
-Add the tapioca starch, cocoa and salt and beat until a smooth batter forms, you will probably need to scrape down the bowl a few times.
-On one half of a prepped baking sheet, take a heaping tablespoon of batter and spread it evenly with an offset spatula into a 6 inch diameter circle about 1/4 inch thick, repeat on the other side of the baking sheet.  If you don't feel confident about this step you can trace a circle in pencil on the reverse side of your parchment paper to use as a guide or you can make a circle stencil out of thin cardboard (think cereal box) and then spread the batter just inside the template.
-Bake for 5-6 minutes until just set, bake only 2 cookies at a time (unless you are crazy fast, or just crazy.)  Immediately after removing from the oven wrap the hot cookie around your cone mold and place seam side down to cool.
-Repeat with the remaining batter.  Be sure to cool off your cookie sheet before adding fresh batter because a warm cookie sheet will throw off your baking time. 

Mint Chocolate Chip Coconut Milk Ice Cream
Inspired by An Opera Singer in the Kitchen and this recipe for Coffee Ice Dream 
Makes a little over a pint

2 cups full fat coconut milk
1/2 cup baby spinach leaves
1/4 cup light (grade A) maple syrup or more to taste, I used some of my 9 Bean Rows maple syrup
1/4 cup cool water
1 1/2 teaspoons gelatin, or 1/2 teaspoon agar powder
1 teaspoon peppermint extract
1/2 teaspoon vanilla extract
pinch of salt
1/3 cup chocolate chips

-Place the water in a bowl and sprinkle the gelatin over the top.  Set aside to bloom (absorb water) for about 5 minutes.
-In the meantime, blend the coconut milk, spinach, and syrup together until the spinach is fully blended and no flakes remain.  If your blender isn't powerful enough then strain the mixture.
-Add about half of your coconut milk mixture to a small saucepan with the bloomed gelatin.  Warm gently until the gelatin dissolves, do not boil!
-Add the remaining coconut milk mixture and your flavorings and salt.  Taste and adjust to add more sweetener or peppermint to suit your taste.  Chill the mixture for at least 2 hours.
-Follow your ice cream maker's instructions to freeze.  After the mixture is soft serve consistency, stir in the chocolate chips and spoon into a container.  Wrap or seal well and store in freezer until use.

Alex went to a new art class today and made this "Ancient Tree" painting

For some festive tunes, check out our friend Frank.  He blogs about electronics, here.

March 12, 2011

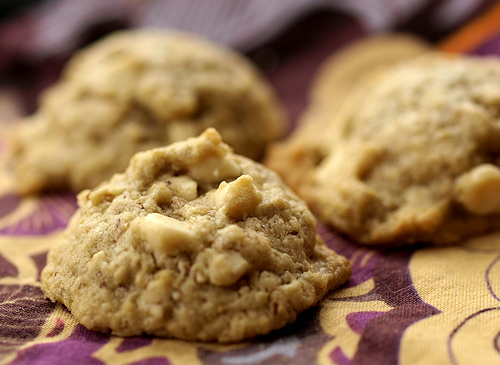
Maple Oat Cookies with White Chocolate

These cookies are the definition of serendipity.  I had no well thought out plan, no research or high hopes when I made these this morning.  The only reason they were created was Alex was out of cookies and has been begging for white chocolate all week.  Oh, and I have maple sugar on the brain-- I'm tapping some trees for the first time this year and boiling down sap today.  I just used what was on hand and what I thought would taste good and they turned out so much better than expected.  They are seriously addictive and for me reminiscent of Oatmeal Scotchies.

Maple Oat Cookies with White Chocolate
Makes ~2 1/2 dozen small cookies

3 ounces (~6 tablespoons) coconut oil
1/2 cup maple sugar*
1 large egg
1 teaspoon vanilla extract
2 tablespoons golden flax seed meal
1/2 cup brown rice flour
1/4 cup whole almond meal
2 tablespoons cornstarch
1/2 teaspoon baking powder
1/4 teaspoon kosher salt
1/4 teaspoon xanthan gum
6 tablespoons Scottish Oatmeal*
3/4 cup white chocolate chips*

-Preheat your oven to 350 degrees F and line baking sheets with parchment.
-In a stand mixer with a paddle attachment, cream the coconut oil and maple sugar until there are no lumps.
-Add the egg and vanilla and beat until creamy and lighter in color. Add the flax seed meal and beat to incorporate.
-In a separate bowl measure and whisk together the rice flour, almond meal, cornstarch, baking powder, salt and xanthan gum.  Add to the egg mixture and mix to combine well. 
-Add the oats and white chocolate chips and mix to distribute evenly.
-Scoop or spoon single tablespoons onto your lined baking sheets, leaving at least an inch between each cookie.
-Bake for 7-9 minutes until light golden brown on edges.  Cool slightly before removing from the baking sheet.

*Ingredient Notes:
-I get my maple sugar from our local co-op which carries U.P. Sugar Shack sugar.  You can also purchase maple sugar online at Marx Foods.
-I use Bob's Red Mill Organic Scottish Oatmeal but you could substitute other oats for more texture or give some regular rolled oats a quick whizz in the food processor.   Think of creating a slightly shredded meal and not oat flour, this should only take a few pulses.
-I get my dairy-free white chocolate from Chocolate Emporium.

We were out monitoring our sap buckets and soaking up the sun yesterday.
Perfect was doing her best Arctic fox impression, trying to catch mice tunneling under the snow.

February 27, 2011

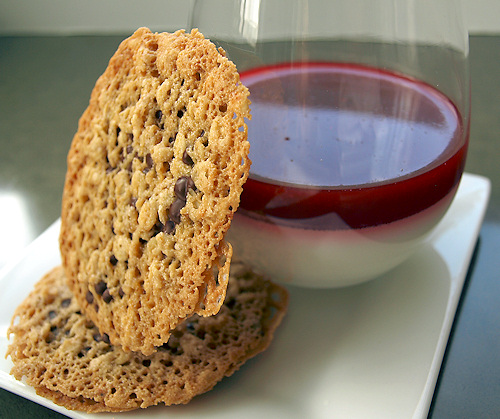
DB Maple Florentine Cookies and Coconut Panna Cotta

The February 2011 Daring Bakers’ challenge was hosted by Mallory from A Sofa in the Kitchen. She chose to challenge everyone to make Panna Cotta from a Giada De Laurentiis recipe and Nestle Florentine Cookies.

Another month gone by and I continued my wheat free experiment.  I also spent most of this past month going fairly low carb and nearly zero sugar so I needed to make quite a few alterations to this month's recipes.  For the panna cotta, I used coconut milk and gelatin without any sweetener at all.  The raspberry gelee on top, made from frozen berries, got just a scant teaspoon of honey to cut the tartness.  They were delicious together and plenty sweet enough for me. 

I ended up spending more time on the Florentine cookie recipe.  I remembered how one of my Christmas cookie experiments with maple sugar produced a lacy cookie so I thought I could adapt this recipe to lessen the refined sugar.  I cut the amount of sugar, replaced it with maple sugar and replaced the wheat flour with gluten-free flours.  My first batch ended up too chewy but were so well received by Alex that I made a second batch to work on a better texture.  I'm quite happy with this lower sugar, maple flavored version. 

Maple Florentine Cookies
My dairy-free, gluten-free, less refined sugar version of these Nestle Florentine Cookies.  If possible weigh your ingredients, the cup measurements are not as exact.
Makes ~2 dozen cookie sandwiches

2/3 cup (150g) coconut oil
2 cups (160g) oatmeal, I used regular oats
2/3 cup (110g) maple sugar
~1/4 cup (35g) almond meal
~1/4 cup (30g) tapioca starch
2 tablespoons maple syrup
2 tablespoons milk, I used unsweetened almond milk
1 teaspoon vanilla extract
1/8 teaspoon xanthan gum
pinch of fine sea salt
1 cup (170g) dark chocolate

-Preheat your oven to 375 degrees F and line a couple of cookie sheets with parchement paper.
-Melt the coconut oil in a large saucepan.  Remove from heat and stir in all the ingredients, mix very well.
-Spoon or scoop on tablespoons of the dough three inches apart.
-Bake for 6-8 minutes until golden brown.  Cool fully on the paper before moving. You can carefully slide the paper with the cooling cookies off your baking sheets onto your counter. Then you can cool the baking pans off with cold water and use another piece of paper to keep the production going.  Or take your time. 
-Repeat to use all the dough.
-Melt your chocolate (double boiler or microwave) and spread a small amount between each cookie before sandwiching.  Baked tops shoudl be facing outside.

Links:
-For the unaltered challenge recipes see our host Mallory's site, A Sofa in the Kitchen.
-Mallory used Giada De Laurentiis' Panna Cotta recipe and the Florentine recipe came from Nestle Classic Recipes which can also be found on the Nestle Kitchen website.
-I get my maple sugar from our local co-op which carries U.P. Sugar Shack sugar.  You can also purchase maple sugar online at Marx Foods
-Ready to take on a monthly baking challenge?  Visit the Daring Kitchen and don't forget to look at the Daring Baker Blogroll for other cookie/gel combos.

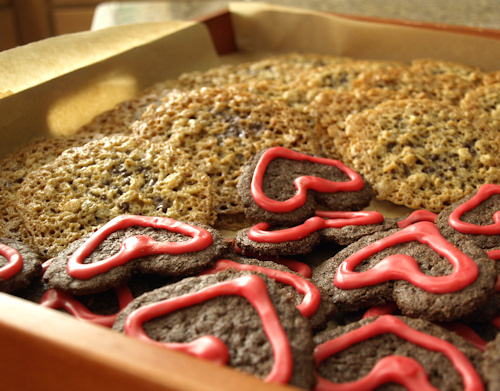
My first batch of Florentines was made with rice and tapioca flours.  They came with some gluten-free chocolate cutout cookies (raspberry frosted) to a Valentine's Day get together.  Unfortunately, I committed the cardinal sin of forgetting that there were kids there with diets even more restricted than Alex's.  I know from experience that it sucks when there are treats he can't have but just didn't think it through. 

February 18, 2011

Dairy-free Citrus Curd

This month's Spice Rack Challenge featured citrus.  At first I racked my brain over the whole idea of dried citrus rind.  What do you use it for, just in place of fresh?  Why would you buy it in the first place when most citrus fruits are so easy to find year round?   Then I gave up pondering and tried making a almond shortbread cookie inspired by these Orange and Dark Chocolate Scones from Joy the Baker.  I liked the texture but hated the flavor, so I pitched them.

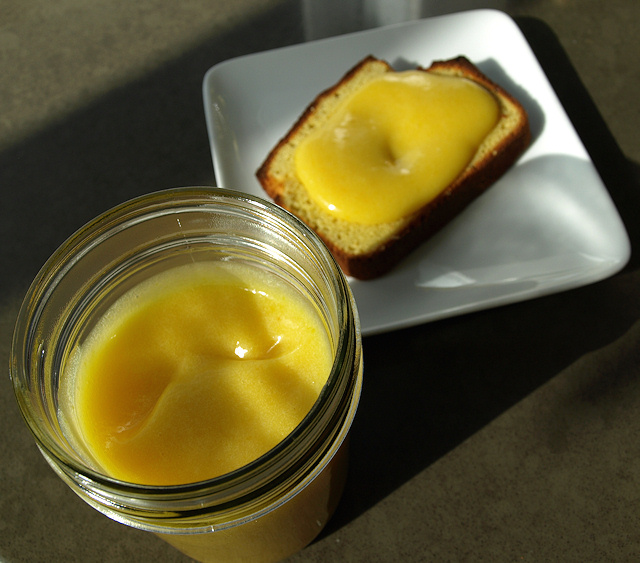
I found myself on the last day to post and all I had in the house was a really sad dried up lemon and two slightly beaten up grapefruit, I never did buy or make any dried peel.  Instead of throwing in the towel I decided to make grapefruit curd.  Lemon curd is so insanely good and addictive that I've never bothered to make a curd with other citrus fruit.  For awhile I made homemade dairy-free lemon curd with Earth Balance margarine but then I found out it is even better made with coconut oil.  Lemon curd sweetened with honey and made with coconut oil is my favorite.  But since grapefruits were what I had, I gave grapefruit curd a try.

Well, I may be won over.  The grapefruit curd was excellent on toast.  For the bread I made this coconut flour bread, except I used coconut oil in place of the ghee and maple butter instead of honey.  It tastes like poundcake without all the crazy sugar and was the perfect foil for the sweet curd. (And now that I'm thinking about it, the coconut bread would be great with a little citrus zest added to it.)  The curd was also great on fruit, try dipping strawberries in it!, and of course straight from the jar.  

Dairy-free Citrus Curd
Thanks to Straight Into Bed Carefree and Dried and Martha Stewart
Makes ~1 1/2 cups

3 egg yolks (egg quality really counts)
zest from 1 fruit
4 tablespoons sugar (or honey)
1/4 cup citrus juice
4 tablespoons coconut oil

-Place your yolks, zest, juice and sugar (or honey) in a small saucepan and cook over medium heat while whisking.
-Cook until the mixture thickens and can coat a spoon.
-Turn off heat and whisk in the coconut oil one tablespoon at a time.
-Strain through a fine metal sieve and whisk again if any oil begins to separate out.
-Cool and use.  Store any remaining in a glass container in the refrigerator. 

February 13, 2011

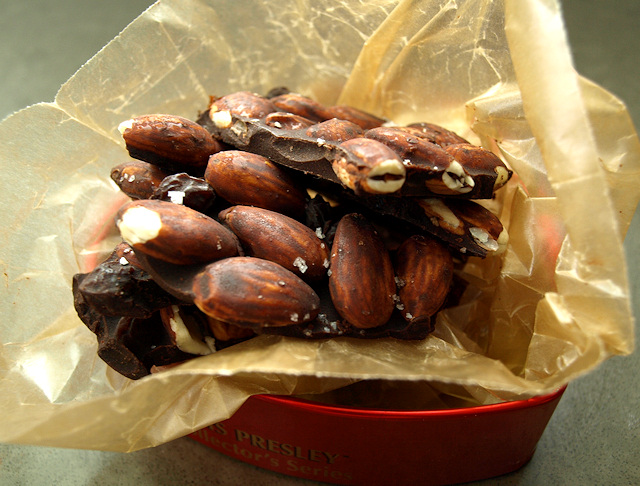
Carob Fruit and Nut Bark

Though I'm still full of my typical end of winter griping about dark days and slippery roads, I am noticing that February has been flying by. Tomorrow is Valentine's Day and I'm still trying to lay off sugar and wheat and grains in general. But that's a topic for another post, which I'm too scatterbrained to write at the moment, so here's a recipe I've been working on.

John and I have been upping the ante with our chocolate lately. I've long been a fan of the dark stuff and look for at least 70% cocoa (the bare minimum) but with my current dietary changes I'm even finding things like these brownies too sweet. So we search for darker chocolate for snacking and that results in eventually even liking unsweetened chocolate, if combined with fruit and nuts. The trouble is that chocolate has caffeine and though my tolerance is way higher than John's a little too much snacking ends with me up all night.

So John suggested carob (yes honey, I'm actually giving you credit) and at first I scoffed. Have you ever had those carob covered nuts from the bulk section? Or a carob bar? They are so insipid and gross with a weird chewy quality but John likes them anyway. I remembered seeing carob powder, also called carob flour, at the co-op so I agreed to give that a try. I had some cocoa butter around to try and make homemade dairy-free white chocolate and thought, "Hey I could make carob chocolate and it wouldn't be an oxymoron!"

For my first attempt I went completely sugar free and it was wonderful! Of course you have to be used to eating very low sugar/high cocoa chocolate but if you are the kind of person who can snack on cocoa nibs than you might really love this and it won't keep you up at night. Plus, carob may have other health benefits and it's much less bitter and therefore requires less sweetness to be delicious. I've played with the recipe further, added a little dried fruit for a smidgen more sweetness and a little coconut oil so that I don't have to worry about tempering the cocoa butter. The variations are endless but I like this Chunky bar homage with raisins and almonds.

Carob Fruit and Nut Bark

This is for super low sugar chocolate lovers. If you can't handle nibbling on cocoa nibs or 90% chocolate then either use a higher percentage of dried fruit or try adding a little stevia. 
Makes about a pound

3 oz (~3/4 cup) cacao butter*
2 oz (7 tablespoons) roasted carob powder*
8 oz (2 cups) almonds, ideally soaked/dehydrated*
3 oz (3/4 cup) raisins*
1/4 ounce (~1 1/2 teaspoons) coconut oil
1 teaspoon flaky sea salt

-Melt the cacao butter in a double boiler add the carob powder and coconut oil and whisk until smooth.  You could also melt the cacao butter in the microwave but it seems to take forever so I prefer a double boiler for this.  Of course a double boiler does not have to mean anything more than a heat proof bowl that fits on a saucepan with a little water in the saucepan.
-Add the almonds and raisins and stir to coat.  Spread on a parchment lined baking sheet and sprinkle with salt.
-Chill in the freezer for 10 minutes and then remove and break apart.

*Ingredient notes:  Cacao butter is the same thing as cocoa butter but be sure not to skimp on this. I've found cheaper stuff that has off flavors and tastes like soap and it's awful!  Carob powder is also called carob flour.  Of course any combination of nuts with/without any combination of dried fruit would be good. 

**Other notes:  I think a variation with some spice would be excellent and there is an interesting Cinnamon Spiced Coconut Bark on Diet, Dessert and Dogs.  Also, I'd love to try some filled chocolates with this carob chocolate mixture and plan on using this recipe for Double Chocolate Hazelnut Candies as inspiration.

***Note to mom: Hey, check out the Russell Stovers Elvis box, that thing has really gotten a lot of reuse!

January 29, 2011

Flaxseed Brownies

Alex has been snacking on lots of soaked/dried almonds this week, as well as corn chips and salsa and rice krispie/marshmallow bowls.  But I thought he needed a homebaked treat and "chewy" brownies were his request.  I sent him out in the snow this morning and made a batch of flax seed brownies and hot cocoa.  They turned out so good!!   Really moist, on that edge between chewy and almost gooey and though they were super sweet for me since I'm not eating sugar all week they aren't sickeningly sweet.  After Alex nibbled on another two this evening I stashed them in the freezer so that he can have all the rest without them tempting me.  He loves gnawing on frozen baked goods and they'd be perfect rewarmed in the microwave and served hot with ice cream!

Update: I couldn't resist making a second batch sweetened with honey.  I used 1/4 cup of honey in place of the brown sugar and left out the water.  They needed to be baked a little longer (28-30 minutes) but were wonderful.   Ideally, I'll try these in the future using unsweetened chocolate and with a little more honey to make them completely refined sugar free. -Maggie (1-30-11)

Flaxseed Brownies
Based on a recipe I made ages ago and can't find online anymore and these brownies, which are made with buckwheat and sweetened with honey. I would love to try this recipe with honey.  When I do I plan on trying it with only 1/4 cup of honey in place of the 1/3 cup brown sugar. Maybe next week...
Makes one 9-inch square pan (9-12 brownies)

3 ounces (~6 tablespoons) coconut oil
4 ounces (~2/3 cup) semi-sweet chocolate chips
1/2 cup flaxseed meal
1/4 cup almond meal
3 tablespoons cocoa powder
1/4 teaspoon fine salt
1/8 teaspoon baking soda
1/3 cup packed dark brown sugar
2 large eggs, room temperature
2 tablespoons hot water
1 teaspoon vanilla extract

-Preheat your oven to 325 degrees F and line a 9 inch square baking pan with parchment paper (or grease and dust the pan with almond meal.)
-Microwave the coconut oil and chocolate together for 30 second increments (1:30 usually does it) until the chocolate is melted.  Or you could get out a double boiler and melt the two together that way.  Mix the oil and chocolate together and set aside to cool slightly.
-Mix together the flax meal, almond meal, cocoa, salt, and baking soda, a whisk is the best tool for this job.  Set aside.
-Add the brown sugar to the oil/chocolate and whisk in.  Add in the eggs one at a time and mix well.  Add the vanilla and hot water and whisk until smooth.
-Add your dry ingredients to your wet and stir until combined.  Pour into the prepped pan.
-Bake for 22-28, until a toothpick test gives you just a few crumbs clinging.
-Cool 10 minutes, slice and serve.


January 27, 2011

DB Entremets with Patterned Biscuit Joconde


The January 2011 Daring Bakers’ challenge was hosted by Astheroshe of the blog accro. She chose to challenge everyone to make a Biscuit Joconde Imprime to wrap around an Entremets dessert.

This month's Daring Baker challenge was an exceptionally fun one.  I've wanted to try making patterned joconde, almond sponge cake, since I saw this Love Cake last year.  How cool is it to decorate a cake, WITH cake!  Alas with the wheat free restriction I put myself on for this month and the fact that I was generally steering clear of all grains and sugars, I couldn't revel in the challenge as much as I'd like.

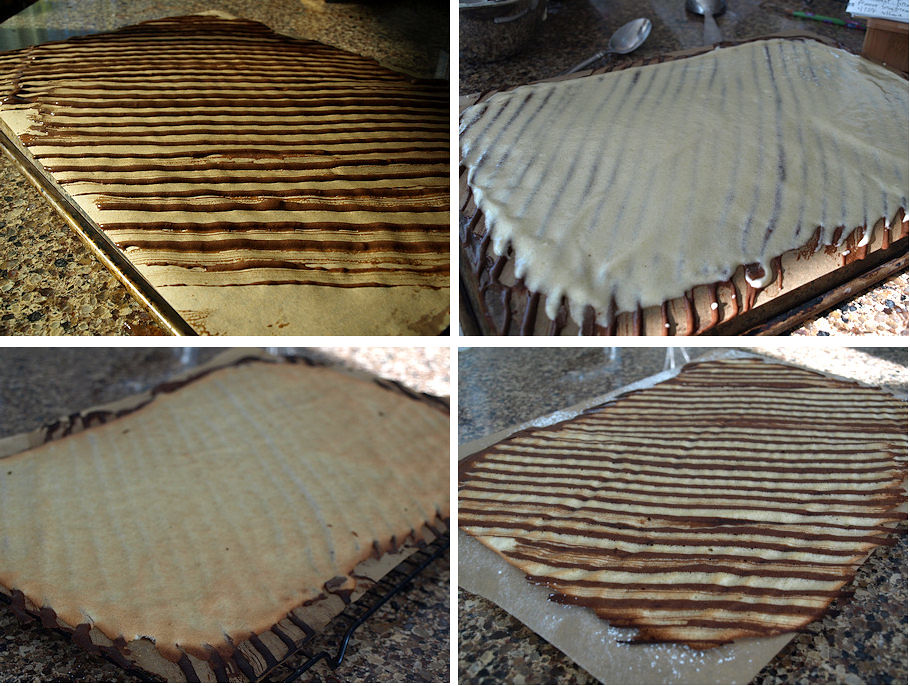
To not tempt myself too much, I made a third of a batch for just a few small individual entremets.  There is so little wheat flour in both the decor paste and the joconde especially in proportion to the amount of eggs involved so I didn't worry too much about the type of flour I replaced it with.  For the joconde I used 2/3 tapioca starch and 1/3 sweet rice flour and I used all tapioca starch for the decor paste.  In place of the melted butter, I used a little Earth Balance margarine. Otherwise these recipes didn't need to be messed with.  To make my pattern I cut a few notches in a piece of cardboard and used it to create diagonal stripes.  I ended up with enough decor paste to prep two sheet pans but only enough joconde batter for one pan.  Well, it turns the decor paste out is pretty much the same as tuile batter so I baked off the second pan to make cookie sticks for decoration.  Both the joconde and the tuile sticks needed significantly less time than the recipe calls for, ~ 5 minutes for the joconde and a little less for the tuiles.  I think I spread it thinner than it was supposed to be and that would account for my altered baking time.

For my fillings, I wanted to go as nutrient dense as possible to not completely blow my plan for the month.  I made this avocado pudding and combined it with soaked cashew creme sweetened with maple syrup. For some texture I soaked/dehydrated/toasted pecans and coated them in chocolate.  I couldn't quite sell Alex on the pudding, though Penny liked it.  So I filled one of the entremets with Alex's new favorite ice cream and a couple of layers of chocolate coated pecans.

In all, this was a fun technique to try out.  Even though I felt a little heady from the sugar in the joconde it was a very tasty cake and so easy to work with.  The possiblities for decorating full sized cakes and making little entremets are endless!  And Alex especially liked the chocolate tuile sticks I made from the decor paste-- perhaps some chocolate ice cream cones should be in his future.  Thanks for the great challenge Astheroshe!
 
Links:
-Check out our host Astheroshe on her blog, accro.  She has the complete recipe along with her spumoni inspired fillings, HERE.  See above for my wheat-free/dairy-free adaptations.
-I filled my entremets with this avocado pudding from Jenn, The Leftover Queen
-I didn't use a recipe for the cashew creme.  I just took well soaked cashews and blended them with a little water and a touch of maple syrup and vanilla extract until they were whipped.
-For a fun example of this technique see Gesine Bullock-Prado's Love Cake.  I really loved her book, Confections of a Closet Master Baker.  It's a must read for food lit lovers of the baking persuasion.  And she has a new cookbook called Sugar Baby due out in April, which looks very cool.
-As always, if you'd like to join in the baking fun visit the Daring Kitchen and look to the Daring Baker Blogroll for other examples of this technique.

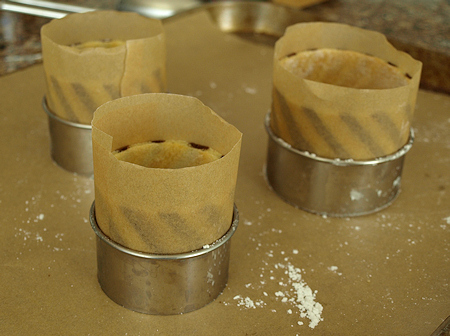
The decor paste, decor covered in joconde batter, baked patterned joconde before flipping to reveil the pattern and after
Patterned joconde lined molds
Alex's ice cream filled entremet
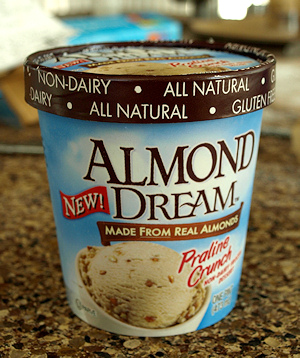
His new favorite ice cream, Almond Dream Praline Crunch