Showing posts with label Recipes: cookies. Show all posts

January 22, 2012

Fortune Cookies (gluten and dairy free)

We were invited to a Chinese New Year celebration yesterday and I was determined to bring fortune cookies that Alex could safely have.  Friday night I fought with three different recipes: two that were gluten free by design and one wheat flour recipe with gluten free flour blend as replacement.  All of them were flops and I was fairly discouraged and a bit angry about wasting some of the last of our eggs.  Our chickens and ducks have mostly stopped laying now.  :(   But the next morning I screwed by courage to the sticking place and gave it one more try.  This time I altered a recipe I already knew worked and success was mine!  I was even happier with how my stir fried pork with mushrooms served with sesame cabbage came out.  I will have to make that again since it was Whole 30 compliant and I'd like to post it.  The pork and cabbage helped me survive the challenge of not eating even the smallest taste of fortune cookie.  Thank goodness the kids make great taste testers!

Fortune Cookies (gluten and dairy free)
Adapted from this recipe which came from this recipe
Makes ~18 cookies

57g coconut oil
57g powdered sugar
2 egg whites, room temperature
48g tapioca flour
17g corn starch
pinch of salt
1/2 teaspoon vanilla extract
1/4 teaspoon almond extract

-Preheat your oven to 375 degrees F.  
-Line a couple of baking pans with parchment paper. If your pans are rimmed I suggest flipping them over and working on the back side so that spreading the batter is easier.  Set out a muffin tin to use while forming cookies and print and cut out your fortunes.  I used a lot from  this list of fortune cookie messages but my favorite is "Your fortune lies in another cookie".
-In a stand mixer, cream the coconut oil and sugar until light in color and smooth.  Add the egg whites and extracts and beat until incorporated.   This will be extra tricky if you don't have your egg whites at room temperature.  
-Add the tapioca starch, corn starch and salt and beat until a smooth batter forms, you will probably need to scrape down the bowl a few times.
-Oil your parchment with spray oil or a little melted coconut oil.  On one half of the parchment take a little less than a tablespoon of batter and spread it evenly with an offset spatula into an ~4 inch diameter circle.  Repeat on the other side of the baking sheet.  If you don't feel confident about this step you can trace a circle in pencil on the reverse side of your parchment paper to use as a guide or you can make a circle stencil out of thin cardboard (think cereal box) and then spread the batter just inside the template.
-Bake for 4-5 minutes until  light golden brown on edges, bake only 2 cookies at a time.
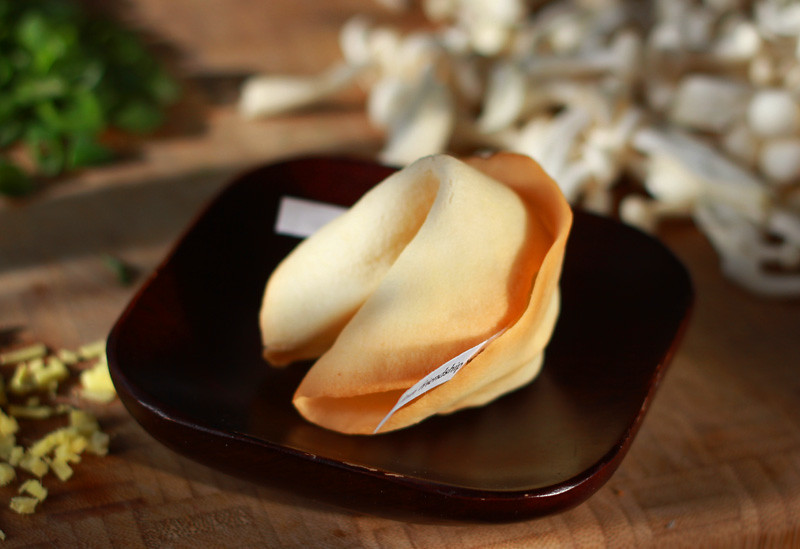
-Immediately after removing from the oven take a fortune and place it on the center line.  Then fold the cookie in half keeping the folded edge flat and not squashed.  Then bend in the two corners and place the cookie inside a muffin tin cup to keep it from unfolding as it cools.  This does some practice and hands that can take some heat.  This image was helpful for me to learn the fold though if you Google other recipes you'll see a lot of people using coffee cups to help fold.  The coffee cup technique wasn't helpful to me but you may be different.
-Repeat with the remaining batter. Be sure to cool off your cookie sheet and reoil your parchment after each batch.  Do not add fresh batter to a warm cookie sheet.  
-After the cookies have cooled store them in an airtight container.  
Gong Xi Fa Cai!

December 5, 2011

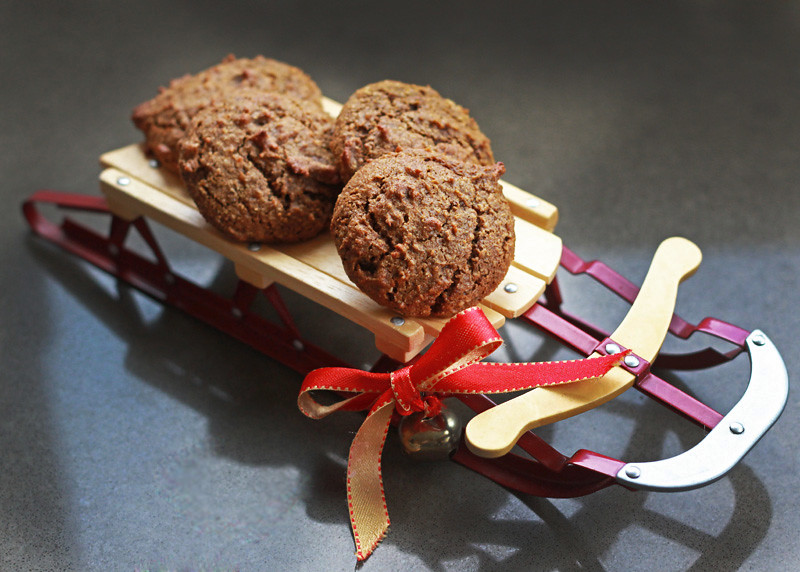
Chewy Molasses Cookies (redone grain free)

When I was younger I teased my mother for eating dried dates by saying they look like cockroaches. It had something to do with the translucence and papery skin, which I still find a little eerie, but recently dates have come to my rescue.  In this year's attempt to tackle wheat free baking I have found that dates, and date paste, are my favorite secret weapon for making good grain-free cookies.  This recipe is the first of two cookies that make use of my current favorite method. Using my ever evolving baking strategies I updated a favorite Christmas cookie of ours, the Chewy Molasses Cookie.  The flavor is still there though the sweetness is toned down to match our current tastes.  In my opinion this allows the zing of the spices and molasses to shine brighter.  I suppose I could still compromise and coat the outside of these in sugar but since they were so well received by both kids I think I'll keep them as is.   One experiment I would like to try is to double bake them at a low temperature like biscotti to see if I can get a crisp version as well as this chewy one.

Chewy Molasses Date Cookies 
Makes ~3 dozen small cookies, made using a 1 tablespoon scoop

7 ounces date paste (or ~1 1/3 cup packed pitted dates)*
3 ounces coconut oil (~1/3 cup + 1 tablespoon)*
2 large eggs
1 tablespoon molasses
1/2 cup almond meal*
2 tablespoons coconut flour
1 teaspoon baking soda
1/2 teaspoon baking powder
1/4 teaspoon fine sea salt
1 1/2 teaspoons ground ginger
1 teaspoon ground cinnamon
1/4 teaspoon ground cloves

-Preheat your oven to 350 degrees F and line your baking sheets with parchment.
-It is best to have all your ingredients at room temperature.  Add your dates, coconut oil, eggs and molasses to a food processor and pulse until you have a smooth paste.  If you are using pitted dates double check them for pits and expect this to take a little longer.
-In a small bowl whisk together all your dry ingredients.  Add the dry ingredients to the date mixture and process until combined, scraping the bowl as needed.
-Spoon tablespoons of dough onto your lined baking sheets leaving at least an inch and a half of spreading room.
-Bake for 8-10 minutes until puffy.  Cool the cookies on the baking sheets before removing.  It's best to release the cookies with an offset spatula before removing.  
-Baked cookies freeze well but I have found that coconut flour baked goods like these tend to not store well for long periods at room temperature.

*Ingredient information:  I get my date paste from Country Life Natural Foods.  It is relatively dry compared to most homemade versions I've seen but it's great for baking.  My kids prefer no coconut flavor and so we use the expeller pressed oil from Wilderness Family Naturals.  I've used both Bob's Red Mill and Honeyville almond flour/meal in these and both work fine.

March 12, 2011

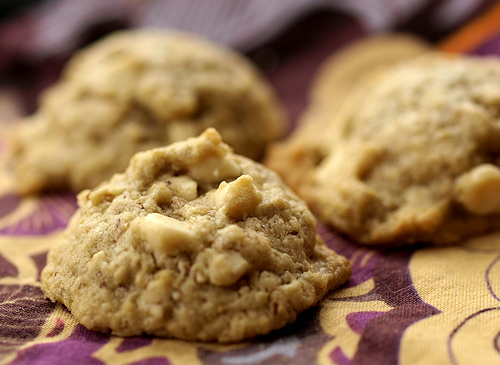
Maple Oat Cookies with White Chocolate

These cookies are the definition of serendipity.  I had no well thought out plan, no research or high hopes when I made these this morning.  The only reason they were created was Alex was out of cookies and has been begging for white chocolate all week.  Oh, and I have maple sugar on the brain-- I'm tapping some trees for the first time this year and boiling down sap today.  I just used what was on hand and what I thought would taste good and they turned out so much better than expected.  They are seriously addictive and for me reminiscent of Oatmeal Scotchies.

Maple Oat Cookies with White Chocolate
Makes ~2 1/2 dozen small cookies

3 ounces (~6 tablespoons) coconut oil
1/2 cup maple sugar*
1 large egg
1 teaspoon vanilla extract
2 tablespoons golden flax seed meal
1/2 cup brown rice flour
1/4 cup whole almond meal
2 tablespoons cornstarch
1/2 teaspoon baking powder
1/4 teaspoon kosher salt
1/4 teaspoon xanthan gum
6 tablespoons Scottish Oatmeal*
3/4 cup white chocolate chips*

-Preheat your oven to 350 degrees F and line baking sheets with parchment.
-In a stand mixer with a paddle attachment, cream the coconut oil and maple sugar until there are no lumps.
-Add the egg and vanilla and beat until creamy and lighter in color. Add the flax seed meal and beat to incorporate.
-In a separate bowl measure and whisk together the rice flour, almond meal, cornstarch, baking powder, salt and xanthan gum.  Add to the egg mixture and mix to combine well. 
-Add the oats and white chocolate chips and mix to distribute evenly.
-Scoop or spoon single tablespoons onto your lined baking sheets, leaving at least an inch between each cookie.
-Bake for 7-9 minutes until light golden brown on edges.  Cool slightly before removing from the baking sheet.

*Ingredient Notes:
-I get my maple sugar from our local co-op which carries U.P. Sugar Shack sugar.  You can also purchase maple sugar online at Marx Foods.
-I use Bob's Red Mill Organic Scottish Oatmeal but you could substitute other oats for more texture or give some regular rolled oats a quick whizz in the food processor.   Think of creating a slightly shredded meal and not oat flour, this should only take a few pulses.
-I get my dairy-free white chocolate from Chocolate Emporium.

We were out monitoring our sap buckets and soaking up the sun yesterday.
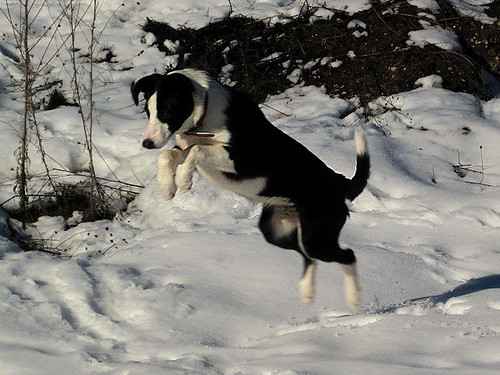
Perfect was doing her best Arctic fox impression, trying to catch mice tunneling under the snow.

February 27, 2011

DB Maple Florentine Cookies and Coconut Panna Cotta

The February 2011 Daring Bakers’ challenge was hosted by Mallory from A Sofa in the Kitchen. She chose to challenge everyone to make Panna Cotta from a Giada De Laurentiis recipe and Nestle Florentine Cookies.

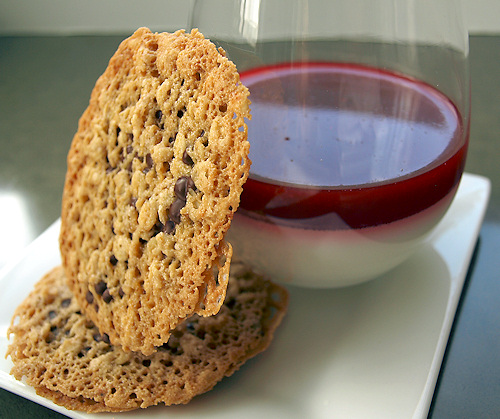
Another month gone by and I continued my wheat free experiment.  I also spent most of this past month going fairly low carb and nearly zero sugar so I needed to make quite a few alterations to this month's recipes.  For the panna cotta, I used coconut milk and gelatin without any sweetener at all.  The raspberry gelee on top, made from frozen berries, got just a scant teaspoon of honey to cut the tartness.  They were delicious together and plenty sweet enough for me. 

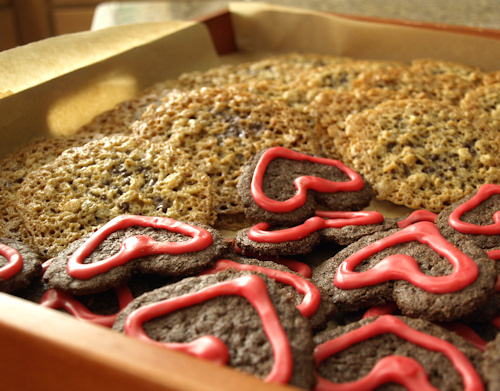
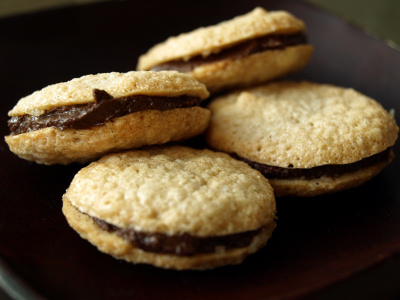
I ended up spending more time on the Florentine cookie recipe.  I remembered how one of my Christmas cookie experiments with maple sugar produced a lacy cookie so I thought I could adapt this recipe to lessen the refined sugar.  I cut the amount of sugar, replaced it with maple sugar and replaced the wheat flour with gluten-free flours.  My first batch ended up too chewy but were so well received by Alex that I made a second batch to work on a better texture.  I'm quite happy with this lower sugar, maple flavored version. 

Maple Florentine Cookies
My dairy-free, gluten-free, less refined sugar version of these Nestle Florentine Cookies.  If possible weigh your ingredients, the cup measurements are not as exact.
Makes ~2 dozen cookie sandwiches

2/3 cup (150g) coconut oil
2 cups (160g) oatmeal, I used regular oats
2/3 cup (110g) maple sugar
~1/4 cup (35g) almond meal
~1/4 cup (30g) tapioca starch
2 tablespoons maple syrup
2 tablespoons milk, I used unsweetened almond milk
1 teaspoon vanilla extract
1/8 teaspoon xanthan gum
pinch of fine sea salt
1 cup (170g) dark chocolate

-Preheat your oven to 375 degrees F and line a couple of cookie sheets with parchement paper.
-Melt the coconut oil in a large saucepan.  Remove from heat and stir in all the ingredients, mix very well.
-Spoon or scoop on tablespoons of the dough three inches apart.
-Bake for 6-8 minutes until golden brown.  Cool fully on the paper before moving. You can carefully slide the paper with the cooling cookies off your baking sheets onto your counter. Then you can cool the baking pans off with cold water and use another piece of paper to keep the production going.  Or take your time. 
-Repeat to use all the dough.
-Melt your chocolate (double boiler or microwave) and spread a small amount between each cookie before sandwiching.  Baked tops shoudl be facing outside.

Links:
-For the unaltered challenge recipes see our host Mallory's site, A Sofa in the Kitchen.
-Mallory used Giada De Laurentiis' Panna Cotta recipe and the Florentine recipe came from Nestle Classic Recipes which can also be found on the Nestle Kitchen website.
-I get my maple sugar from our local co-op which carries U.P. Sugar Shack sugar.  You can also purchase maple sugar online at Marx Foods
-Ready to take on a monthly baking challenge?  Visit the Daring Kitchen and don't forget to look at the Daring Baker Blogroll for other cookie/gel combos.

My first batch of Florentines was made with rice and tapioca flours.  They came with some gluten-free chocolate cutout cookies (raspberry frosted) to a Valentine's Day get together.  Unfortunately, I committed the cardinal sin of forgetting that there were kids there with diets even more restricted than Alex's.  I know from experience that it sucks when there are treats he can't have but just didn't think it through. 

January 29, 2011

Flaxseed Brownies

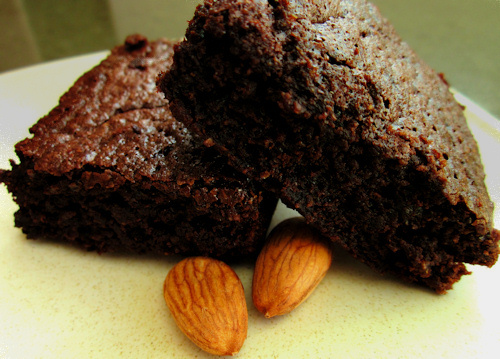
Alex has been snacking on lots of soaked/dried almonds this week, as well as corn chips and salsa and rice krispie/marshmallow bowls.  But I thought he needed a homebaked treat and "chewy" brownies were his request.  I sent him out in the snow this morning and made a batch of flax seed brownies and hot cocoa.  They turned out so good!!   Really moist, on that edge between chewy and almost gooey and though they were super sweet for me since I'm not eating sugar all week they aren't sickeningly sweet.  After Alex nibbled on another two this evening I stashed them in the freezer so that he can have all the rest without them tempting me.  He loves gnawing on frozen baked goods and they'd be perfect rewarmed in the microwave and served hot with ice cream!

Update: I couldn't resist making a second batch sweetened with honey.  I used 1/4 cup of honey in place of the brown sugar and left out the water.  They needed to be baked a little longer (28-30 minutes) but were wonderful.   Ideally, I'll try these in the future using unsweetened chocolate and with a little more honey to make them completely refined sugar free. -Maggie (1-30-11)

Flaxseed Brownies
Based on a recipe I made ages ago and can't find online anymore and these brownies, which are made with buckwheat and sweetened with honey. I would love to try this recipe with honey.  When I do I plan on trying it with only 1/4 cup of honey in place of the 1/3 cup brown sugar. Maybe next week...
Makes one 9-inch square pan (9-12 brownies)

3 ounces (~6 tablespoons) coconut oil
4 ounces (~2/3 cup) semi-sweet chocolate chips
1/2 cup flaxseed meal
1/4 cup almond meal
3 tablespoons cocoa powder
1/4 teaspoon fine salt
1/8 teaspoon baking soda
1/3 cup packed dark brown sugar
2 large eggs, room temperature
2 tablespoons hot water
1 teaspoon vanilla extract

-Preheat your oven to 325 degrees F and line a 9 inch square baking pan with parchment paper (or grease and dust the pan with almond meal.)
-Microwave the coconut oil and chocolate together for 30 second increments (1:30 usually does it) until the chocolate is melted.  Or you could get out a double boiler and melt the two together that way.  Mix the oil and chocolate together and set aside to cool slightly.
-Mix together the flax meal, almond meal, cocoa, salt, and baking soda, a whisk is the best tool for this job.  Set aside.
-Add the brown sugar to the oil/chocolate and whisk in.  Add in the eggs one at a time and mix well.  Add the vanilla and hot water and whisk until smooth.
-Add your dry ingredients to your wet and stir until combined.  Pour into the prepped pan.
-Bake for 22-28, until a toothpick test gives you just a few crumbs clinging.
-Cool 10 minutes, slice and serve.


December 3, 2010

Cherry Pie Lattice Cookies with an Iron Foodie Twist

Iron Foodie 2010 | Here's Why that will be me:
MarxFoods.com -- Fine Bulk Foods The Foodie BlogRoll
Last week I received my Iron Foodie ingredients from Marx Foods.  In our mystery "basket" were whole bourbon vanilla beans, Aji Panca chiles, fennel pollen, dried wild porcini mushrooms, maple sugar, dulse seaweed,Tellicherry peppercorns, and smoked salt.  In an attempt to be a "serious" competitor I spent most of the week tasting and contemplating a savory entree entry.  But the whole time all I could think about was Christmas cookies and cornmeal. 

I wait all year for the baking excitement around Christmastime and planning a new addition to the cookie round up is a big deal to me.  (What can I say, maybe my life is too mundane or maybe I'm baking-obsessed?)  Old favorites take up considerable cookie plate real estate so a new cookie has to be something special to earn a spot.  I knew these ingredients could help an average cookie recipe become "Christmas plate worthy".

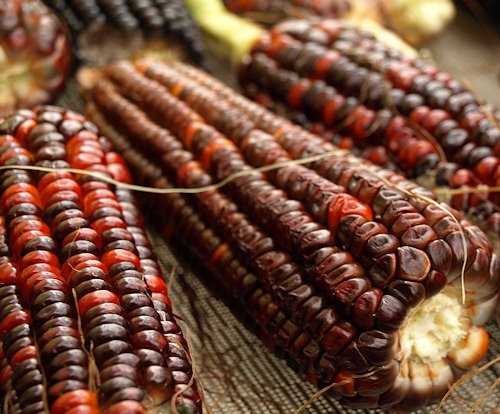
I browsed my cookie recipe collection and found one I liked.  This Apricot Windows recipe from Martha Stewart gave me a chance to use some cornmeal from my homegrown Bloody Butcher corn, the same corn we used to make our corn husk dolls, and it seemed adaptable to the mystery ingredients.

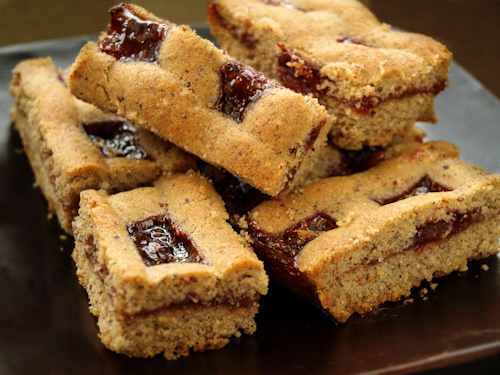
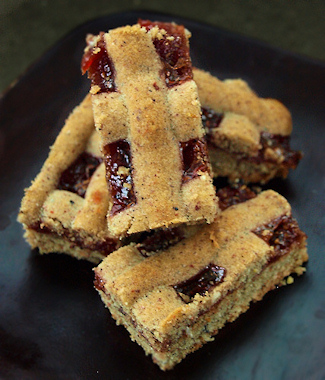
The bourbon vanilla bean combined with the cornmeal and the maple sugar to make a brilliantly flavorful shortbread.  In place of the apricot jam, my shortbread was topped with Michigan sour cherry preserves that had been jazzed up with some freshly cracked Tellicherry peppercorns and fennel pollen.   Sour cherry was a better foil for the fennel and pepper together, anise flavors go well with cherry and I love almost all fruit with black pepper.  The resulting cookie had an attractive lattice-topped pie appearance and a unique flavor that will earn it a place on this year's cookie plate.


Cherry Pie Lattice Cookies
Based on Martha Stewart's Apricot Windows recipe
Makes 12-16 cookies in an 8"x8" pan

1/2 cup sour cherry preserves or jam, at room temperature
1 teaspoon fennel pollen
1 teaspoon freshly cracked  Tellicherry peppercorns
1/2 cup maple sugar
3/4 cup butter or margarine
1 whole vanilla bean
1 cup + 2 tablespoons flour
1/2 cup cornmeal, medium or coarse for texture
1/4 teaspoon salt
1 large egg 

-Preheat your oven to 375 degrees F.
-In a small bowl, mix the jam with the fennel pollen and pepper.  Set aside.
-Place the maple sugar and butter or margarine into a stand mixer bowl fitted with a paddle blade.  Scrape in the seeds from the vanilla bean and cream these three ingredients until light and fluffy.
-While the sugar and butter mixture is beating, whisk together the flour, cornmeal and salt in a separate bowl.
-Add the egg to the creamed butter and beat until incorporated.   Add the flour mixture in three installments, beating until almost combined each time.  Then scrape and beat to create a fully mixed batter.  
-Fit a piping bag with a #12 or #11 plain piping tip or use a sandwich bag and cut a 1/4 inch hole in one end.  Fill with a 1/2 cup of batter.  Fold over or close to keep the batter from drying out and set aside.
-Line an 8 inch by 8 inch baking pan with parchment paper and spray lightly with vegetable oil.  To keep the parchment paper from shifting spray a small amount under the paper as well.
-Spread the rest of the batter in an even layer onto the parchment lined pan.  Bake for 20 minutes, until light golden brown.
-Remove the pan from the oven, spread on an even layer of the seasoned jam or preserves.  Then top with crisscrossing lines of piped batter approximately one inch apart to create a grid.
-Return the pan to the oven and bake for another 20-25 minutes until the piped lines on top are golden brown.
-Allow the cookies to cool.  Using the parchment paper, lift the uncut cookie out of the pan and then slice into bars or squares. 

*Variation: These could also be baked in a removable bottom tart pan and then cut into wedges like a mini pie. I would suggest a 8 or 9 inch diameter pan.

Our homegrown Bloody Butcher corn
If you are a Foodie Blog Roll member you can vote for your favorite Iron Foodie dish starting Tuesday December 7th.

September 27, 2010

DB Sugar Cookies

The September 2010 Daring Bakers’ challenge was hosted by Mandy of “What the Fruitcake?!” Mandy challenged everyone to make Decorated Sugar Cookies based on recipes from Peggy Porschen and The Joy of Baking.

Our Daring Baker host this month gave us the challenge of making decorated sugar cookies.  This was a relatively easy challenge to do dairy-free.   I used a big vanilla bean for flavor and swapped Earth Balance margarine in place of the butter called for.  The technique in the given recipe was interesting.  It involves rolling the dough between parchment and then chilling the parchment sandwiched dough.  But the lower melting/softening temperature of EB tub margarine made the dough sticky and fussy.  I ended up improvising and tossing it in the freezer.  With the real whole vanilla bean in them, these cookies came out with decent vanilla flavor but they did spread more than I would have liked.  There needs to be some tweaking to make this recipe usable for more elaborate cookie cutters.  Or I'd have to compromise and use Earth Balance in stick form.

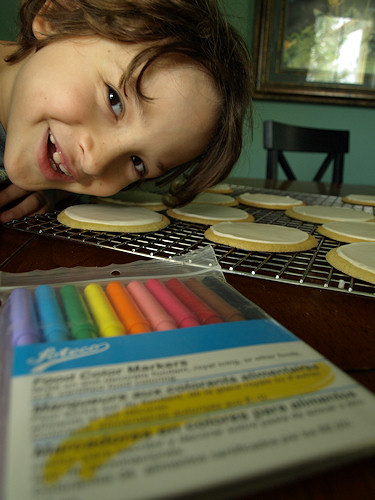
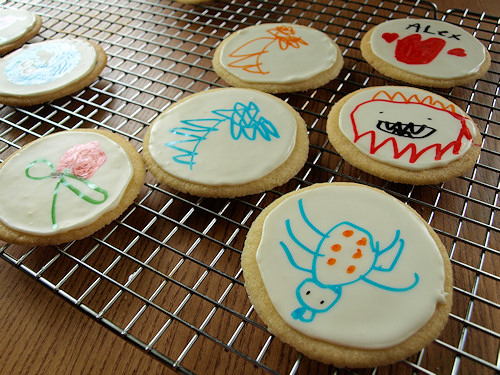
Mandy told us to decorate the cookies with September as the theme.  What could be better than a fresh pack of markers to celebrate back to school, edible food color markers that is, something I've been itching to have an excuse to buy.  Plus it made a fun coloring project for my son Alex.  Alex came up with a couple different designs including his recent favorite, the man-eating plant. I recruited my husband John for some cookie decorating and he made up a Raptisoft game trio of cookies.  I contributed an apple design so I could say I gave it a try.  Thanks for the challenge!

Links:
-The challenge recipes are available from our host Mandy who blogs at What the Fruitcake?!
-Mandy adapted the sugar recipes from Peggy Porschen.  They were published in Cosmopolitan Bride Oct/Nov 2008 and also found in her book, “Romantic Cakes”.
-The Royal Icing recipe adapted was from The Joy of Baking.
-Or you can buy royal icing mix, which is just powdered egg whites and powdered sugar.
-Visit the Daring Kitchen and see other sugary works of art made this month by browsing the Daring Baker Blogroll
Alex hamming it up with the markers
Drawing man-eating plants
The Raptisoft cookies, representing our games Solomon's Keep, Hoggy and Chuzzle

Alex's cookie creations
Fritz offers his tasting assistance
Meanwhile, Penny has been hanging out with Grandma at the Arts and Apples Festival
And getting her first tastes of solid food

June 8, 2010

Double Dark Chocolate Cookies (vegan)

Don't all diets need a little chocolate?  I'm busy working to fit back into my pre-pregnancy jeans but just can't live without a little chocolate now and then...or rather nearly every day.  The question that remains is how to administer said chocolate.  Some of my chocolate cravings are satisfied by very good chocolate from TCHO, a new favorite, but I'm also itching to get back into my baking groove and had cookies in mind.

I started with a basic recipe from Martha Stewart.  I knew it could be tweaked to make a just as satisfying and yet much more nutritionally valuable cookie.  I did have my diet in mind but there also was the soon-to-be 8!! year-old monster, my son Alex, that needed to be kept happy.  It would be cruel to make batches of cookies that were too "healthy" to appeal to his taste buds.  So I tested and tried combinations until I arrived at this recipe.

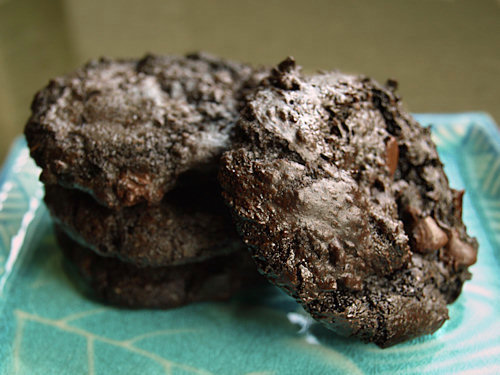
This dairy-free, egg-free, low-soy, whole wheat, lower sugar version of the double chocolate cookie really satisfies my chocolate cravings and yet still manages to stay kid friendly.  They exemplify my ideal cookie texture: crispy on the outside, chewy inside with melty chocolate bits throughout.  And if you just so happen to be counting points with Weight Watchers you can have one for 2 points or two for 3 1/2.  They fit in perfectly with my dieting modus operandi: filling up on vegetables seasoned with good quality protein and skipping the bread/pasta/rice so I can indulge in a sweet--that is if I can get to them before Alex does!

Double Dark Chocolate Cookies
My adaptation of the Double Chocolate Cookie recipe  from Martha Stewart
Makes 3 bakers dozen cookies (39 cookies)

Ingredients:
4 oz (~1/2 cup) unrefined coconut oil*
2/3 cup dark brown sugar
8 oz (~1 1/3 cup) semi-sweet chocolate chips or chunks
3 tablespoons golden flax seed meal
6 tablespoons warm water
2 teaspoons vanilla extract
1 cup whole wheat pastry flour
1/2 cup cocoa powder**
1/2 teaspoon baking soda
1/4 teaspoon salt

Ingredient notes:
*Lately I've been using Tree of Life brand coconut oil which has very mild coconut flavor and is acceptable to Alex's palate.  If you or those you are baking for don't object to coconut then by all means use a more coconutty oil.
**Any baking cocoa you have will work but if you want the darkest cookies use half regular cocoa and half black cocoa (like this one from King Arthur Flour).   You would then be using 1/4 cup of each type of cocoa.

Directions:
-Preheat your oven to 325 degrees F.  Line your baking sheet pans with parchment paper.
-If your coconut oil is liquid it's best to chill it until just firm.  Add your solid coconut oil and brown sugar to a stand mixer and beat until well combined.  Note: this will not cream and become fluffy like margarine or butter.
-Melt half of the chocolate (4 oz) in a double boiler or microwave and set aside.  Mix the flax seed meal and water together and allow to gel.
-Add the gelled flax and the vanilla extract to the coconut oil mixture and beat until combined, at least one minute.  Add the melted chocolate and beat until incorporated, you will need to scrape the sides of the bowl a few times.
-Stir or sift together the flour, cocoa(s), baking soda and salt.  Add to the coconut oil mixture and beat until smooth, scraping the sides several times.
-Add in the remaining chocolate (4oz).  The dough will be thick and gummy at this point and you will have to work to get the chips even throughout.
-Scoop tablespoon sized balls of dough onto the lined cookie sheets leaving at least 1 1/2 inches between each cookie.  To make this easier use a 1 tablespoon disher, see link at the end for an example.
-Bake for 11-12 minutes until puffy.  Remove and allow to cool on the baking sheets.
**These freeze very well as baked cookies.  You can bring them to room temperature or gnaw on them frozen.

Trying something new...
I'm an avid fan of Amazon.com so I'm testing the Amazon Associates function in Blogger. For full disclosure these are links that would give me a kick back if you purchased the item through them.  They are however things I actually do use and like a lot.


December 27, 2009

DB Gingerbread House

The December 2009 Daring Bakers’ challenge was brought to you by Anna of Very Small Anna and Y of Lemonpi. They chose to challenge Daring Bakers’ everywhere to bake and assemble a gingerbread house from scratch. They chose recipes from Good Housekeeping and from The Great Scandinavian Baking Book as the challenge recipes.

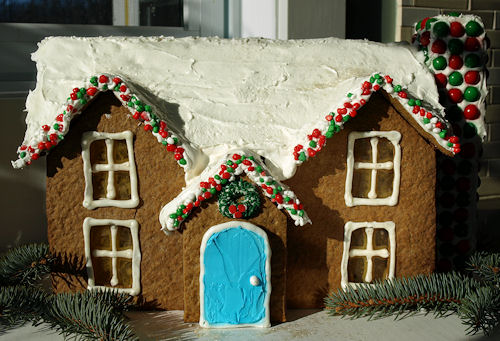
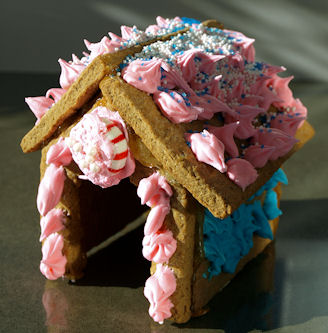
I love making a yearly gingerbread house. As it was the designated Daring Baker challenge I made changes to my typical gingerbread MO. I tried the recipe that came from Y of Lemonpi because it was less like the recipes I've tried in the past. I liked how sturdy the gingerbread was but found it got very brittle on the second day. This made for some breakage when I was assembling but I did my best to repair and move on. Instead of the little cottage design I normally make, I attempted to copy a house from a photo I found online that had a more complicated roof. I managed it but just barely. I think I need more than once a year practice to improve my technique. I glued the house together with sugar syrup and used the same syrup to form windows. Royal icing, some candy and I was done. I also made a couple of little dog houses and had my son Alex decorate them. This was a great challenge and I can't wait to get time to take a look at all the other Daring Baker houses.

Links:
-I used the recipe given by Y of Lemonpi which came from The Great Scandinavian Baking Book by Beatrice A. Ojakangas. Another option is the Spicy Gingerbread Dough recipe chosen by Anna of Very Small Anna. This recipe is available on Anna's blog as well as Good Housekeeping.com.
-To glue the house together and make the windows I followed the directions for Martha Stewart's caramel syrup
-My house pattern was based (loosely) on this Victorian cottage photo from Flickr
-I purchase CK royal icing mix from Candyland Crafts. I need a kid safe icing and in the past have found that powdered egg whites either taste metallic or have a off color. This icing mix solves both problems and works perfectly for me every time.
-Challenge yourself in the new year by becoming a Daring Baker, now no blog needed! Visit the Daring Kitchen for more information. There you can also check out all the other gingerbread goodness made this month by browsing the Daring Baker Blogroll.
-Go here to see my gingerbread house from last year

2009's gingerbread house
Alex's gingerbread dog house, he insisted on colored frosting

My cardboard gingerbread house patterns

December 19, 2009

Vanilla-Bean Sugar Cookies

Just like my trouble replacing the taste of butter in yellow cake, tasty sugar cookies were in the past a troublesome thing to make dairy-free. For me nothing could make up for the lack of real butter in such a simple cookie, but real vanilla beans come to the rescue once again in this Gourmet magazine recipe I adapted. Get baking now if you want these ready in time for Christmas. I've made these several times and giving the dough an extra day or two in the fridge lets the vanilla flavor develop and really pays off.

Dairy-free Vanilla-Bean Sugar Cookies
My dairy-free adaptation of the Gourmet magazine recipe for Vanilla-Bean Sugar Cookies found on Epicurious
Makes 3-4 dozen cookies

1/2 cup Earth Balance margarine*
3/4 cup sugar + more to roll in
2 vanilla beans
1 large egg
1 teaspoon vanilla extract
1 1/4 cups all-purpose flour
1 teaspoon baking powder

*If you aren't an EB fan and use another margarine you might want to add a pinch of salt. I use EB in the tub and it's always a little heavy on the salt.

-Beat the margarine with 3/4 cup of sugar and the scraped seeds from both vanilla beans until light in color. Adding the vanilla seeds to the creaming process helps spread them evenly throughout the dough.
-Add the egg and vanilla extract to the creamed margarine mixture and beat to combine.
-In a separate bowl, whisk (or sift) together the flour and baking powder. Then add to the creamed mixture in two or three doses beating just until combined.
-Spoon the dough onto a sheet of plastic wrap (or parchment paper) and roll into a log. Make the log approximately 1 1/2 inches in diameter. Add another protective wrap of aluminum foil or a second layer of plastic. You don't want any funky flavors sneaking into these cookies from your fridge!
-Chill the dough, ideally for 2-3 days but at least overnight.
-When you are ready to bake, preheat your oven to 375 degrees F.
-Take half a log at a time, the Earth Balance margarine softens quickly so it's best to not work with the whole log at once. Roll the log in sugar to coat the outside and then cut 1/4 inch slices.
-Lay the slices on your cookie sheets at least 1 inch apart and bake for 9-11 minutes, until golden brown on the edges.
-Allow the cookies to cool slightly on the cookie sheets before transferring them to a wire rack to cool completely. Repeat with the remaining dough.

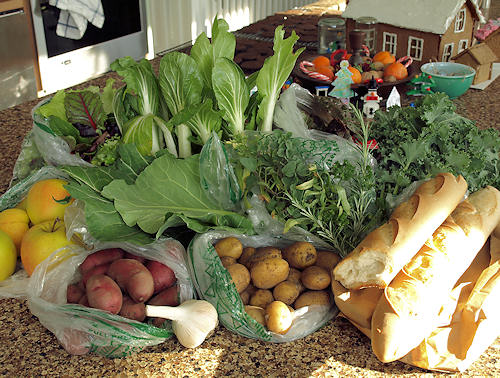
Yesterday I received my last fall 9 Bean Rows share. New Year's Day will start the winter share and I'm excited to see what it will have. Here's this week's goodies: (clockwise from top right)
red Swiss chard (which was very good last week - I'm growing to love it), kale, baguettes, lots of herbs (rosemary, parsley, oregano and even a sprig of tarragon), yellow potatoes, collards, garlic, red potatoes, apples, salad mix and bok choi
I plan on making a big batch of dairy-free potato pierogies for Christmas Eve, with some extra to freeze, and if I have time in between the rest of the cookie and candy making I'll also whip up a doubled recipe of the Daring Baker Danish Braid to use up some of my apples and feed our post-Christmas house guests.


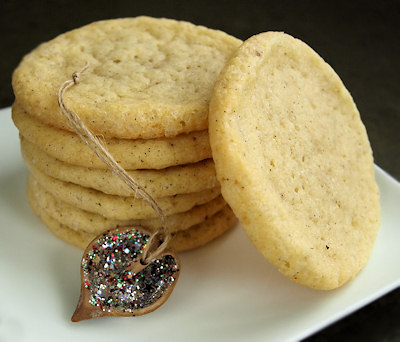
P.S. Notice the ornament with the cookies? I finally got around to making something with the Michigan-grown heartnut shells from summer '08! My son Alex and I had fun glittering the insides a few weeks back.

October 28, 2009

DB French Macaroons

The 2009 October Daring Bakers’ challenge was brought to us by Ami S. She chose macarons from Claudia Fleming’s The Last Course: The Desserts of Gramercy Tavern as the challenge recipe.

This is a last minute effort but I'm glad I gave it at least a quick try. Of course I got no feet, the little base that all French macaroons should have, and they didn't puff as much as I would have liked. However the cinnamon in the batch I made went over extremely well with my son Alex. Another day and I *will* try these again...

Links:

-Get yourself a copy of The Last Course: The Desserts of Gramercy Tavern by Claudia Fleming for this recipe and more.
-Or see the recipe at our host's site, Baking Without Fear
-If you'd like to join in on the fun visit the Daring Kitchen. There you can also check out all the participants by browsing the Daring Baker Blogroll.

In case you're wondering what I've been doing since I clearly wasn't busy perfecting my macaroon technique,
here's my son Alex in his haunted tree Halloween costume.

Since it's relevant, there is a super cute commercial I posted last year that's for my husband's game Chuzzle and it features macaroons! *BTW, Chuzzle for iPhone/iPod Touch will hopefully be out before Christmas for those interested.

July 28, 2009

DB Mallows and Milanos

The July Daring Bakers' challenge was hosted by Nicole at Sweet Tooth. She chose Chocolate Covered Marshmallow Cookies and Milan Cookies from pastry chef Gale Gand of the Food Network.
Ah, sweet summer! The Michigan cherries are wonderful this year, late but huge and flavorful. The nights are chilly and I'm loving the summer even more than ever before since moving up north. So I've let another month pass and I've been too busy hiking, gardening, playing and laying in the sun to cook a whole lot or blog. How do people who live in year round sun get anything done?

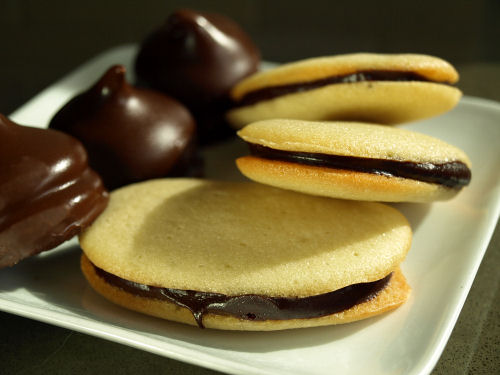
I did check in early in the month to see what the Daring Baker challenge would be. The Milan cookies (like the infamous Pepperidge Farm Milanos) were very intriguing to me. I made my first batch early in the month but struggled with the runny batter. I was making 1/3 batches because the recipe calls for 6 egg whites and it divided easily that way. I triple checked my measurements but couldn't make that batter pipable without an extra tablespoon of flour. No matter, they were a HUGE hit with my son Alex despite the slightly heavier texture. Maybe we were supposed to whip the egg whites? That was the only thing I didn't try but Alex's admiration for this cookie will have me researching and trying other recipes.

The mallow cookies were another matter, I really didn't want to make them. I dread coating things with chocolate. Even when a recipe lets you off the hook and you don't have to temper chocolate it's still a tedious, messy chore. But I felt like I was cheating if I didn't even give the recipe one go so I whipped up a batch yesterday at the last minute. True to form I made a mess with the chocolate but they tasted good enough. They just aren't a favorite cookie for me. I did like the chance to make a batch of homemade marshmallows, which I haven't done in a couple of years. Alex wasn't interested in the cookies but loved the extra marshmallow

At the end of this week I'm heading out for a beach vacation in South Carolina but know that my new land and already beloved vegetable garden won't be far from my mind. Here are some more photos to show you what I've been up to.

Links:
-Visit our host this month, Nicole, at her blog Sweet Tooth or come on over to the Daring Kitchen to join in on the fun. You can see the other versions of this month recipe by browsing the Daring Baker Blogroll for the other versions of this month's recipe.
-The complete recipes can be found at Food Network's website. Here are the links for both: Chocolate Covered Marshmallow Cookies and Milan Cookies
**To accommodate my son's dairy allergies I replaced the butter called for with Earth Balance margarine and used dairy-free chocolate. My chocolate ganche for the Milanos is made by melting 4 ounces of chocolate with 4 teaspoons of soy milk and 2 teaspoons of margarine. This ratio doubles or halves very easily.
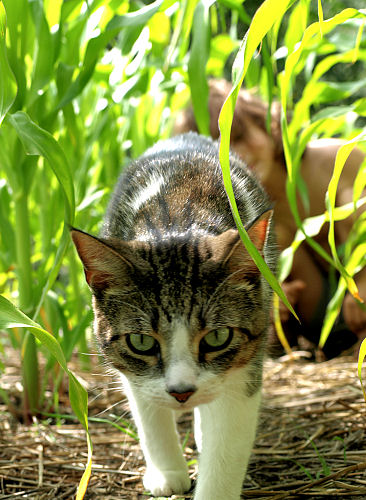
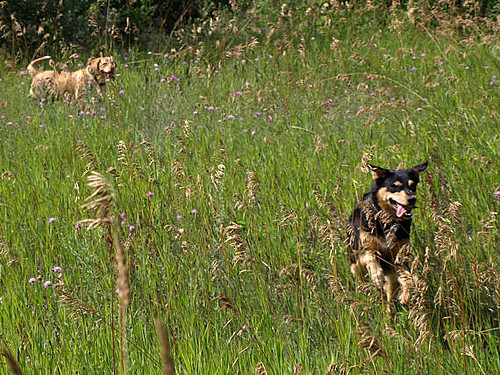
The dogs of Dog Hill (Roxy and Karmal) romping in the grassMy cat Nelson in the corn rows
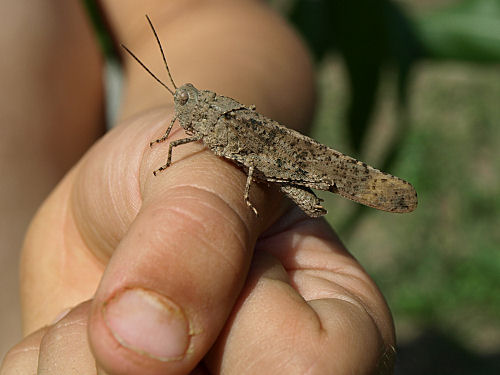
Alex with a grasshopper
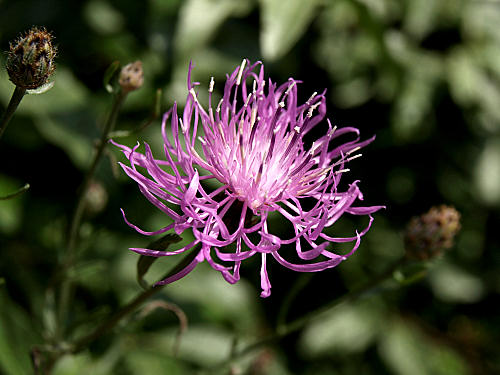
Spotted knapweed, a scratchy invasive whose pretty flowers are a hit with the bees
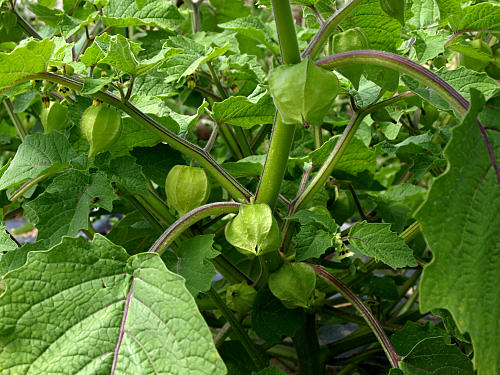
My prolific husk cherries, I'd better start looking for recipes. I have six plants.
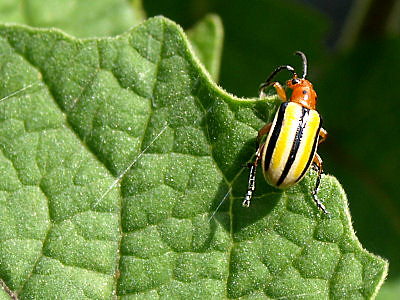
Three-lined potato beetles have been a nuisance. They are terribly fond of the husk cherries.
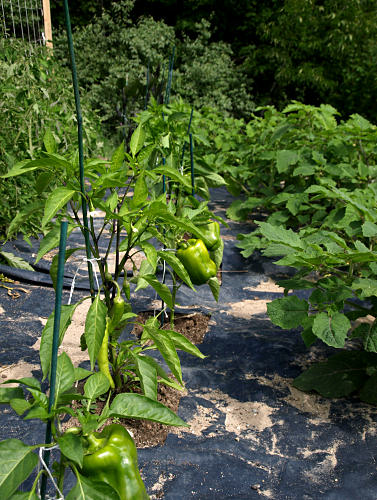
Peppers almost ready to pick
Pumpkins, sunflowers and sweet corn

March 25, 2009

Dairy-free TKOs (Thomas Keller Oreos)

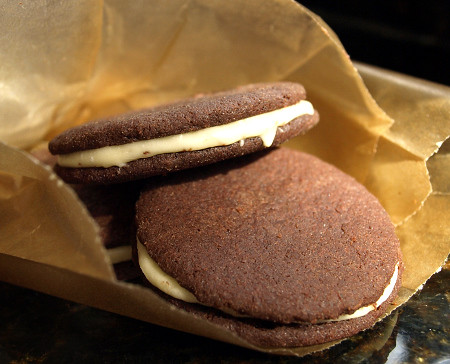
A lot of people with dairy allergies eat Oreos but they haven't worked out for us. A couple of times my son has had questionable reactions on days when he ate them. On top of that I object to the HFCS in them and prefer making cookies to buying them. Who doesn't love the smell of freshly baked cookies? So when I saw a Thomas Keller version of Oreos on the blog Jumbo Empanadas I had to give it a try.

I used the ratio for white chocolate ganache that I finally perfected during my yule log trials this December and my favorite cocoa, Green & Black's. The dough is a little fussy to work with but well worth it. The cookies are very tender and very chocolaty. The white chocolate ganache was wonderful and I'd consider making the next batch double stuf'd (IE double the amount of ganache). My husband loved them but I think my son would prefer these made with vanilla or lemon cookies. He's just not that into chocolate. I think a batch of lemon shortbread sandwich cookies would be perfect for Easter but have to do some lemon shortbread research first. Does anyone have any good recipes?

Dairy-free Chocolate Sandwich Cookies
For those who can use real butter and cream please look at the following recipes, I adapted my recipe from Jumbo Empanadas' recipe for Baby TKOs. The original recipe comes from Thomas Keller in Essence of Chocolate.
Makes ~3 dozen (2-inch) sandwich cookies

Filling ingredients:
8 ounces white chocolate chips (I get my dairy-free white chocolate from Chocolate Emporium)
2 tablespoons + 2 teaspoons soy milk
1 tablespoon + 1 teaspoon Earth Balance margarine

Cookie ingredients:
1 1/2 cup + 3 tablespoons all-purpose flour
3/4 cup + 1 tablespoon cocoa powder
3/4 cup sugar
1/2 teaspoon baking soda
1/2 teaspoon salt
7 1/2 ounces (3/4 cup + 3 tablespoons) Earth Balance margarine, at room temperature

-Add the white chocolate, soy milk and margarine for the filling to a microwave safe bowl. Microwave on high for 1 1/2 minutes. *If you haven't microwaved chocolate before then check every 30 seconds and stir to make sure that the chocolate doesn't burn or use a double boiler instead. You don't want the chocolate to melt completely in the microwave. Instead you want to just warm the whole mixture and melt the chocolate most of the way in the next step.
-After microwaving, remove the chocolate and stir with a whisk until the mixture becomes homogeneous and smooth. It will look separated for awhile but keep stirring and it will eventually come together. If after stirring for a minute there are still large pieces of unmelted chocolate then you can microwave the mixture for 15 seconds once or twice to warm it enough to melt.
-Set the filling aside at room temperature for 30 minutes to 1 hour. Or chill in the fridge to make the process go faster. It will thicken further as it cools but you can rewarm it before using by carefully microwaving the mixture for 10-15 seconds to make it workable again. In this time get started making your cookies.
-Preheat your oven to 350 degrees F and line two baking sheets with parchment paper.
-Add the flour, cocoa, sugar, baking soda and salt to the bowl of a stand mixer and stir together with the paddle attachment until mixed thoroughly.
-Add the room temperature margarine a bit at a time while the mixer is running. Mix until the dough starts to come together in a cohesive ball.
-Knead the dough a little on a floured surface until it is holding together nicely. Divide the dough in half and roll out one half between two sheets of parchment paper. The dough will still be fairly sticky. Cut out 2-inch circles of dough and carefully transfer them to the lined baking sheets, leaving a 1/2 inch between each cookie. Gather and reroll the scraps and repeat with the remaining dough until all dough is used up.
-Bake for 10-12 minutes. Cool the cookies on the baking sheets for at least 10 minutes before transferring them to wire racks to cool completely.
-Flip half of the cookies over and pipe or spoon on ~1 teaspoon of filling onto each cookie. Place another cookie on top and give a gentle squeeze to spread the filling between the two cookies. You may need to warm your filling in the microwave for 10-15 seconds to get it pipable. It should be the consistency of mayonnaise when piped.
-Dunk in (soy, rice, nut, cow's, hemp) milk and enjoy!


I'm adding this to Bookmarked Recipes, an event started by Ruth of Ruth's Kitchen's Experiments. Visit the new Bookmarked Recipes site on Monday for the roundup of other bookmarked and tested recipes. This week’s round up will be hosted by Psych Grad at Equal Opportunity Kitchen.


February 13, 2009

Strawberry Jello Heart Cookies

These cookies are an oddity and not something I would normally make, but I asked my son Alex what kind of cookies he wanted and "strawberry" popped out of his mouth. I've never had luck making anything with baked strawberries but I do have a bad habit of buying Jello even though we only eat it 2-3 times a year. So I dug around and found that yes a box of strawberry Jello was hiding in my pantry. Armed with artificial strawberry flavor and red dye #40 (hey moderation is the key, right?) I hunted down a Jello cookie recipe I'd seen online. I felt I had to redeem myself somewhat so I added a real vanilla bean and made them heart-shaped for Valentine's Day.

I think any sliceable cookie recipe would be easy to make heart shaped. All I did was roll the dough up into a tube, refrigerate it for the required 2+ hours. Then when I was ready to bake I cut a notch on one side and shaved off a little on the other side to make the pointed bottom of the heart. I rolled the whole thing in colored sugar which helped to knock down the edges and enhance the heart shape. Despite the dubious ingredients, these were a tasty buttery cookie with a pleasant strawberry flavor and perfect for Valentine's Day!

Strawberry Jello Heart Cookies
Adapted from Cast Sugar's Cherry Almond Jello Cookies, her recipe came from Gelatin Spritz Cookies from All Recipes
Makes ~4 dozen cookies

1 1/2 cups (12 oz) butter (Earth Balance margarine in our house)
1 (3 oz) package strawberry Jello
1 cup sugar
the scrapings from 1 vanilla bean
3 1/2 cups all-purpose flour
1 teaspoon baking powder
1 egg
1 teaspoon vanilla extract
colored sugar, optional

-Cream the butter/margarine with the sugar, Jello powder and vanilla bean scrapings until light and fluffy.
-Stir together the flour and baking powder and set aside.
-Add the egg and vanilla extract to the creamed butter/EB and beat until combined.
-Add the flour mixture and beat until the dough is smooth and even. *If you have a cookie press they can be baked as spritz cookies at this point.
-Place a third of the dough on a large sheet of plastic wrap, shape into a log ~2 inches in diameter and wrap tightly in the plastic wrap. Repeat with the other two thirds of the dough. Refrigerate for at least 2 hours, overnight is better to develop the vanilla flavor.
-Preheat your oven to 400 degrees.
-Remove one log of dough from the fridge and cut out a small groove on one side, this will form the top indent of the heart. Turn the log over and trim a little on the sides to form a point.
-Roll the log in the colored sugar. You will need to pour some colored sugar into the groove to get it to stick in. Be gentle so you don't destroy the details of the heart.
-Slice 1/4 inch slices from the log and place them on a parchment lined baking sheet. Leave an inch between each cookie.
-Bake for 6-9 minutes, until they puff slightly and the bottoms are very light brown. Cool on the baking sheet for 1-2 minutes and then remove to cool completely on a wire rack.
-Repeat the process with the remaining dough. The dough will keep well in the fridge for up to 5 days and the vanilla flavor will improve with longer refrigeration.

My cat Abbie has a heart shaped spot on her nose, isn't she the cutest thing ever!!

February 9, 2009

"Forget Me Not" Sambusik Cookies

I'm not a big cookbook collector, it takes a really impressive collection to get me to commit to buying one. There are just too many recipes to try online, in magazines, etc. However, I leap at the chance at anything new to read that is food related. Fiction involving food is always welcome but the genre I really love includes the histories, science discussions and memoirs that revolve around food. My favorites are too many to list but here are some examples you might recognize: On Food and Cooking, Kitchen Confidential, Salt, Garlic and Sapphires, My Life in France. Just point me in the direction of a new book of this nature and a few days later I'll be on the couch devouring it-- it'll only be hours if it's available on the Kindle.

So I loved hearing about the Cook the Books Club. The club's current book is The Language of Baklava by Diana Abu-Jaber. It's an engaging story of the author's childhood experience that centers around the experiences related to her Jordanian father. The recipe I really wanted to make was the "Nostalgic Chicken Livers", chicken livers with onions and lemon juice cooked in olive oil. It's a dish I order regularly at the various middle eastern restaurants around Detroit and I make it at home all the time. But, have you ever tried to take an attractive picture of chicken livers? I tried, but...

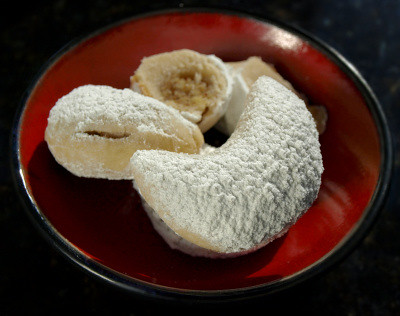
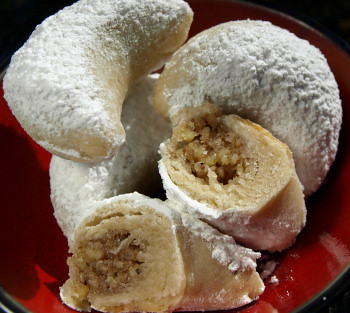
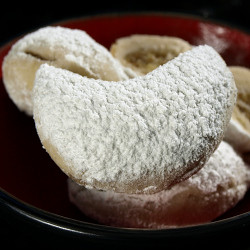
So I decided to play with her Sambusik cookies instead. To make them dairy-free I substituted walnut oil for the clarified butter. This gave the exterior dough a lot of walnut flavor. I also swapped orange flower water for the rose water. Rose water reminds me of a high school French teacher that wore too much rose perfume and I find it cloying. I think the orange flower water goes very well with the walnuts. The cookies were delicious with an enchanced walnut flavor. I think they might be even better with a touch of cinnamon as well. Here's my interpretation of her recipe.


My version of "Forget Me Not" Sambusik Cookies
Adapted from The Language of Baklava
Makes ~2 dozen cookies

Filling:
3/4 cup ground walnuts, lightly packed
1/4 cup sugar
1/2 teaspoon orange flower water

Dough:
1/2 cup walnut oil
6 tablespoons milk (soy worked fine)
2 tablespoons + 2 teaspoons sugar
2 cups all-purpose flour

~ 1/2 cup powder sugar to dust

-Preheat your oven to 350 degrees F.
-Stir together the filling ingredients and set aside.
-Mix together the oil, milk, and sugar. Add the flour and knead a small amount until a smooth dough forms.
-Roll the dough out to 1/4 inch thick and cut out 2 inch circles of dough. Fill each circle with approximately a teaspoon and a half of the nut filling. Fold over the circle of dough and pinch together. Bend to form a crescent shape.
-Bake for 15-18 minutes until lightly browned on the bottom.
-Cool and dust with powdered sugar.


I'm adding this to Bookmarked Recipes, an event started by Ruth of Ruth's Kitchen's Experiments. Visit the new Bookmarked Recipes site for the roundup of other bookmarked and tested recipes. And give some of your saved recipes a try and post about them! I'm hosting in a couple of weeks.