Showing posts with label Recipes: eggs. Show all posts

February 14, 2012

Chocolate Pots de Creme (dairy free and date sweetened)

My foray into non-Whole 30 foods didn't go quite as well as I previously reported.  A few days after my "cheating" I had a few break outs and gained back a little weight.  I felt even worse after tasting frosting (very little) I made for potluck cupcakes, obviously a dumb idea.  Feeling fuzzy-headed and sluggish were my main complaints. I detoxed by eating tons of raw vegetables for a few days and that has made me feel much better. I just need to figure out what starchy/sweet foods agree with me and which ones don't.  It's all a big crazy experiment anyway since I really don't have any confidence that anyone knows what we should eat.  Sometimes I think about all the people that seem to be thriving on fast food and vending machine fodder and wonder what in the world is the difference between me and them.  Is body chemistry, self control, portion sizes, nurture, nature...?

Anyway, it's Valentine's Day and I knew I would never get through the whole day without something chocolate.  I let Alex stay up late last night because he was thoroughly engrossed in a book, Mousenet, and Penny had fallen asleep super early so I was wasting time reading blogs.  I came across a recipe for Pots de Creme on Pioneer Woman. I usually read her blog only for the photography and homeschooling ideas because the delicious-looking real butter and cheese in her food torture me; but something made me check out this recipe.  I was thrilled to find out that it was already dairy free and so simple!

The amount of sugar in the original recipe is relatively low, coming only from the semi-sweet chocolate, but I wanted to try and make these a little more nutritionally dense.  I took inspiration from the white chocolate both my children love from Organic Nectars.  They use cashews in place of milk powder so I used some cashews to lighten my unsweetened chocolate.  I added my favorite natural sweetener, dates, and changed the flavorings to suit my mood.  Probably these should now have a different name but I have had the real thing and these are better than quite a few that bore that name honestly with real cream.  Be sure to take your time and fully blend the mixture so you get the creamiest texture possible with your blender.  And don't be surprised if you want to eat them all at room temperature once you take a taste.

Happy Valentine's Day!

Pots de Creme
Based on Pioneer Woman's Pots de Creme a L'orange recipe
Makes 6-8 servings, halves easily but requires more scraping while blending

6 oz unsweetened chocolate, chopped fine
3 oz (1/2 cup) raw cashews
6 oz dates or date paste, (~1 cup packed, pitted dates)
4 eggs
1 tablespoon vanilla extract
pinch of salt
1 cup very hot water

-Add the chocolate, cashews, dates, eggs, salt and vanilla to a blender and blend until everything is combined and the cashews and dates are mostly smooth.  You may need to stop and scrape down the sides a few times to get everything together.
-With the blender running, slowly add the hot water through the hole in the lid.  After all the water is added, stop the blender and scrape down the sides.  Blend again until very smooth, scraping more as needed.
-Spoon into cups or jars.  Serve either right away because it is pudding-like warm from the blender or chill and eat cold, chilled it is very rich and almost like frosting.

Variations:
You could replace the hot water with hot coffee and/or replace the vanilla extract with Grand Marnier, Chambord or other liquor

After nearly 10 years of product loyalty, I gave up using Paint Shop Pro last fall and have been slowly learning my way around Adobe Photo Shop.  I figured I was finally ready to try using some actions.  Here is Penny with PW's Old West action.  You can download her action sets here.  

February 7, 2012

Dark Days Frittata

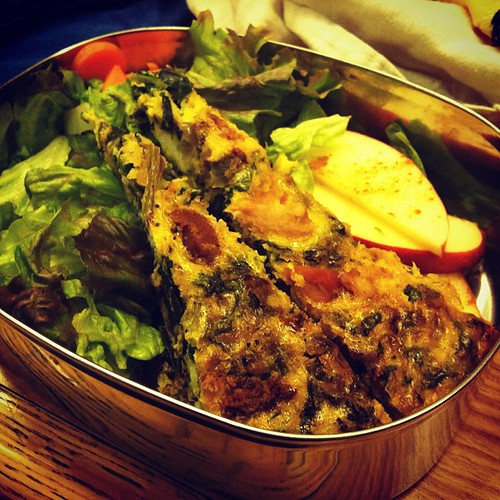
For this week's Dark Days of Winter Challenge I give you a cell phone photo of a potluck dish-- not my best entry but at least it's something.  To the potluck today, I brought a frittata made with 9 Bean Rows turnip greens and red onions, eggs from The Saturday Farmers Market at the Village and my home-smoked ham I made with the half hog from Bare Knuckle Farm.  I can't vouch for the salad and apple I had with it but given the company it was quite possible they were local and/or organic.
Visit Not Dabbling In Normal on Sundays for the round up of Dark Days meals. You can also visit our coordinator at Unearthing this Life to see some of our Midwest group entres.  

February 1, 2012

Dark Days Smoked Paprika Turnips and Kale

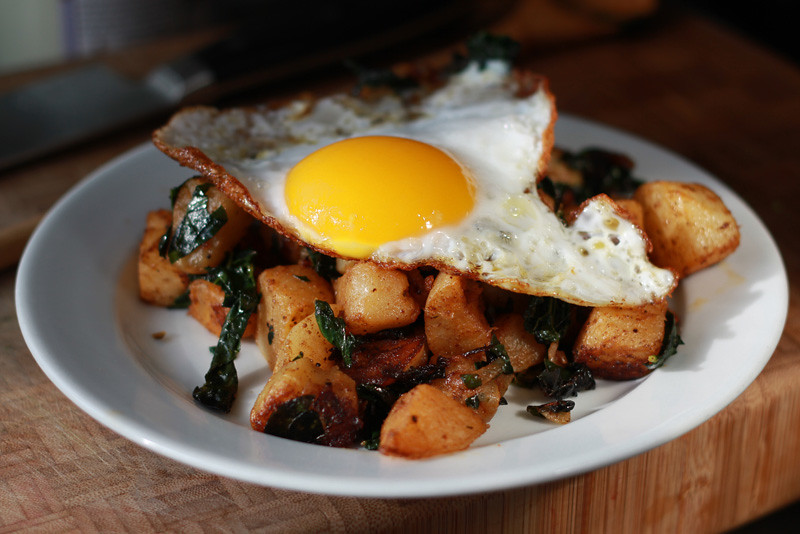
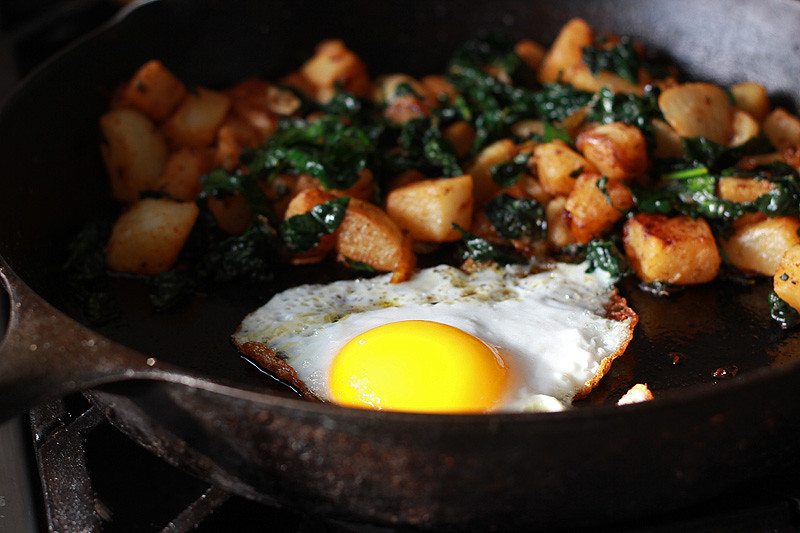
To complete this week's Dark Days challenge I made lunch today using turnips, kale and onions from my 9 Bean Rows winter CSA share.  I saw this recipe for Smoky Roasted Turnips on The Food Lover's Primal Palate but didn't feel like waiting for the oven to heat up. I then started thinking about bubble and squeak and so added kale.  A fried egg from our ducks seemed like a good bump of protein.  I had bacon fat on hand but thought the flavor of olive oil would be good with the pimenton and so I used oil from Higher Grounds.  It was delicious and when Penny noticed me eating she ran over and stole a bunch even though there was enough hot pimenton to give a little burn.  She's my little firecracker!
Smoked Paprika Turnips and Kale (with an egg)
Add peeled and cubed turnips to salted boiling water and cook just until tender.  Drain immediately and allow the extra steam to evaporate off.  Soften some sliced onion in olive oil in a cast iron pan.  Add the turnips and sprinkle hot pimenton (smoked paprika) and cracked black pepper to taste.  Cook over medium/high until the turnips and onions are caramelized.  Add in chopped kale and toss to wilt.  Push the vegetables over to one side and add a little more olive oil to the empty side.  Crack in an egg and cook to your taste, I love crispy edges!  Serve with the egg on top for runny yolk awesomeness.
Visit Not Dabbling In Normal on Sundays for the round up of Dark Days meals. You can also visit our coordinator at Unearthing this Life to see some of our Midwest group entres.  

Penny's rainbow nose
Paint covered hands!
I may regret reading this book to her a few days ago.

January 22, 2012

Fortune Cookies (gluten and dairy free)

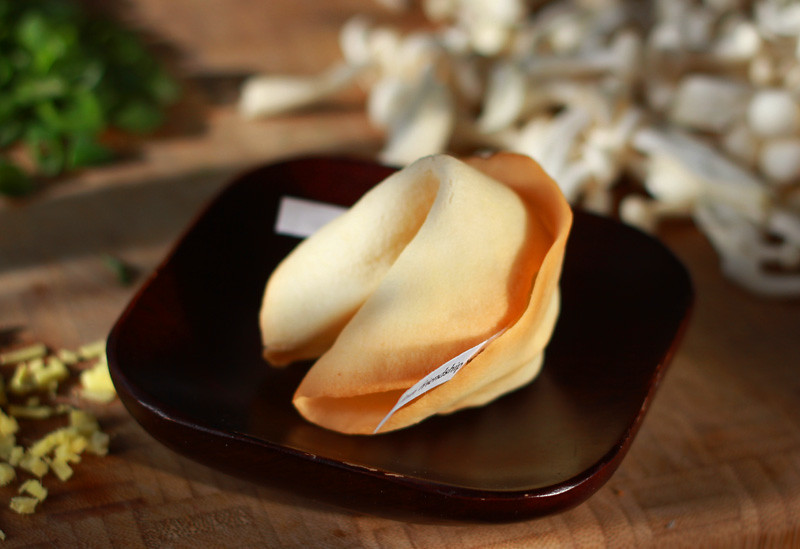
We were invited to a Chinese New Year celebration yesterday and I was determined to bring fortune cookies that Alex could safely have.  Friday night I fought with three different recipes: two that were gluten free by design and one wheat flour recipe with gluten free flour blend as replacement.  All of them were flops and I was fairly discouraged and a bit angry about wasting some of the last of our eggs.  Our chickens and ducks have mostly stopped laying now.  :(   But the next morning I screwed by courage to the sticking place and gave it one more try.  This time I altered a recipe I already knew worked and success was mine!  I was even happier with how my stir fried pork with mushrooms served with sesame cabbage came out.  I will have to make that again since it was Whole 30 compliant and I'd like to post it.  The pork and cabbage helped me survive the challenge of not eating even the smallest taste of fortune cookie.  Thank goodness the kids make great taste testers!

Fortune Cookies (gluten and dairy free)
Adapted from this recipe which came from this recipe
Makes ~18 cookies

57g coconut oil
57g powdered sugar
2 egg whites, room temperature
48g tapioca flour
17g corn starch
pinch of salt
1/2 teaspoon vanilla extract
1/4 teaspoon almond extract

-Preheat your oven to 375 degrees F.  
-Line a couple of baking pans with parchment paper. If your pans are rimmed I suggest flipping them over and working on the back side so that spreading the batter is easier.  Set out a muffin tin to use while forming cookies and print and cut out your fortunes.  I used a lot from  this list of fortune cookie messages but my favorite is "Your fortune lies in another cookie".
-In a stand mixer, cream the coconut oil and sugar until light in color and smooth.  Add the egg whites and extracts and beat until incorporated.   This will be extra tricky if you don't have your egg whites at room temperature.  
-Add the tapioca starch, corn starch and salt and beat until a smooth batter forms, you will probably need to scrape down the bowl a few times.
-Oil your parchment with spray oil or a little melted coconut oil.  On one half of the parchment take a little less than a tablespoon of batter and spread it evenly with an offset spatula into an ~4 inch diameter circle.  Repeat on the other side of the baking sheet.  If you don't feel confident about this step you can trace a circle in pencil on the reverse side of your parchment paper to use as a guide or you can make a circle stencil out of thin cardboard (think cereal box) and then spread the batter just inside the template.
-Bake for 4-5 minutes until  light golden brown on edges, bake only 2 cookies at a time.
-Immediately after removing from the oven take a fortune and place it on the center line.  Then fold the cookie in half keeping the folded edge flat and not squashed.  Then bend in the two corners and place the cookie inside a muffin tin cup to keep it from unfolding as it cools.  This does some practice and hands that can take some heat.  This image was helpful for me to learn the fold though if you Google other recipes you'll see a lot of people using coffee cups to help fold.  The coffee cup technique wasn't helpful to me but you may be different.
-Repeat with the remaining batter. Be sure to cool off your cookie sheet and reoil your parchment after each batch.  Do not add fresh batter to a warm cookie sheet.  
-After the cookies have cooled store them in an airtight container.  
Gong Xi Fa Cai!

December 5, 2011

Chewy Molasses Cookies (redone grain free)

When I was younger I teased my mother for eating dried dates by saying they look like cockroaches. It had something to do with the translucence and papery skin, which I still find a little eerie, but recently dates have come to my rescue.  In this year's attempt to tackle wheat free baking I have found that dates, and date paste, are my favorite secret weapon for making good grain-free cookies.  This recipe is the first of two cookies that make use of my current favorite method. Using my ever evolving baking strategies I updated a favorite Christmas cookie of ours, the Chewy Molasses Cookie.  The flavor is still there though the sweetness is toned down to match our current tastes.  In my opinion this allows the zing of the spices and molasses to shine brighter.  I suppose I could still compromise and coat the outside of these in sugar but since they were so well received by both kids I think I'll keep them as is.   One experiment I would like to try is to double bake them at a low temperature like biscotti to see if I can get a crisp version as well as this chewy one.

Chewy Molasses Date Cookies 
Makes ~3 dozen small cookies, made using a 1 tablespoon scoop

7 ounces date paste (or ~1 1/3 cup packed pitted dates)*
3 ounces coconut oil (~1/3 cup + 1 tablespoon)*
2 large eggs
1 tablespoon molasses
1/2 cup almond meal*
2 tablespoons coconut flour
1 teaspoon baking soda
1/2 teaspoon baking powder
1/4 teaspoon fine sea salt
1 1/2 teaspoons ground ginger
1 teaspoon ground cinnamon
1/4 teaspoon ground cloves

-Preheat your oven to 350 degrees F and line your baking sheets with parchment.
-It is best to have all your ingredients at room temperature.  Add your dates, coconut oil, eggs and molasses to a food processor and pulse until you have a smooth paste.  If you are using pitted dates double check them for pits and expect this to take a little longer.
-In a small bowl whisk together all your dry ingredients.  Add the dry ingredients to the date mixture and process until combined, scraping the bowl as needed.
-Spoon tablespoons of dough onto your lined baking sheets leaving at least an inch and a half of spreading room.
-Bake for 8-10 minutes until puffy.  Cool the cookies on the baking sheets before removing.  It's best to release the cookies with an offset spatula before removing.  
-Baked cookies freeze well but I have found that coconut flour baked goods like these tend to not store well for long periods at room temperature.

*Ingredient information:  I get my date paste from Country Life Natural Foods.  It is relatively dry compared to most homemade versions I've seen but it's great for baking.  My kids prefer no coconut flavor and so we use the expeller pressed oil from Wilderness Family Naturals.  I've used both Bob's Red Mill and Honeyville almond flour/meal in these and both work fine.

November 24, 2011

DB Filipino Desserts

Catherine of Munchie Musings was our November Daring Bakers’ host and she challenged us to make a traditional Filipino dessert – the delicious Sans Rival cake! And for those of us who wanted to try an additional Filipino dessert, Catherine also gave us a bonus recipe for Bibingka which comes from her friend Jun of Jun-blog.

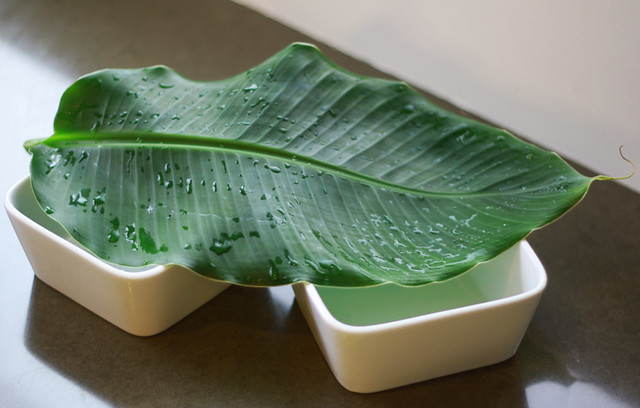
Filipino desserts were chosen to be this month's Daring Baker challenge.  Already wheat-free with lots of eggs and low dairy these recipes were a fun adventure that began with making salted duck eggs.  Raw duck eggs sat on my pantry shelf, curing in a salt brine, for over 20 days before they were boiled and used as a garnish for the sweet rice cake, Bibingka.  The salted eggs weren't that strange in flavor but the texture was unusual.  To complete the authentic flavor, the rice cake bowl was lined with a banana leaf I clipped from my own banana plant.   It was an interesting combination but not something I loved.  The Sans Rival was a more familiar recipe for a chocolate nut meringue, cashew in the original recipe/almond in mine, layered with French butter cream.  The meringue was wonderful, chewy and nutty and a tad crispy.  The lack of real butter in my butter cream was disappointing but mattered little to the kids who haven't had anything frosted in a while.  It was fun to try some new things.  Thanks for the challenge Catherine!

Links:
-For the complete challenge recipes visit our host, Catherine, at her blog Munchie Musings.  The Sans Rival recipe is her creation.  For the original Bibingka recipe and more Filipino food take a look at the site Jun-blog.
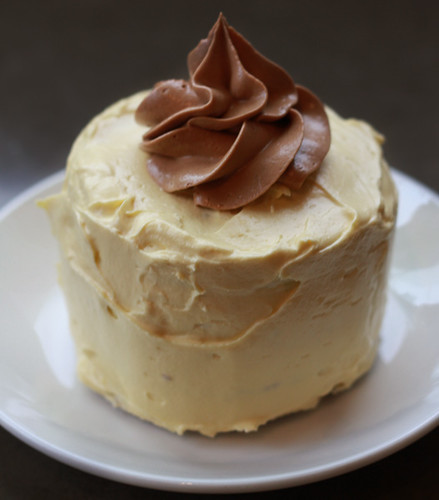
-My alterations this month were simple.  Coconut oil in place of the butter in the Bibinka and no cheese.  I used Spectrum Butter Flavor shortening in the butter cream, remember that it is unsalted and so you need to add salt to the egg yolks so that it will dissolve.  The butter cream was flat tasting without any salt and added later it didn't dissolve.  If I were to try this butter cream again I would try  adding a single tablespoon of milk (almond or coconut) to cut the waxiness of the shortening.  It did pipe beautifully though!

The chocolate Sans Rival
A vanilla frosted version requested by Alex
My banana plants
Their sacrificial leaf
My flock feasting on $1ea after Halloween pumpkins.  
They graciously provided the eggs for this challenge.
Our dog Perfect, I'm recently trying to get her out with the poultry with the hope that I can train her to help in some way.  Of course I have no idea what I'm doing but she is smart and obedient and starting to get over her puppy craziness.

November 4, 2011

Pumpkin Donut Holes (redone GF/DF)

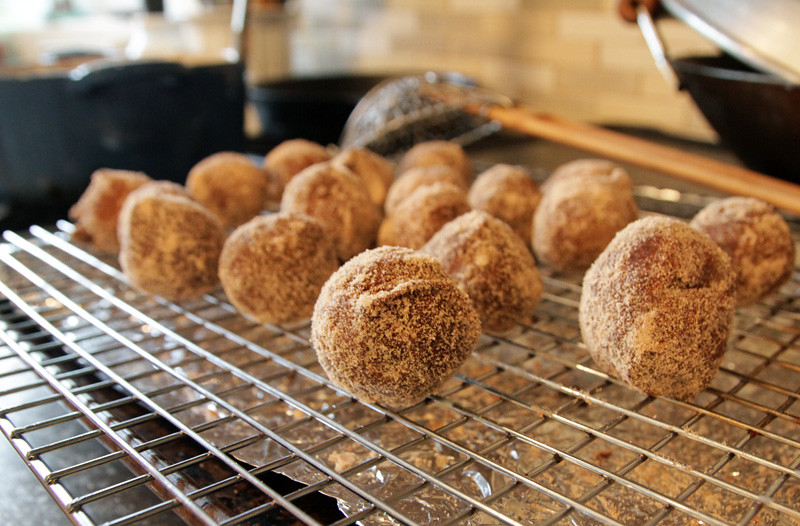
I made these last week to bring to our orchard trip because even though the place we visited doesn't sell donuts it is ingrained in me that cider must equal donuts.  Besides, it had officially been at least 3 months since my last donut frying and four times a year seems reasonable to me.  These are a work in progress because the batter is too loose to make into rings and can only be scooped into donut holes but that doesn't stop them from being delicious!

GF Pumpkin Donut Holes
Thanks to Comfy Belly's Pumpkin Muffin recipe for giving me a starting point.
Makes ~ 3 dozen holes

1/2 cup roasted pumpkin puree (or use canned pumpkin)
3/4 cup maple syrup
4 eggs
1/2 cup sweet rice flour
6 tablespoons arrowroot starch
6 tablespoons coconut flour
1/4 teaspoon baking soda
1/4 teaspoon baking powder
1/2 teaspoon salt
1 teaspoon ground cinnamon
1/2 teaspoon grated nutmeg
1/2 teaspoon allspice
1/2 cup fine maple sugar + 1 teaspoon cinnamon, optional for coating the finished donuts
+Fat to fry in, I used rendered beef tallow but of course you could use another high heat fat/oil.

-Warm your fat/oil, you will need at least an inch but preferably two inches in a heavy pot.  I use a enameled cast iron dutch oven to fry in.
-Mix the pumpkin, syrup and eggs by hand or in a food processor.
-Whisk together the dry ingredients and add to the wet.  Process or stir until combined.
-When the fat reaches 350 degrees F, scoop tablespoon sized blobs of batter carefully into the hot fat.  Add more blobs but do not overcrowd.
-Turn the holes gently with a wire spider or slotted spoon.  Fry until dark golden brown, ~ 1 1/2 minutes.   For the best results time a sacrificial hole and cut it open at one minute to see if the interior is cakey and cooked through.  Then judge how much more than one minute you may need of frying time.
-Remove the donuts and drain on a wire cooling rack set over a baking sheet to catch any dripping grease.
-After they have cooled enough to handle quickly, roll them in maple sugar and cinnamon mixture.  They are also good with a chocolate glaze.

*In search of a vegan pumpkin donut made with wheat flour?  Here is my recipe from a few years ago.  For a gluten-free and vegan option, I am fairly certain that these recent donuts would work well with flax eggs (1 tablespoon flaxseed meal + 2 tablespoons water = 1 egg) but I haven't tried it yet.

Some Halloween pictures to share as well, one of the family
Me and my little devil, Alex
Angel Penny and John the dark wizard

July 26, 2011

DB Fresh Frasier (or rather Framboises)

Jana of Cherry Tea Cakes was our July Daring Bakers’ host and she challenges us to make Fresh Frasiers inspired by recipes written by Elisabeth M. Prueitt and Chad Robertson in the beautiful cookbook Tartine.

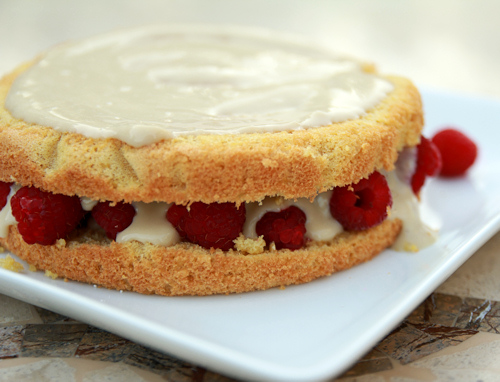
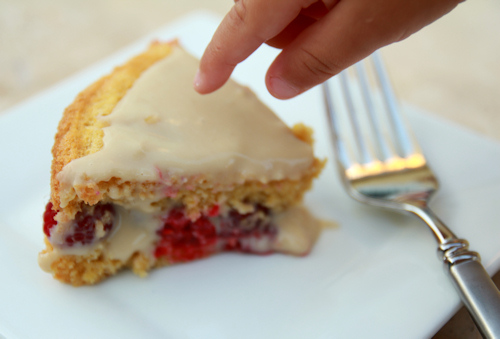
Daring Baker time!  This month's creation was chiffon cake filled with fresh fruit and pastry cream, a Fresh Frasier.  I chose to use fresh raspberries, made the gluten-free chiffon cake from Penny's birthday, used coconut milk for the pastry cream (alas no stabilized whipped cream for us) and sweetened it all with maple sugar. I overcooked the pastry cream a bit and I think I'm getting to a point where even maple sugar is too much for me.  I'd rather just have the berries plain or the berries with a splash of coconut milk and skip the cake.  But the cake was put to use and served some kind friends that put up with my experimental desserts.  Penny loved hers but Alex balked at the coconut milk cream.  He's my picky one.  Thanks for the challenge Jana!

Links:
-For the full original recipe visit our host Jana at Cherry Tea Cakes or see the pdf recipe.
-I made this gluten-free chiffon cake but this time used maple sugar.  I made the pastry cream from Jana's recipe but replaced the whole milk with full fat coconut milk and left out the whipped cream.
-Her recipes are based on those of Elisabeth M. Prueitt and Chad Robertson from the cookbook Tartine.
-Other participants for this challenge are listed in the Daring Baker Blogroll.

Penny had no patience for my picture taking.
Her new hobby is flower picking.  This week Queen Anne's Lace is the favorite.

May 27, 2011

DB Chocolate Marquise (done dairy-free and honey sweetened)

 The May 2011 Daring Bakers’ challenge was hosted by Emma of CookCraftGrow and Jenny of Purple House Dirt. They chose to challenge everyone to make a Chocolate Marquise. The inspiration for this recipe comes from a dessert they prepared at a restaurant in Seattle.

This month I've been far too busy to do much blogging.  There has been gardening, Alex's school, houseguests and trips downstate, 15 new birds (9 new ducks and 6 chickens), lots of poking around outside looking for morels-- plus I seem to be terribly accident prone this month.  I usually rack up a number of burns, cuts and bruises but this month I've added a smashed shower door, a sunburn and a punctured foot to my list.   Let's hope I piled all of this into May and will have a pleasently uneventful, productive and relaxing summer.

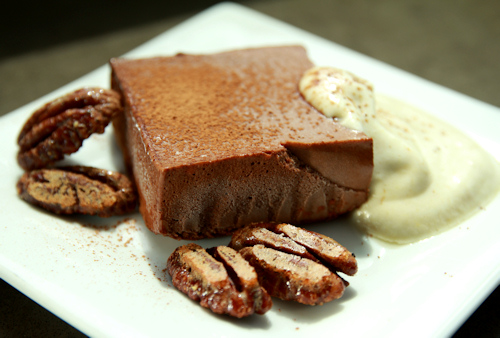
Somehow I did manage to whip up this month's Daring Baker challenge.  Looking at the recipe I initally was annoyed and frustrated.  Recipes for mousse are so tough to do dairy-free, especially if you are also mostly soy-free as well like us and don't have the option of using silken tofu.  Then I went through a pouty phase where I complained in my head that the hosts chose a recipe that didn't even have a mandatory baked item.  It's supposed to be Daring *Bakers* not Daring Desserts!  But eventually I came up with a game plan and forged ahead.  I've been eating almost no refined sugar since the beginning of the year so the first change I made was to use honey to sweeten all the components.  I also substituted unsweetened baking chocolate for the bittersweet and swapped carob powder for the cocoa.  For that tricky heavy cream I gave extra chilled coconut cream a try and I spiced my mousse and nuts with ginger and black pepper.

The changes ended up being fairly simple and the result was pretty decent.   The ginger and pepper went well with the honey flavor and yet dark chocolate was still the star.  The mousse texture was a little grainy when still hard but smoothed nicely when I let the squares warm up a little more.  With all the egg and yolks they still were light and creamy.  But the best part was the nuts--they are fantastic!!  I'll be making batches (and batches and batches) of them again.  So thanks for the challenge Emma and Jenny, as always I'm happy to be a Daring Baker and give something I would never try to make a chance.

Here are my altered ingredient lists. All of these are scaled to make 1/4 of the original recipes or 6 servings each with 1 (2"x2") cube of marquise.  Instructions and original ingredient lists found here on the Daring Kitchen.
Chocolate Marquise
3 large egg yolks at room temperature
1 large egg
3 tablespoons honey
Chocolate Base, barely warm (ingredients follow)
½ cup coconut cream*
½ cup carob powder (for rolling or dusting)
*By coconut cream I mean I took can of coconut milk and placed it in the fridge unopened overnight. I then scooped out only the thick cream and left the watery liquid to be used in another application. I chilled the measured amount of cream in the fridge and whipped it like heavy cream using chilled beaters and a chilled bowl. It doesn't get the volume of heavy cream but does get fluffier. I then combined the whipped coconut cream with the chocolate base before folding it into the egg/yolk mixture.  This is the opposite of the instructions which have you mix the base with teh yolk mix first.  This way the egg mixture is able to transfer as much volume and air as possible to the finished dish.

Chocolate Base
3 oz (85 grams/ 6 tablespoons) unsweetened chocolate
1/3 cup + 2 teaspoons coconut cream
1/8 teaspoon salt
1/2 teaspoon black pepper
1 teaspoon ground ginger
1 tablespoon tequila
2 tablespoons honey
1/4 teaspoon vanilla
1 tablespoon carob powder
1/4 oz (1/2 tablespoon/8 grams) coconut oil, softened

Torched Meringue
3 large egg whites
3 tablespoons honey
Splash of apple cider vinegar
1/8 teaspoon ground ginger

Honeyed Spiced Pecans
2 tablespoons honey
1 teaspoon ground ginger
1/2 teaspoon black pepper
1/4 teaspoon salt
1/2 large egg white
1/2 cup pecans, ideally soaked and dehydrated first

Links:
-For the instructions to go with my ingredient lists, or the original recipes, visit our hosts Emma of CookCraftGrow and Jenny of Purple House Dirt.  Or see the complete recipe here on the Daring Kitchen site.
-Emma and Jenny learned how to make this marquise dessert when they worked together at a Seattle restaurant. The recipe is adapted from one developed by Bennie Sata, a Seattle-area pastry chef who introduced the city to one of its iconic chocolate desserts. They also included vegan recipes which were created by Ashlae of Ladycakes.
-Visit the Daring Kitchen to see the baker blogroll and other treats made this month.

My favorite Instagram shot from this month
Alex and Penny drawing together
Penny sitting in a patch of ramps.  She was stealing cooked ramp greens from my plate just yesterday.
I'm adding this to Simply Sugar and Gluten Free's Slightly Indulgent Tuesdays

April 1, 2011

Airy Oat Waffles (gluten-free, soaked oats)

We managed to survive last week's rehash of winter (Mother Nature, did we really need another 8 inches of snow?) only to have the whole family struck with a new case of the gloppy nose and cough syndrome.  I clearly tempted the fates by thinking that we were done with that garbage.   So I have two kids who haven't really been interested in food other than the extra-garlic fortified chicken broth I've been foisting on them.

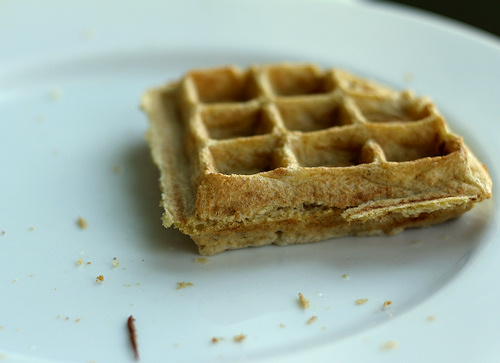
But, I had already soaked some oats and had to do something with them.  Thinking they wouldn't be eaten, I chose to make waffles which would be easier to freeze and reheat in the toaster.  I adapted a pancake recipe but my freezer saw no action because they were devoured as fast as I could make them.  The lone waffle pictured above was all that was left.

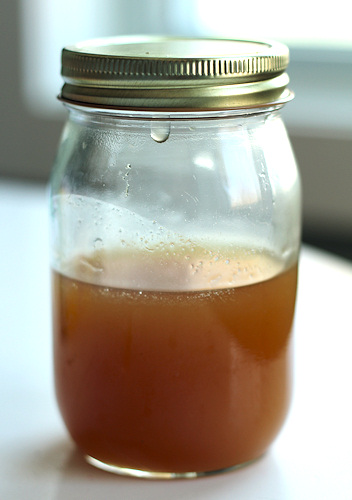
This may have been because they were really that good--light and airy and perfectly crispy on the outside, or it might be due to the fact that I served them with my latest batch of homemade maple syrup.  After losing a huge batch of syrup because I was busy doing schoolwork with Alex (there was smoke, a scorched pan and some tears) I have been much more attentive to my syrup and have made 2 quarts without crystals.  I think that calls for some more celebratory waffles!

Update: I changed the amount of water because I added a little more and liked the result better because they still cooked up great but the batter was easier to blend.  Orginal amount of water was 1 cup.


Airy Oat Waffles
Based on the recipe for Soaked, Flour-Free Oatmeal Pancakes from Nourishing Days
Makes about 4 (8 inch square) Belgian waffles

1 1/2 cup rolled oats*
1 1/4 cup water
1 teaspoon apple cider vinegar
3 eggs
1 tablespoon sweetener of your choice (I used coconut sugar)
1 teaspoon vanilla extract
1 teaspoon baking powder*
1/4 teaspoon baking soda
1/4 teaspoon salt
oil for waffle iron
*gluten-free versions as needed for your situation

-Add the water and vinegar to your oats and soak at least overnight on the counter.
-Separate your egg whites into a clean mixing bowl.   Set aside for now.
-Place the egg yolks, the oats with their soaking liquid and all the other ingredients (except the egg whites) into a blender jar.  Blend until smooth.
-Whip your egg whites to firm peaks, not super stiff or they won't mix as easily.  Fold one third of the whipped whites into your oat mixture and then gently fold the remaining whites.
-Cook according to your waffle iron's instructions (*see my iron at the end of this post.)   Coat the iron with oil before each addition of batter, coconut oil spray works well or brush on melted coconut oil with a pastry brush.
-Serve with a small pat of coconut oil and maple syrup or fruit and whipped coconut cream.

One of my smaller batches of successful syrup, see my previous practice batches at Maple Tapping '11
The sick kids took a bath.  I hadn't planned on letting Penny in but she insisted and Alex was a good sport.
Of course he did stick Lego minifigs in her hair
And he can be such a goof with his crazy expressions!
I'm adding this to Go Ahead Honey, It's Gluten-Free. This month's host is another Maggie who blogs at She Let Them Eat Cake, the theme is Springtime Brunches and I think these waffles would be perfect.
*Notes on waffle irons: I really like the control of a stovetop waffle iron.  They take up way less storage space and can get hotter than most electric models but they do have a learning curve.  The NordicWare model is the one I own but I really want to get the Rome's Cast Iron one to try.
 

March 26, 2011

Penny is One! (gluten-free chiffon cake)

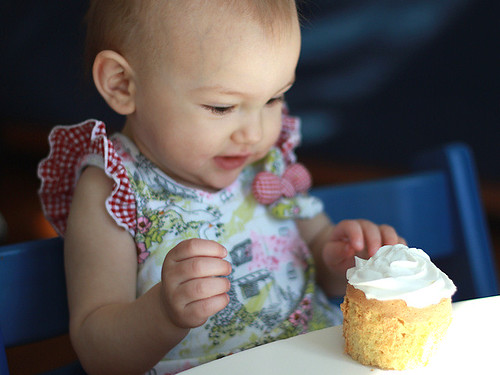
Today was all about Penny.  We woke up in bed together and almost immediately Alex, her older brother, came bounding in.  After a little snuggling Alex snuck off to help John/daddy wrap a present.  Once her gift was opened we rounded out our day with a lot of play time, some picture taking, dress-up, a little baking, a nap (which I also took) and of course singing and the cake ceremony.  Penny was eager to have tastes of frosting and nibbles of cake all morning.  After the actual singing she carefully tasted icing and a little more cake but wanted out of the chair so that she could play once more.  The rest of the cupcake fell to the ground and was quickly devoured by Karmal, our beagle mutt. 
I struggled with choosing a cake to make today but in the end decided to go ahead and give her a little white sugar.  The frosting was decent but nothing to write home about but this chiffon cake came out perfectly.  Ethereally light, just sweet enough and by no means compromised by not having wheat flour in it.  It is a keeper recipe. I plan on making them again for strawberry shortcakes when Michigan finally gets fresh strawberries.  Or maybe I don't have to wait that long and could serve them with rhubarb instead!

Gluten-free Chiffon Cake
This was good frosted but I think it would be best with a fruit compote or sauce or even plain.  Based on the recipe from Chocolate and Zucchini, please take a look there for a wheat flour version.
 Makes 7 cupcakes

4 tablespoons brown rice flour
2 tablespoons potato starch, not flour
2 tablespoons tapioca starch
1/4 teaspoon gluten-free baking powder
a pinch of fine salt
3 eggs
6 tablespoons sugar
1 teaspoon vanilla extract
4 tablespoons coconut oil, melted but not hot*
2 tablespoons water

*Many coconut oils will give a strong flavor.  I like the expeller pressed oils from Tree of Life and Wilderness Family Naturals, both will give you richness but no strong coconut flavor.

-Preheat your oven to 350 degrees F.  Set 7 cups on a baking sheet.  You can choose to use oven-safe mugs lined with parchment or unwaxed paper cups to tear away.
-Sift the brown rice flour, potato starch, tapioca starch, baking powder and salt.  Sift twice more and set aside.
-Separate your eggs.  The yolks should go into a stand mixer bowl with a whisk attachment and the whites into a clean medium-sized mixing bowl.
-Add three tablespoons of sugar to the yolks and beat with the mixer until pale yellow in color, scrape the sides as needed.
-Beat the whites until they reach soft peaks and then start adding your remaining sugar (3T) bit by bit whisking in between each addition.  This can be done by hand with a balloon whisk or with an electric hand mixer.
-Add the vanilla, water and oil to your beaten yolks and sugar and beat to blend together.  Then add in your sifted dry ingredients and mix until smooth.
-Fold in a third of the beaten egg whites and then after they are incorporated fold in the rest of the whites.  Carefully pour the batter into your prepared cups. 
-Bake for 25-30 minutes, until they pass the toothpick test.  Cooking time may vary depending on your choice of cup.
-After removing the cups from the oven invert them on a cooling rack.  When they are cool run a knife around the inside of the cup and give them a shake to release the cakes.

Penny's perfect lips
Lots of attention from Big Bro today

*More 1st birthday photos on this Flickr set
**To see my chiffon cake history check out these Mead Chiffon Cupcakes. I missed the honey flavor but liked the richer cake that the above recipe had. Perhaps a combination of the two is in order?

February 20, 2011

Dog Hill Ducks lay eggs!

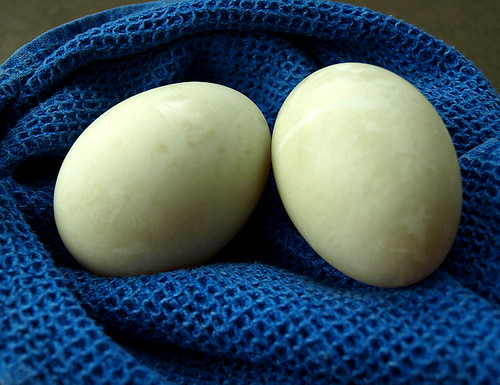
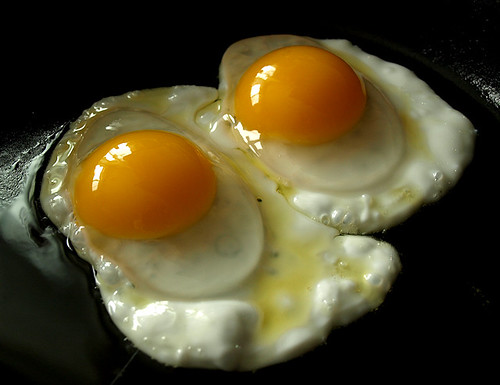
Yesterday we caught the dogs tearing apart a large greenish egg shell.  At first we thought they might have found eggs laid last fall that had been hidden in the woods. Then Perfect, our new border collie, brought us another slightly frozen egg.  We searched around the yard for a nest we thought might have been uncovered by the melting snow but found nothing.  This morning John took a leap of faith and went out to check in the duck house and discovered these two beauties!  We all tasted them and declared them to be the most delicious eggs ever. Just look at the huge, golden yolks!  I made sure to reward the ducks with some fresh greens for their trouble. 

February 18, 2011

Dairy-free Citrus Curd

This month's Spice Rack Challenge featured citrus.  At first I racked my brain over the whole idea of dried citrus rind.  What do you use it for, just in place of fresh?  Why would you buy it in the first place when most citrus fruits are so easy to find year round?   Then I gave up pondering and tried making a almond shortbread cookie inspired by these Orange and Dark Chocolate Scones from Joy the Baker.  I liked the texture but hated the flavor, so I pitched them.

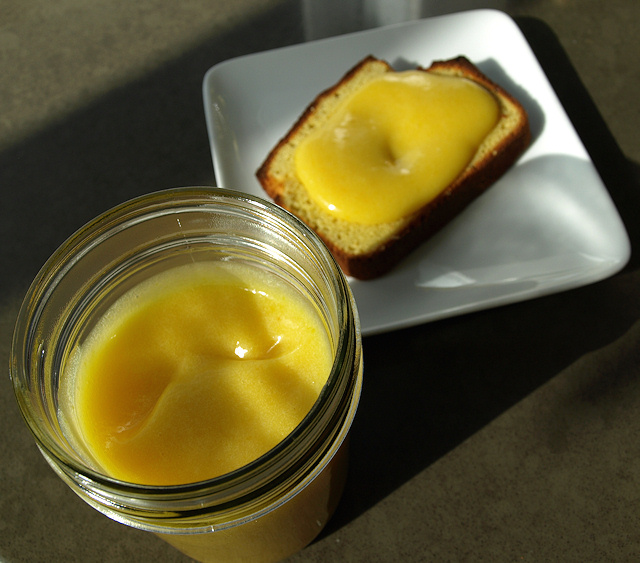
I found myself on the last day to post and all I had in the house was a really sad dried up lemon and two slightly beaten up grapefruit, I never did buy or make any dried peel.  Instead of throwing in the towel I decided to make grapefruit curd.  Lemon curd is so insanely good and addictive that I've never bothered to make a curd with other citrus fruit.  For awhile I made homemade dairy-free lemon curd with Earth Balance margarine but then I found out it is even better made with coconut oil.  Lemon curd sweetened with honey and made with coconut oil is my favorite.  But since grapefruits were what I had, I gave grapefruit curd a try.

Well, I may be won over.  The grapefruit curd was excellent on toast.  For the bread I made this coconut flour bread, except I used coconut oil in place of the ghee and maple butter instead of honey.  It tastes like poundcake without all the crazy sugar and was the perfect foil for the sweet curd. (And now that I'm thinking about it, the coconut bread would be great with a little citrus zest added to it.)  The curd was also great on fruit, try dipping strawberries in it!, and of course straight from the jar.  

Dairy-free Citrus Curd
Thanks to Straight Into Bed Carefree and Dried and Martha Stewart
Makes ~1 1/2 cups

3 egg yolks (egg quality really counts)
zest from 1 fruit
4 tablespoons sugar (or honey)
1/4 cup citrus juice
4 tablespoons coconut oil

-Place your yolks, zest, juice and sugar (or honey) in a small saucepan and cook over medium heat while whisking.
-Cook until the mixture thickens and can coat a spoon.
-Turn off heat and whisk in the coconut oil one tablespoon at a time.
-Strain through a fine metal sieve and whisk again if any oil begins to separate out.
-Cool and use.  Store any remaining in a glass container in the refrigerator. 

January 27, 2011

DB Entremets with Patterned Biscuit Joconde


The January 2011 Daring Bakers’ challenge was hosted by Astheroshe of the blog accro. She chose to challenge everyone to make a Biscuit Joconde Imprime to wrap around an Entremets dessert.

This month's Daring Baker challenge was an exceptionally fun one.  I've wanted to try making patterned joconde, almond sponge cake, since I saw this Love Cake last year.  How cool is it to decorate a cake, WITH cake!  Alas with the wheat free restriction I put myself on for this month and the fact that I was generally steering clear of all grains and sugars, I couldn't revel in the challenge as much as I'd like.

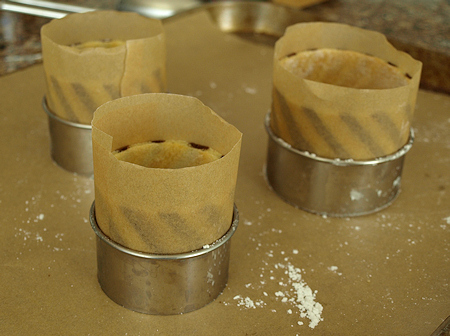
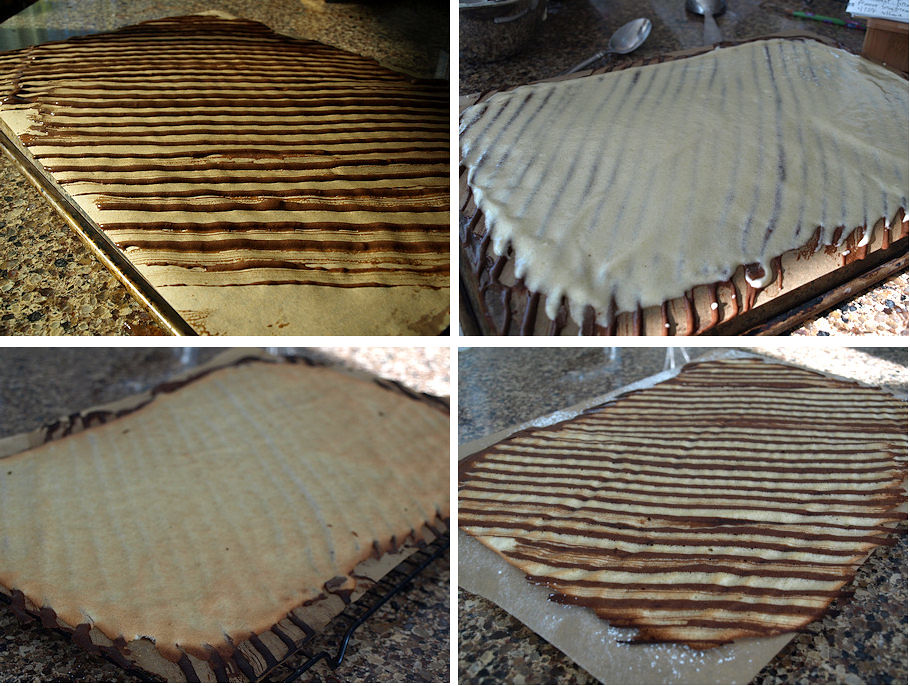
To not tempt myself too much, I made a third of a batch for just a few small individual entremets.  There is so little wheat flour in both the decor paste and the joconde especially in proportion to the amount of eggs involved so I didn't worry too much about the type of flour I replaced it with.  For the joconde I used 2/3 tapioca starch and 1/3 sweet rice flour and I used all tapioca starch for the decor paste.  In place of the melted butter, I used a little Earth Balance margarine. Otherwise these recipes didn't need to be messed with.  To make my pattern I cut a few notches in a piece of cardboard and used it to create diagonal stripes.  I ended up with enough decor paste to prep two sheet pans but only enough joconde batter for one pan.  Well, it turns the decor paste out is pretty much the same as tuile batter so I baked off the second pan to make cookie sticks for decoration.  Both the joconde and the tuile sticks needed significantly less time than the recipe calls for, ~ 5 minutes for the joconde and a little less for the tuiles.  I think I spread it thinner than it was supposed to be and that would account for my altered baking time.

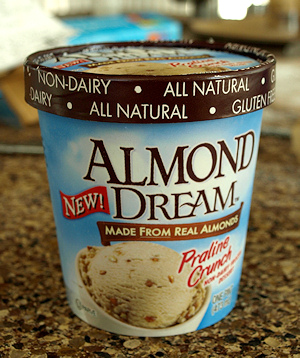
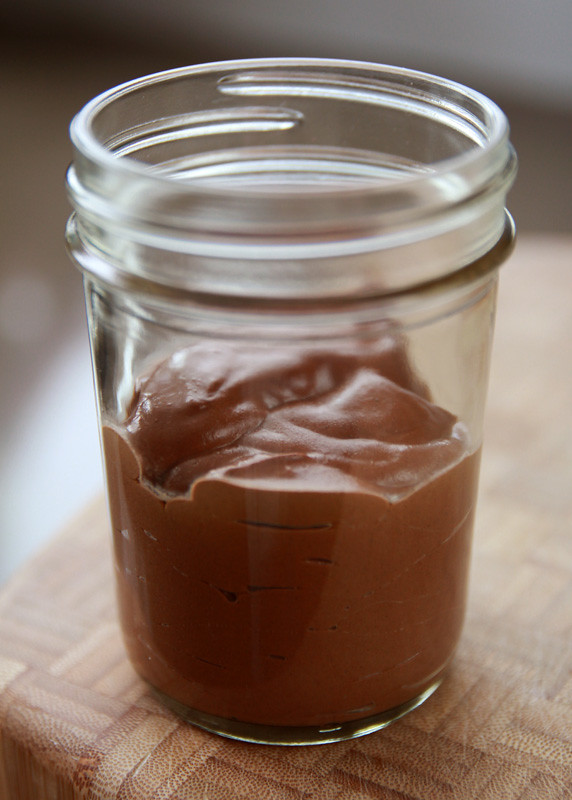
For my fillings, I wanted to go as nutrient dense as possible to not completely blow my plan for the month.  I made this avocado pudding and combined it with soaked cashew creme sweetened with maple syrup. For some texture I soaked/dehydrated/toasted pecans and coated them in chocolate.  I couldn't quite sell Alex on the pudding, though Penny liked it.  So I filled one of the entremets with Alex's new favorite ice cream and a couple of layers of chocolate coated pecans.

In all, this was a fun technique to try out.  Even though I felt a little heady from the sugar in the joconde it was a very tasty cake and so easy to work with.  The possiblities for decorating full sized cakes and making little entremets are endless!  And Alex especially liked the chocolate tuile sticks I made from the decor paste-- perhaps some chocolate ice cream cones should be in his future.  Thanks for the great challenge Astheroshe!
 
Links:
-Check out our host Astheroshe on her blog, accro.  She has the complete recipe along with her spumoni inspired fillings, HERE.  See above for my wheat-free/dairy-free adaptations.
-I filled my entremets with this avocado pudding from Jenn, The Leftover Queen
-I didn't use a recipe for the cashew creme.  I just took well soaked cashews and blended them with a little water and a touch of maple syrup and vanilla extract until they were whipped.
-For a fun example of this technique see Gesine Bullock-Prado's Love Cake.  I really loved her book, Confections of a Closet Master Baker.  It's a must read for food lit lovers of the baking persuasion.  And she has a new cookbook called Sugar Baby due out in April, which looks very cool.
-As always, if you'd like to join in the baking fun visit the Daring Kitchen and look to the Daring Baker Blogroll for other examples of this technique.

The decor paste, decor covered in joconde batter, baked patterned joconde before flipping to reveil the pattern and after
Patterned joconde lined molds
Alex's ice cream filled entremet
His new favorite ice cream, Almond Dream Praline Crunch