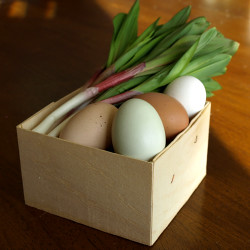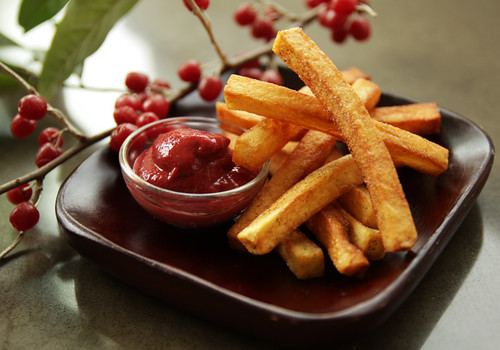
Showing posts with label Foraging. Show all posts

October 30, 2011

Autumnberry Ketchup

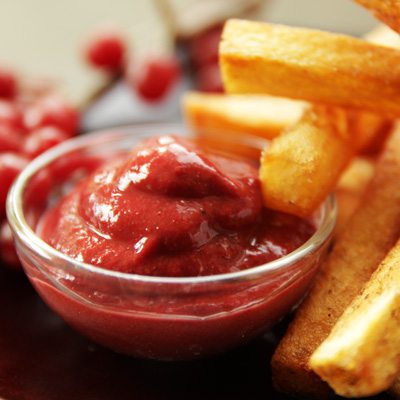
For several years now I've been all talk, claiming that I'd try to make something other than jam and fruit leather with the plentiful autumn olive berries, aka autumnberries, we have around our property.  Well this year the Spice Rack Challenge, mace, gave me a second reason to push myself to make some ketchup.  Mace if you don't know is the outer covering of nutmeg and is similar in flavor.  Though it is sometimes found in sweet recipes I find mace more suited to savory dishes.  Seasoning for pot roast or a pinch added to faux cheese sauce (made with nutritional yeast) are two of my favorite ways to use mace.  And you often find it in the spices in ketchup.  

I based my experimenting on a cherry ketchup recipe I found online from Jose Andres.  After making one batch with the exact same spice amounts I found his recipe a little too assertive and made some adjustments.  I love the resulting milder condiment.  It is very similar in taste to good store bought ketchup though my son Alex still found it too "mustardy".  I guess a few more batches are needed to fit his palate.  This shouldn't be a problem, we have enough berries on our land to fill a pool!
Perfect with homemade fries
(cooked in beef tallow, from my Gallagher Farms steer)
Autumnberry Ketchup
Based on several basic ketchup recipes online and this cherry ketchup from Jose Andres.
Makes ~1 1/2 cups

24 ounces of autumnberry pulp* (~3 cups)
1 teaspoon whole mace (or 1/3 teaspoon ground)
1 teaspoon granulated onion
1 teaspoon whole black peppercorns
1 teaspoon ground dry yellow mustard
1 inch piece of cinnamon stick
1/2 teaspoon whole allspice berries
5 whole cloves
1 teaspoon kosher salt 
1/4 cup apple cider vinegar

-Add your prepared autumnberry pulp and the salt and spices to a saucepan.  Bring to a simmer and simmer for 15 minutes.
-Add the vinegar and cook until thick enough to coat the back of a spoon.
-Strain through a fine mesh strainer to remove the whole spices.  Store in the fridge until use.

*Instructions for autumnberry pulp:
Rinse and drain the berries.  Place in a pot with a tiny amount of water and cook covered over medium heat until the flesh is loose and the seeds squish out easily.  Strain the pulp either with a chinois, mesh strainer or a food mill.  I prefer the food mill.  Chill until use.  Be aware that the pulp may separate into the red skin material and a milky liquid.  If it does, stir it well before measuring for a recipe.

More autumnberry recipes
Autumn Olive Jam and Leather
Spiced Autumnberry Jam
*I also found a good article on mace at the Kitchn.  It has a great photo of mace covering a whole nutmeg.  
**Updated to add some more information about autumnberries/autumn olive:
Autumnberries are also known as autumn olive (scientific name: Elaeagnus umbellata) and are found in various places across the US, most heavily in the mid-west and New England. They are prevalent in my part of Michigan and thrive in nutrient poor, dry, disturbed areas. Here is a good link with pictures and information on how to identify the plants: Information on habitat and identification of autumnberry (aka autumn olive)

I've been busy sewing more this month. I just finished this jacket for Penny. She has a major Hello Kitty addiction.
And is also fond of apples.
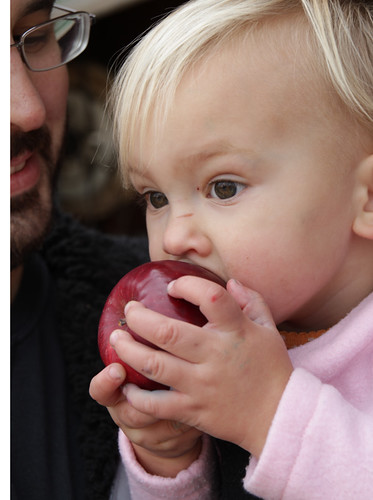
We went to Rennie Orchards.  The kids loved their teepee.
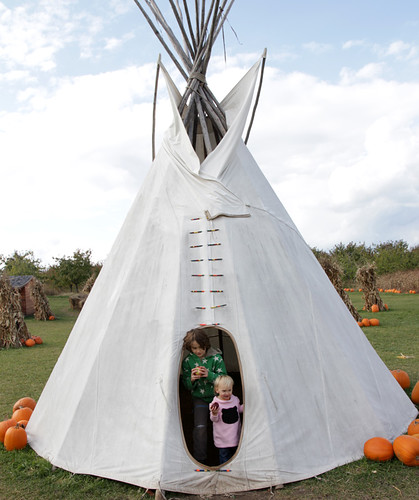
Any hike means eating a ton of autumnberries off the bushes that are everywhere.
Alex's new photo expression, *maybe* it is a slight improvement over the tongue out and other crazy faces of the past months.

I added this post to the Make Your Own Mondays 

April 1, 2011

Airy Oat Waffles (gluten-free, soaked oats)

We managed to survive last week's rehash of winter (Mother Nature, did we really need another 8 inches of snow?) only to have the whole family struck with a new case of the gloppy nose and cough syndrome.  I clearly tempted the fates by thinking that we were done with that garbage.   So I have two kids who haven't really been interested in food other than the extra-garlic fortified chicken broth I've been foisting on them.

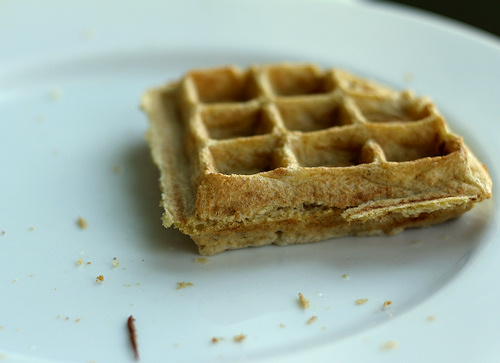
But, I had already soaked some oats and had to do something with them.  Thinking they wouldn't be eaten, I chose to make waffles which would be easier to freeze and reheat in the toaster.  I adapted a pancake recipe but my freezer saw no action because they were devoured as fast as I could make them.  The lone waffle pictured above was all that was left.

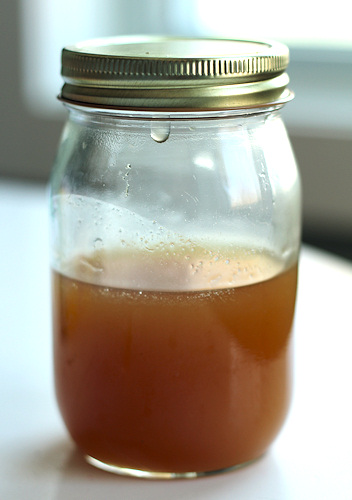
This may have been because they were really that good--light and airy and perfectly crispy on the outside, or it might be due to the fact that I served them with my latest batch of homemade maple syrup.  After losing a huge batch of syrup because I was busy doing schoolwork with Alex (there was smoke, a scorched pan and some tears) I have been much more attentive to my syrup and have made 2 quarts without crystals.  I think that calls for some more celebratory waffles!

Update: I changed the amount of water because I added a little more and liked the result better because they still cooked up great but the batter was easier to blend.  Orginal amount of water was 1 cup.


Airy Oat Waffles
Based on the recipe for Soaked, Flour-Free Oatmeal Pancakes from Nourishing Days
Makes about 4 (8 inch square) Belgian waffles

1 1/2 cup rolled oats*
1 1/4 cup water
1 teaspoon apple cider vinegar
3 eggs
1 tablespoon sweetener of your choice (I used coconut sugar)
1 teaspoon vanilla extract
1 teaspoon baking powder*
1/4 teaspoon baking soda
1/4 teaspoon salt
oil for waffle iron
*gluten-free versions as needed for your situation

-Add the water and vinegar to your oats and soak at least overnight on the counter.
-Separate your egg whites into a clean mixing bowl.   Set aside for now.
-Place the egg yolks, the oats with their soaking liquid and all the other ingredients (except the egg whites) into a blender jar.  Blend until smooth.
-Whip your egg whites to firm peaks, not super stiff or they won't mix as easily.  Fold one third of the whipped whites into your oat mixture and then gently fold the remaining whites.
-Cook according to your waffle iron's instructions (*see my iron at the end of this post.)   Coat the iron with oil before each addition of batter, coconut oil spray works well or brush on melted coconut oil with a pastry brush.
-Serve with a small pat of coconut oil and maple syrup or fruit and whipped coconut cream.

One of my smaller batches of successful syrup, see my previous practice batches at Maple Tapping '11
The sick kids took a bath.  I hadn't planned on letting Penny in but she insisted and Alex was a good sport.
Of course he did stick Lego minifigs in her hair
And he can be such a goof with his crazy expressions!
I'm adding this to Go Ahead Honey, It's Gluten-Free. This month's host is another Maggie who blogs at She Let Them Eat Cake, the theme is Springtime Brunches and I think these waffles would be perfect.
*Notes on waffle irons: I really like the control of a stovetop waffle iron.  They take up way less storage space and can get hotter than most electric models but they do have a learning curve.  The NordicWare model is the one I own but I really want to get the Rome's Cast Iron one to try.
 

March 21, 2011

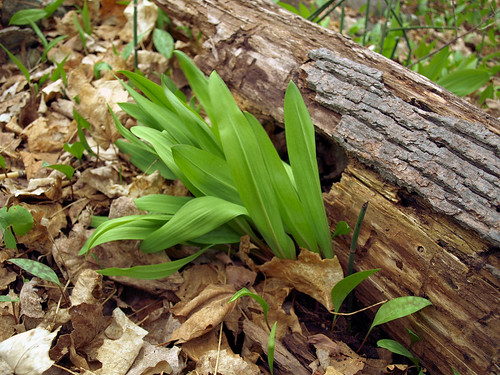
In anticipation of spring-- and Ramps!

Michigan's Spring has just barely poked her toe out from under the blanket of winter.  So when Shayne of fruitcake or nuts asked us to post about our favorite spring food it all had to come from memory.  As much as I'm enjoying tapping our maple trees what I really long for is the first green things sprouting up and one of the first is ramps!

In past years ramps have become something of a foodie cliche because of their rabid fans, but I think most of the adoration is well deserved.  Fresh and green with that pungent combined garlic/onion flavor, who could hate this gift that pops up from under the leaf litter.  My favorite part is the leafy greens.  Like garlic scapes, they have a verdent flavor that I love.  Here is my favorite quick meal to make with them.

Ramps and Beans 

Rinse and spin or pat dry a bunch of ramps.  Chop your ramp stems and bulbs separately from your greens.  Add the chopped bulbs and stems to a pan with a couple of glugs of good olive oil and salt and pepper.  Cook until softened.  Add in about two cups of cooked white beans (navy or cannelini) and cook to warm up the beans.  Add in the ramp greens and cook just until they are tender.  Add a splash of lemon juice, more olive oil and more salt and pepper to taste.  Great served with a fried egg on top or spooned onto crusty bread.

*See the other favorite spring foods on the group blog for Michigan Lady Food Bloggers at the end of this month.
**I'll also be remaking these Buckwheat Crepes with Ramps this year, but this time around I'm going to hunt down a wheat-free all buckwheat crepe recipe. 
***And since I have no pictures of the food, here's a little video of Penny pushing around her toy shopping cart.  (Please ignore the voice over at the end contributed by her annoying older brother.)

March 20, 2011

Maple Tapping '11

This is our inaugural year of maple syrup production on Dog Hill.  I purchased a kit from Tap My Trees last year but due to my very pregnant state at the time and John's desire to hurry and finish a project before the birth it never happened.  So the sap buckets collected dust for a year.

Alex was very eager to start and so we put in the taps at the beginning of this month.  In the first few days we got a small amount, enough to make a 1/4 cup of maple sugar, and then the temperature dropped.  Finally, this past week was wonderfully warm and the sap was flowing.  Unfortunately, I'm ridiculously stubborn and wanted to try judging the doneness of the syrup by look instead of being smart and getting out a thermometer.  Hence the three jars above of crystallized maple goo.

It doesn't matter though, it's been a tremendously fun learning experience.  In all we've collected enough maple sap to make over three pints of goo, which I think would translate to a little more syrup if I could master the last half an hour of sap boiling.  Now if I can just keep the kids (and myself) out of these jars so they last a little while, I may cook with some and use the rest to make maple sugar candies or some maple candied ginger.  
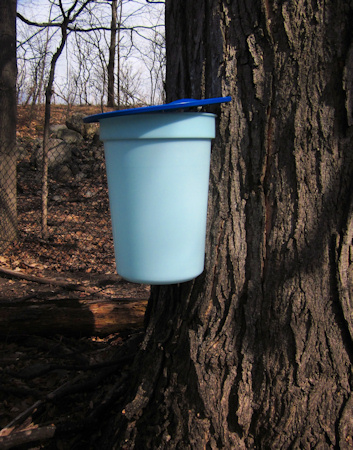
One of our sap buckets
Penny likes peeking
Perfect was helping too
I received no compensation from Tap My Trees but I do get some amount if you purchase through the Amazon links below.

November 27, 2010

DB Autumnberry Crostata

The 2010 November Daring Bakers’ challenge was hosted by Simona of briciole. She chose to challenge Daring Bakers’ to make pasta frolla for a crostata. She used her own experience as a source, as well as information from Pellegrino Artusi’s Science in the Kitchen and the Art of Eating Well.
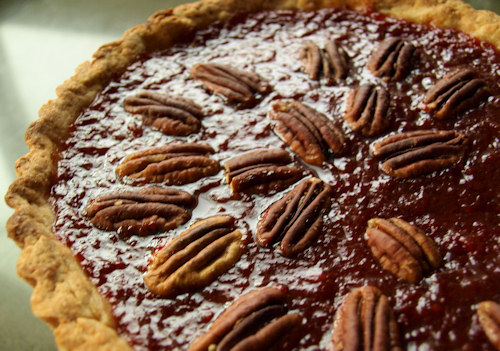
Ever in search of a better pie crust I was trilled to try out this month's recipe for pasta frolla, Italy's contribution to the pastry dough world.  I made our host's variation that adds in coconut flour and whole wheat pastry flour to supplement the all-purpose flour.  For the fat I used a combination of two thirds solid extra virgin coconut oil with one third Earth Balance margarine.  I filled my tart with the spiced autumnberry jam I made earlier in the month.  Then because Alex and I nibbled too much on the scraps, which were very tasty, I added some pecans on top for crunch and decoration.  It was a simple but tasty tart that I brought along to a Black Friday lunch with my parents.  Thanks for the challenge Simona!

Links:
-Go to our host Simona's blog briciole for her two pasta frolla recipes and her aunt's pastry cream recipe.
-Simona used the recipes for pasta frolla from the book Science in the Kitchen and the Art of Eating Well, follow the link to read it on Google books.
-Come across any autumn olive berries (autumnberries) still left on bushes in the woods?  Make a batch of this jam.  The berries are even sweeter after the frost. 
-Visit the Daring Kitchen and see more crostatas made this month by browsing the Daring Baker Blogroll.

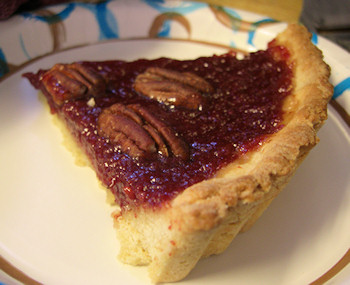
A slice of autumnberry crostata
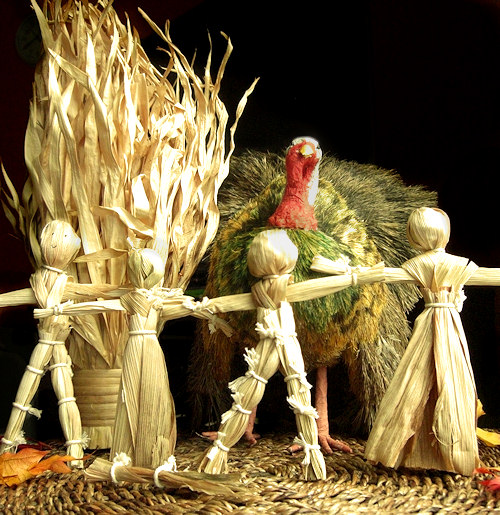
 This Thanksgiving my son Alex and I made corn husk dolls using husks from our homegrown Bloody Butcher corn.  The corn itself is drying for our next project of grinding it into cornmeal. 

November 13, 2010

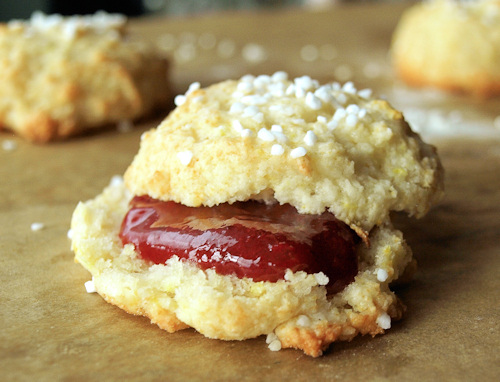
Spiced Autumn Berry Jam and Vegan Lemon Yogurt Scones

The wild autumn berries on our land have been ripe for a few weeks now.  Autumn berry is a more attractive common name I found for autumn olive berries, scientifically known as Elaeagnus umbellata.  We have a ton of these invasive shrubs on our property and while they make for tasty snacking on hikes they shine the most in jam and fruit leather.

My son Alex and I picked a big load and I decided to spice up, literally, one batch of this year's jam.  Since I find the berry's flavor similar to cranberries, I chose to flavor them like my favorite cranberry relish.  This relish, which I typically make for Thanksgiving, includes oranges, cinnamon and ginger.  I also was craving fruit and black pepper together so I gave the jam a little extra heat with freshly ground black pepper.  To try out some of the jam I made lemon scones with coconut milk yogurt.  The scones were a special request from Alex and a great match for the jam.

For pictures of autumn berry bushes and more information see my first post on autumnberries, Autumn Olive Jam and Fruit Leather or read more about autumn berries and their controversal status.  Don't have access to autumn berries?  Buy some Michigan made jam from Food for Thought.

Spiced Autumn Berry Jam
Makes ~9 cups

5 cups seedless autumn berry pulp*
1 tablespoon freshly grated ginger
2 teaspoons finely grated orange zest
1/2 teaspoon ground cinnamon
1/2 teaspoon fresh ground black pepper
7 cups sugar
1 box SURE.JELL Fruit Pectin

*To make the berry pulp:  Pull the berries from their stems, wash and drain them.  Add them to a pan with 1/2 cup of water for every 4 cups of berries and cook over medium high heat until the seeds are separating from the fruit flesh.  Use a food mill to remove the seeds.  Cool and store the prepared pulp in the fridge until needed.  Note that the pulp will separate into a milky liquid with red particles when cooled in the fridge. You will probably need at least 8 cups of berries to get the required 5 cups of pulp.

-Follow the standard SURE.JELL Directions for Berry Jam but add the ginger, zest, cinnamon and pepper along with the pectin at the start of the recipe.

Lemon Coconut Milk Yogurt Scones
Based on this Orange Yogurt Scone recipe from Taste of Home 
Makes 8-10 mini scones

1 cup flour
1/4 cup sugar
1 teaspoon baking powder
1/4 teaspoon baking soda
1/4 teaspoon salt
1 1/2 teaspoon grated lemon zest
3 tablespoons coconut oil, solid
6 tablespoons plain So Delicious Coconut Milk Yogurt
1-2 tablespoons pearl or coarse sugar, optional

-Preheat your oven to 400 degress F and line a baking sheet with parchment paper.
-Sift or whisk together the flour, sugar, baking powder, baking soda, and salt.  Then after that is whisked or sifted well add in the zest and stir or whisk to evenly distribute.
-Cut in the solid coconut oil with a fork or pastry cutter until there are no pieces of solid oil larger than a pea.
-Add the yogurt and stir in just until the dough comes together.
-Scoop with a medium disher (mini ice cream scoop) onto the lined baking sheet and press down the mounds slightly.  Or you can gather the dough into a flattened circle and cut into wedges.
-Sprinkle over the pearl or coarse sugar.
-Bake for ~12 minutes until light golden brown.

Penny came along for the berry picking.
Later that evening I found a bunch of berries that had fallen in her hood and gotten smashed, eww!
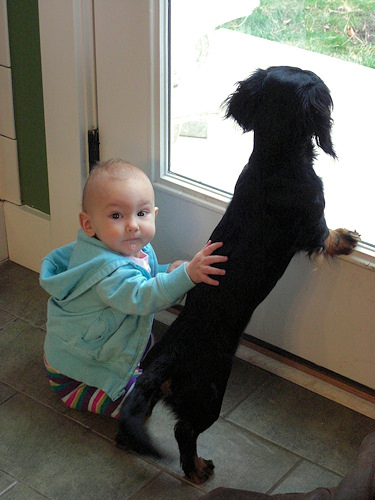
She and Fritz love to look out the doors and windows together.
P.S. Thanks to all those who are rooting for me in the Iron Foodie challenge. I got in! The box of mystery ingredients should be arriving early next week. Alex and I can't wait to see what's inside!

June 27, 2009

DB Bite-sized Bakewells w/Autumn Olive Berry Jam

The June Daring Bakers' challenge was hosted by Jasmine of Confessions of a Cardamom Addict and Annemarie of Ambrosia and Nectar. They chose a Traditional (UK) Bakewell Tart... er... pudding that was inspired by a rich baking history dating back to the 1800's in England.

This month represents several Daring Baker firsts for me: my first Bakewell tart (a first taste as well as my first ever baked) and my first challenge completed on the posting day. Distractions from the new house still have me disconnected from the blogging world. We were lucky enough to close a deal on our old house in the Metro-Detroit area--which was no small feat in this economy! This lead to a big clean out and our second Uhaul move with the furniture and flotsam we left for staging. Moving is exhausting work but more enjoyable hard work has been occupying me in my newly built vegetable garden!! It's off to a late start and so it's hard for me to spend even a single day lit hour not poking around in it. In Michigan, if you blink too long you can miss summer completely.

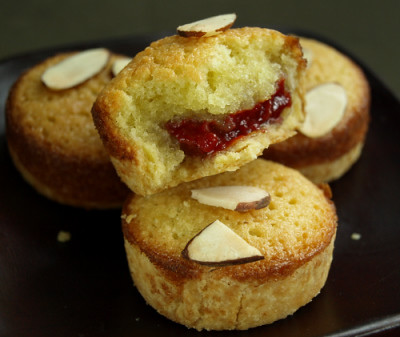
I was very interested in the Bakewell tart/pudding. Most British desserts are an enigma to me and this was one I hadn't even heard of before. I love working with almond meal and have been sneaking it into quick breads and cookies to up their nutritional density. How could I resist the chance to make a tart that revolves around almonds? A Bakewell tart requires jam but I only just bought strawberries to begin preserving this morning so I used the last half of the final jar of autumn olive jam from last year.

Since I didn't have a use for a whole tart today, I made mini tarts using a mini cheesecake pan (I used it for tarts here as well). I halved the pastry dough to insure I would have enough, rolled it out and cut 2 1/2 inch diameter circles for each compartment. I only made a third of the frangipane and used 1/3 cup of jam which worked out to a little more than a teaspoon of jam per tart and a little over a tablespoon of frangipane topping each. My divisions created a full 12 tarts and each was a perfect 2-3 bites. I loved how light both the pastry and the frangipane were and the touch of almond extract in both was lovely. I will definitely be digging out that bottle of extract more often. I would have liked a little more jam for more tart contrast but I think the autumn olive berry jam color looked great in these.

I do have a few things to post because it would be a crime to not use my new kitchen but I can't bear to sit at the computer when there are other things to be done. Maybe we'll finally get some rain...or fall and winter will come eventually and I'll have more time on my hands.

Links:
-Our hostesses this month are Jasmine of Confessions of a Cardamom Addict and Annemarie of Ambrosia and Nectar
-Visit the Daring Kitchen to join in and take a look at the Daring Baker Blogroll for the other versions of this month's recipe.
-The complete recipe can be found here. Due to my son's dairy allergies I replaced the butter called for with Earth Balance margarine. I also downsized the recipes as described above and cut the baking time down to 17 minutes.

My newly built and planted vegetable garden
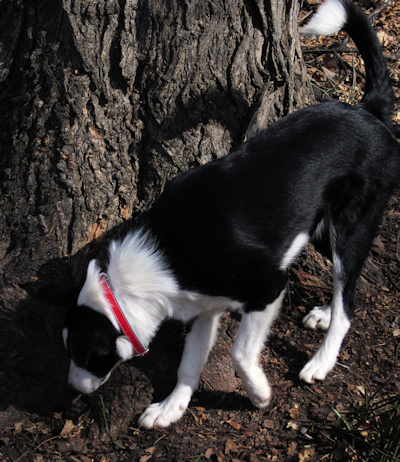
Abbie gets supervised outings. She likes sniffing around for chipmunks.

October 27, 2008

Autumn Olive Jam and Leather

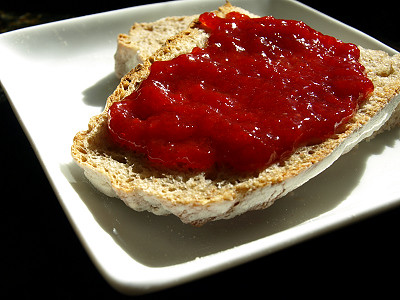
Elaeagnus umbellata (autumn olive) is a ubiquitous invasive species in Michigan but up until this year I had no idea it was edible. Then I came across this post on a blog called Tea and Food that mentioned autumn olive fruit leather. I knew immediately that I had to harvest some of the numerous bushes on our land and I've been waiting for them to ripen ever since. Alex has loved knowing there is something to nibble on while walking in the forest and has been taste testing them for me. Unfortunately he's as bad as the birds for spreading the seeds since he spits them out as he walks. I was surprised by how tasty they were the first time I tried them. The berries are tart and vaguely cranberry-like. My husband John thought they tasted like tart grapes. Finally them seemed ripe enough on our last trip so I picked a couple of bags and brought them home.
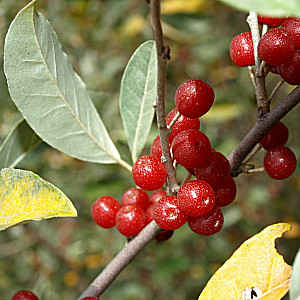
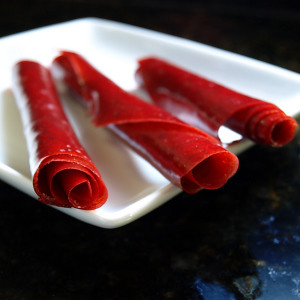
When I got home I looked around online for recipes. There was one blog called Dreams and Bones that had great information about using autumn olive berries. The writer Leslie had recipes for both jam and fruit leather. I rinsed and cooked my berries with a little water per Leslie's instructions. Then I put the pulp through a food mill to separate the seeds. I only had a packet of full sugar sure-jel left from all of my jam and jelly making this fall so I used it and the berry jam instructions included in the package for my jam. For my fruit leather I decided to sweeten the pulp with all honey instead of stevia and honey. I had some local raw honey that was light in flavor so I added just enough to balance the tartness of the berries, about 1/4 cup of honey for 2 cups of pulp. I used my food dehydrator but there is an oven dried method on Dreams and Bones that I'll link to at the end of this post.

The fruit leather is wonderfully chewy, tangy and sweet! I like Leslie's idea to cut up the leather into small bits and use them in place of dried cranberries in salads. I think the same bits would be great in bread or cookies as well. The jam is equally good. It's a beautiful, rich red color. In my reading I found out that autumn olive berries can have as much as 17 times the amount of lycopene as tomatoes and it really shows in the color of the jam. I'd love to pick some more berries and try them in savory recipes. I think they would be great in a barbecue sauce. I should have plenty of time when we move to the new house so it's probably a project for next year. The only problem is that I might get attached to these tasty invasives. I'll have to spend lots of time looking at plant and seed catalogs for natives to replace them with...
A berry laden branch of Elaeagnus umbellata (autumn olive) Washed berries ready to be smashed and cookedFinished rolls of honey sweetened fruit leather

Dreams and Bones for the recipe for fruit leather and a link to a low-sugar jam recipe
Tea and Food
Autumn olive wine recipe
Wikipedia Article on autumn olive

April 16, 2008

Buckwheat Crepes and Ramps

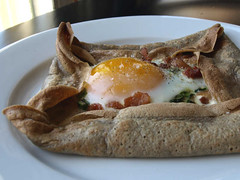
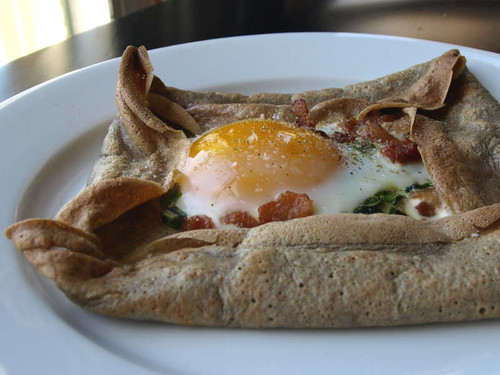
We went up north this past weekend and visited our property. (If you are interested, I'm writing about our move to northern Michigan at Building on Dog Hill.) I took a walk looking for signs of spring and found several patches of ramps! The ramps (also known as wild leeks) were still small but I couldn't resist bringing some home. I've used them a couple of times instead of green onions in my go-to coconut vegetable curry. But, I also came home with local, free range eggs from Mayfair Farm. The eggs were a beautiful clutch of various sizes and colors. Well, I figured I had the pungent, foraged ramps and flavorful, local eggs and I had to find a novel way to put the two together. After some searching I found a buckwheat crepe recipe on Epicurious. Their suggestion was to cook an egg inside the crepe with either bacon or spinach. I made the batter dairy-free by substituting soymilk for the cow's milk, Earth Balance for the butter and adding a little toasted sesame oil since browned Earth Balance does NOT taste like browned butter. Then, I filled the crepes with bacon, egg and ramps and they were great! Alex had a couple of bites of the eggy crepe but didn't care for the one bite he got with a lot of ramps. Then, he gobbled up a plain crepe spread with Earth Balance and sprinkled with cinnamon sugar. We'll definitely make these crepes again with different fillings.

I'm entering the image to the right in the Art You Eat: Go Local event. Visit and see all the local food submissions at the beginning of May.
Buckwheat Crepes with Egg, Ramps and Bacon
Makes 8 crepes
Batter:
3/4 cup plus 1 tablespoon buckwheat flour
1/3 cup all-purpose flour
1/2 teaspoon salt
1 tablespoon margarine, melted
½ teaspoon toasted sesame oil
1 1/2 cups soymilk
3 eggs
Filling:
8 eggs
4 slices thick-cut bacon
1 tablespoon olive oil
6 ounces of ramps (12-14 ramps)
Salt and pepper
Oil or margarine and a non-stick frying pan or crepe pan

-First make the batter. Sift together the dry ingredients. In a separate bowl mix together the wet ingredients. Add the wet ingredients to the dry and beat until smooth. Cover and chill the batter for 30 minutes.
-Turn on broiler and place an oven rack in the top position. Lay out a sheet pan or cookie sheet.
-Chop bacon and cook until crispy, drain and set aside. Slice and wash the ramps keeping the green tops separate from the white bottoms. Cook the ramp bottoms in a pan with the olive oil over medium low heat. When the bottoms are softened add the green tops and toss. Remove the pan from the heat and season with salt and pepper to taste.
-Make a crepe by heating the non-stick skillet over medium high heat. When the pan is hot coat the inside with oil or margarine. Dump a ¼ cup of crepe batter and immediately swirl to coat the pan evenly. Cook until the edges dry out and the top is mostly set. Loosen the crepe around the edges with a spatula and then flip.
-As soon as it is flipped, add 1/8th of the cooked ramps in the middle of the crepe and crack an egg on top. Sprinkle on 1/8 of the bacon and flip up the sides of the crepe to form a rough square with the egg exposed in the center. Slide the filled crepe out of the pan and onto the sheet pan. Repeat 8 more times.
-Place the sheet pan under the broiler and cook until the egg whites are set (30 seconds to 1 minute). Plate with salt and freshly ground black pepper on top.
http://www.grouprecipes.com/49542/buckwheat-crepes-with-egg-ramps-and-bacon.html