Showing posts with label Recipes: mushrooms. Show all posts

April 10, 2011

Spring in the air and gluten-free pizza in the oven

The pizza pictured above is my very first attempt at a gluten-free/dairy-free pizza and it was damn good.  I used the recipe for Gluten-Free Crusty Boule dough from Healthy Bread in Five Minutes a Day.  With help from the directions in the book I kept my crust thin, patting it out with floured hands instead of rolling and baked it at 500 degrees F for about 10 minutes.  But as good as that pizza was the time spent outside today was even better.

A few hours in the afternoon, bracketed by thunderstorms in the morning and early evening, the weather was perfect--just enough sun and as warm as a midsummer day.

It began innocently enough.
We thought it would be fun to let Penny try out her walking feet in the grass.
She is still unsure about walking on uneven ground and completely refuses to walk in shoes.
Alex wanted to make a hose river but his sister didn't think it was a good idea.
Her fears were validated when he put mud on her foot.
Things looked considerably better after Abbie showed up.
And all was forgiven once the mud was wiped off.
We left Alex to his imagination.
There were mumblings about the mighty Mississippi.
And we did some daydreaming of our own in the garden. 
I don't know what Penny is thinking but I'm picturing pumpkins and lots of kale.
Karmal came with us to the garden.
But Perfect stayed to watch the river.
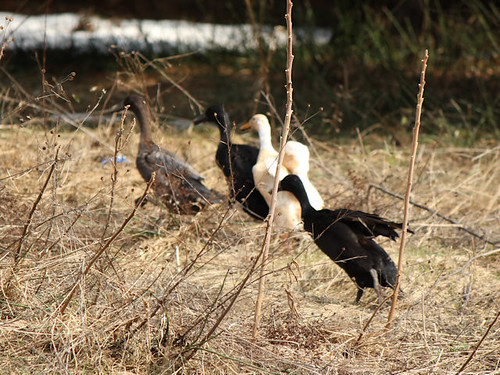
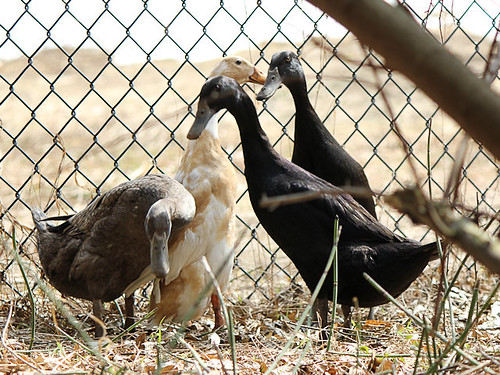
We tracked down the ducks, who seemed a little skittish.
They finally settled down in the white pine forest in our valley.
Penny and I relaxed under the pine boughs on the soft fallen needles.
The weedy equisetum growing there kept Penny entertained.
And Fritz acted as our guard dog.
It's a good thing we had him because look what came after us!
We had nothing to fear, except getting dirty, it was only Alex.
Thunder and a chill in the air chased us indoors where we told a sleepy Nelson all about our adventure.
And then we had some leftover pizza.

January 10, 2010

Pak Choi and Squash Hot Pot

Ah my beloved DVR, how I love that you allow me to catch the five to ten minutes of valuable information left in the hour long debacle known as the Martha Stewart Show. Without you, I wouldn't have been able to sift through the product plugs and celebrity prattle and I would have missed the segment featuring Japanese hot pot meals from this week.

This gave me a new way to use up the pak choi I've been struggling with from my farm share. Plus, I used up local shiitake mushrooms that I dried this fall and butternut squash left from my garden. Hot, comforting and ridiculously fast and easy to make, this hot pot has me adding yet another cookbook to my Amazon wish list.

Pak Choi and Squash Hot Pot
Serves 3-4
Based on the recipe for Kabocha Pumpkin Hot Pot from "Japanese Hot Pots: Comforting One-Pot Meals" by Tadashi Ono (Note: these adaptions are made to fit what's in my pantry and what needs to get used up)

8-10 dried shiitake mushrooms
1-2 pieces of kombu*
1/2 cup soy sauce or tamari*
1/2 cup mirin*
8 oz (~2 cups) diced, peeled winter squash (butternut, kambocha, etc)
6 oz cubed firm tofu
3-4 cups pak choi, chopped into 1-inch pieces
4-5 green onions, chopped into 1-inch
1 (1.6 oz package) of rice noodles or raman noodles, like these from Thai Kitchen
1 cup boiling water + 4 cups water

*These ingredients are available from the Michigan-based company, Eden Foods, though of course no one is harvesting kombu anywhere near here.

-Cover the mushrooms with a cup of boiling water and let set for 5-10 minutes. You could soak them in all of the cold water overnight but who thinks ahead like that?
-Remove the mushrooms from the hot water, trim the stems and cut any large mushrooms in half. Add the mushroom water to 4 more cups of water, the kombu, soy sauce and mirin in a heavy soup pot, like an enameled cast iron pot. Bring to a boil.
-When the broth is boiling, add the squash and mushrooms and return to a boil. Turn the heat to medium-low and cook covered for 5-6 minutes.
-Uncover and add the tofu, pak choi, green onions and noodles. Push the ingredients into the broth, cover and turn the heat up to medium-high. Cook for ~3 more minutes or until the noodles are done. Remove the kombu before serving (or see how long your dinner companions will chew on it, LOL!)

Notable variation:
When I made this earlier this week I didn't feel like noodles so I made some sticky rice, IE unseasoned sushi rice. Then I poured the finished soup with the vegetables over a pile of the rice in a large bowl. It was as good or better, depending on your mood.

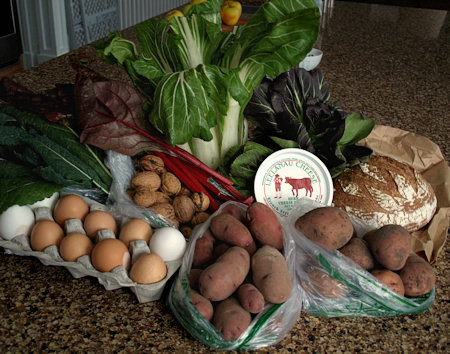
This week's 9 Bean Rows winter farm share: (clockwise from top middle)
white pak choi, purple pak choi, Leelanau Cheese fromage blanc, wheat boule, potatoes, more potatoes, eggs, lacinato kale, walnuts and Swiss chard
Extra link: You can watch the Martha Stewart Show segments on hot pots, HERE

November 29, 2009

Butternut Squash and Brown Rice Porridge (congee-style)

Before diving into making Christmas sweets I needed some detox food to recover from my Thanksgiving indulgences. My mother made a wonderfully simple squash and rice soup for our Black Friday brunch and I couldn't resist playing with the idea when I got home. I used up one of my smaller butternut squash with short grain brown rice. After they cooked together to make a creamy porridge I topped it with green onions, fresh ginger, soy sauce and fried locally-grown shiitake mushrooms. It was savory and comforting and was the perfect stomach healing food I craved. I also tried out a variation with brown sugar and Earth Balance margarine for my son. Alas, he objected to the squash, which is usually a favorite vegetable of him. I thought it was pretty tasty myself but not as appealing as the savory version. Here is what I did:

Butternut Squash and Brown Rice Porridge
Based on this recipe for Yum Yum Brown Rice Congee
Makes 4 servings

1/2 cup short brown rice
4 cups water
1/2 teaspoon salt
1 1/2 cup peeled and diced (1/2 inch dice) butternut squash, other squash or pumpkin
toppings (suggestions listed at the end)

-Add the brown rice, salt and water to a small soup pot. Bring to a boil, stir and then reduce the heat to a strong simmer. Cook covered for 1 to 1 1/2 hours, stirring occasionally.
-Add in the squash and bring back to a strong simmer. Cook covered for another 30-45 minutes until the squash is tender.
-Top with your desired toppings and serve warm.

Optional toppings:
-sliced green onion, fried shiitake mushrooms, freshly grated ginger, soy sauce, chili oil
-brown sugar and butter (or EB)
-if I had some I would have tried some kim chee and a poached egg or maybe

Another variation with brown sugar and Earth Balance margarine
(real butter or a splash of cream would be even better if you can have them)
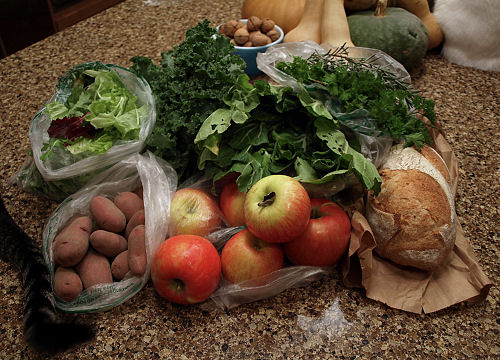
This week's 9 Bean Rows share: (clockwise from top)
bok choi, parsley and rosemary, rye bread (my favorite), apples, potatoes, salad greens and kale
*note the cat tail and rear, they were eager to be fed
It's been ages since I posted a shot of Abbie.
She likes to annoy me by sitting on the counter, where she isn't supposed to be, and chewing on the squash stems.

March 13, 2009

Spiced Braised Red Cabbage and Glazed Corned Beef

Despite my denial (and complaining) winter is not yet over in Michigan. I could hear the snowflakes mocking me as they fell yesterday. Well I just had to make some wintery food and prove that I can take it no matter how long it lasts, even though I'm bluffing. In honor of St Patty's Day I had a corned beef brisket in the fridge. I was excited to try a glazed corned beef recipe that Kevin posted recently on his blog Closet Cooking. I could have made traditional boiled cabbage but all I had was red cabbage. Boiled red cabbage just doesn't really work.

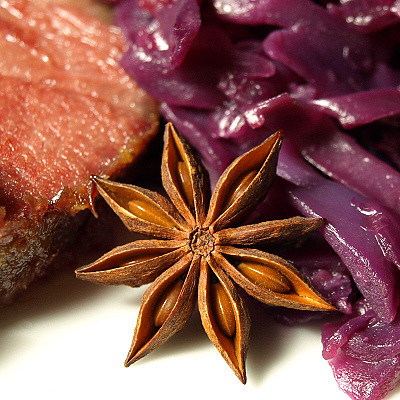
So I made a new twist on standard braised red cabbage. I added star anise and cloves because they go so well together. Apple, onion, and bay leaf I left in from my typical red cabbage recipe but I swapped most of the red wine vinegar for ume plum vinegar. Ume plum vinegar is a wonderful condiment. It's made from umeboshi plums and shiso (a Japanese herb) fermented with sea salt. The result is a tangy, salty condiment that gives a nice punch of umami flavor to dishes. Beware the salt in the ume plum vinegar though, I removed all the other salt in the recipe because the vinegar itself is quite salty.

I liked the star anise, clove, cabbage combination a lot and was really happy with the added flavor from the ume plum vinegar. I can't say enough good things about Kevin's glazed corned beef. It's a great idea that combines sweet and salty with a little spice. It reminded me of Easter ham and my husband and son both loved it. The only addition I would make to his recipe would be to remind people to trim down the fat from the brisket before baking it with the glaze.

Links:
-Here's the recipe for Corned Beef Glazed in Honey and Mustard Dinner with Cabbage from Closet Cooking
-I recommend Eden Food's Ume Plum Vinegar, they're a Michigan-based company
-For the beef-free folks, how about serving the cabbage with my Honey Mustard Glazed Tofu

Spiced Braised Red Cabbage
Serves 4 generously, would easily serve 6 as a side dish

1 onion, diced
2 tablespoons neutral oil
1 small head of red cabbage, cored and shredded
1 apple, peeled, cored and cut into eighths
1 whole star anise
3-4 whole cloves
1 dried bay leaf
3 tablespoons ume plum vinegar
1 tablespoon red wine vinegar
1/4 teaspoon freshly ground black pepper
1/4 cup water

-Cook the onion in the oil in a large soup pot until soft and translucent, allowing the onion to caramelize a little is good but not necessary.
-Add the rest of the ingredients to the pot and stir together.
-Cover and cook over medium-low heat, stirring occasionally, for 1 hour to 1 1/2 hours. The cabbage will be tender and the flavors will have melded together.
-Pick through to remove the star anise, cloves and bay leaf or warn your guests that these whole spices are not meant to be eaten.
-Serve hot. Additional ume plum vinegar can be served on the side to adjust the seasoning to individual tastes. Remind your guests that this vinegar is salty and should be used in place of additional table salt.


I'm adding this to Bookmarked Recipes, an event started by Ruth of Ruth's Kitchen's Experiments. Visit the new Bookmarked Recipes site on Monday for the roundup of other bookmarked and tested recipes. This week’s round up will be hosted by Patsy of Family, Friends & Food.

Morel Giveaway

Marx Foods is giving away 2 POUNDS of MORELS!! How can you resist entering?
I'm very eager to see how the morel patch I planted last fall will fare this year. I'm also hoping, praying, and pleading that we'll be moved in and settled so that I can attend the two mushroom festivals in my new stomping grounds in Michigan. First there is the Mesick Mushroom Festival and then the following weekend there is the National Morel Mushroom Festival in Boyne City. Michigan cherries are nice and all but morels are swoon-worthy.

Links:
-See my mushroom growing experience from last year, Growing Mushrooms posts: Day 1, Day 4, Day 5, Days 6&7, Day 9, Day 12
-More information about the National Morel Mushroom Festival in Boyne City, MI (May 14-17 2009) and the 50th Annual Mesick Mushroom Festival in Mesick, MI (May 8-10 2009).
-My new house is coming along, see the latest pictures at Building on Dog Hill.

To enter the contest at Marx Foods click below

February 25, 2009

Black Bean "Tacos" with Smoked Paprika Shiitake Mushrooms

I'm overwhelmed by the response to pudding cakes. I'm so glad you liked them! This is food to balance out that indulgence.

I'm working on cleaning out my pantry so I have less to pack for our move. Six months ago I was going through a black bean kick and in my digging today I found a can that had gone astray. My mind wandered and I got to thinking about these beautiful beans from ChezWhat?. The author, Christo (aka doggybloggy), had a plan to cook his beans with wild mushrooms. Green beans and mushrooms is a dish that would be part of my Last Supper but I don't think I've ever eaten dried beans and mushrooms together. I had shiitakes in my fridge and decided to make Napa cabbage wrapped tacos filled with beans and mushrooms. I enhanced the natural smokiness of the shiitakes with some pimenton (smoked paprika) and adapted a Weight Watcher recipe for cumin-scented black beans. Some lime, cilantro and green onions topped it off, with cherry tomatoes grown in my Aerogarden on the side. This was a satisfying lunch and I loved the spices, especially the smoked paprika on the shiitakes. I could eat a whole bowl of those mushrooms! I'll be thinking of other dishes to add them to. These also got a glowing review from my husband, he said they were "surprisingly good."

Black Bean "Tacos" with Smoked Paprika Shiitake Mushrooms
Inspired by the Weight Watchers recipe for Shrimp Over Cumin-Scented Beans
Makes 2 servings (each serving is 4 WW points by my calculations)

8 ounces shiitake mushrooms
1 1/2 teaspoon neutral oil
1/4 teaspoon pimenton dulce (sweet smoked paprika)
1 chile pepper, seeded and minced (I used a Thai bird)
1 clove garlic, minced or grated with a microplane
1 (15 oz) can of whole black beans, drained and rinsed
1/2 teaspoon ground cumin
1/4 teaspoon oregano (I used Mexican)
4-6 leaves of Napa cabbage, washed and dried
a handful of cilantro, washed, dried and torn
1 green onion, cleaned and thinly sliced
1 lime, cut into wedges
kosher salt and black pepper

-Trim off and discard the shiitakes stems (or save them to use in making stock). Brush any dirt from the mushroom caps and thinly slice them.
-Add 1 teaspoon of the oil to a hot skillet or saute pan. Add the mushrooms and cook until they are golden brown. Toss them with the smoked paprika and a good pinch of kosher salt and remove them from the pan.
-Add the remaining 1/2 teaspoon of oil to the pan with the chile and garlic. Cook over low until fragrant, just a few seconds.
-Add the beans, cumin and oregano to the pan along with a good pinch of kosher salt and a couple grinds of black pepper. Warm the beans and smash a quarter of them. Taste and add more salt and pepper as desired. Remove the pan from the heat.
-Serve each leaf of cabbage with some of the beans topped with the mushrooms, cilantro, and green onion. Squeeze a wedge of lime over the "taco" before eating.

I'm adding this to Bookmarked Recipes, an event started by Ruth of Ruth's Kitchen's Experiments. Visit the new Bookmarked Recipes site for the roundup of other bookmarked and tested recipes. The host for next week’s round up will be Marci of Pieces.

*I'm also submitting this to the current BSI, Blogger Secret Ingredient, which is black beans. This is my first time participating in this event but I was inspired after seeing the winning recipe from last week, Kale Crust Pizza. Doesn't that sound awesome?! If you'd like to join in or read some interesting facts about black beans visit Just Sweet Enough.

**I was curious about how many points a pudding cup would have and for one espresso cup without foam it comes to 3 WW points.

October 11, 2008

Growing mushrooms Days 6 & 7 (1st harvest)

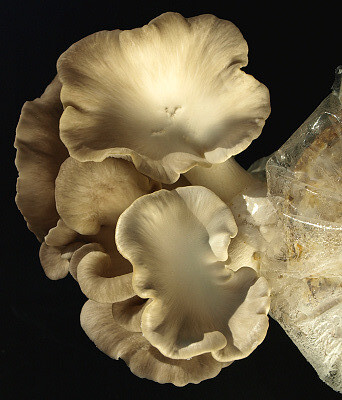
Yesterday afternoon I got the oyster mushrooms out to take a picture and noticed that the largest was starting to shed spores. I had planned on letting them grow a day more but instead harvested them immediately per the directions. I had already eaten so I stored them in a paper bag in the fridge overnight and browsed oyster mushroom recipes online. I came across a recipe for
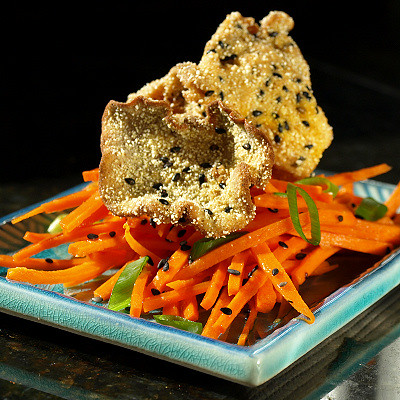
Sesame Crusted Fried Oyster Mushrooms and Carrot Salad on the blog Brownie Points. Fried oyster mushrooms sounded so appealing I had a hard time resisting the urge to make the recipe that night. I wanted to get a half decent picture so I forced myself to wait until this morning.

This morning I got ready to make the oyster mushrooms for lunch. First I carefully toasted some black sesame seeds. Some of the toasted sesame seeds went into the mushroom coating along with Wondra flour (instead of the original rice flour), dry polenta, smoked paprika, cayenne, and salt. The rest went into a simple salad of shredded carrots and sliced green onion dressed with rice wine vinegar, toasted sesame oil, a bit of freshly grated ginger, a pinch of sugar and salt. I noticed that the largest shiitake was also ready to harvest and so I added it to the pile of oyster mushrooms. I heated the oil, trimmed the mushrooms and got a small bowl of soy milk ready. When the oil was hot I dipped each mushroom in the soy milk, then into flour mix and into the hot oil. The mushrooms were cooked in batches until golden brown and drained on paper toweling. Then they topped the piles of carrot salad.

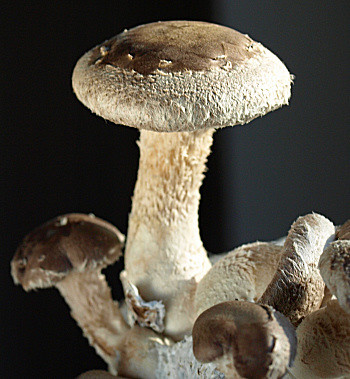
The carrot salad on its own was good but I'd really love to try these mushrooms on a bowl of udon and broth. They were wonderfully crispy and the sesame seeds in the coating gave a lot of toasty flavor. The oyster mushrooms were good but the shiitake cap was more flavorful and held up better to the coating. The oyster mushroom log is now getting a rest in paper towel and I can restart it in a week. There are almost a dozen little shiitake mushrooms yet to mature and the pom pom blanc mushrooms have finally begun to bud! Right now they look like miniature cauliflower florets and aren't very photogenic but I'll get a picture of them as they get bigger.

Growing mushrooms Day 5
Growing mushrooms Day 4
Growing mushrooms Day 1
If you are interested in buying your own mushroom logs, I purchased mine from Gourmet Mushrooms.
The recipe for Sesame Crusted Oyster Mushrooms with Toasted Sesame Carrot Salad
(I used Wondra flour instead of rice flour and a little less smoked paprika. I also added a pinch of sugar and a 1/2 teaspoon of grated ginger to the salad dressing.)

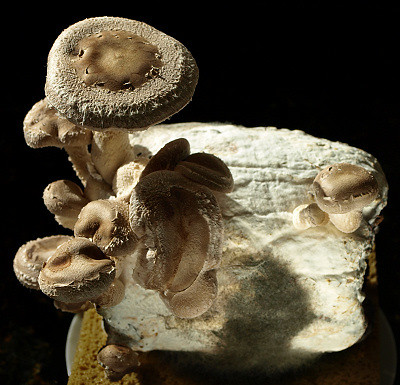
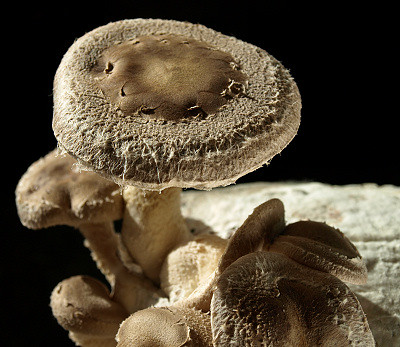
The shiitake log on day 6 The largest shiitake mushroom on day 6
The oyster mushroom log on day 6
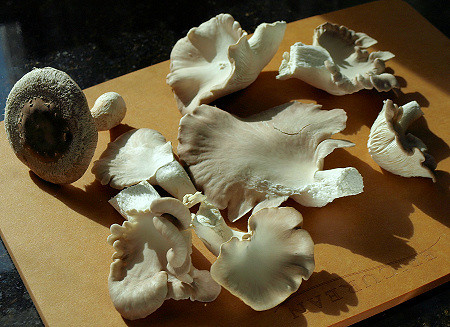
The first flush of oyster mushrooms before harvesting The oyster mushrooms on day 6
The shiitake log on day 7
The largest shiitake cap on day 7
My first mushroom harvest


I'm adding this to Bookmarked Recipes, an event started by Ruth's Kitchen's Experiments. Visit her site for the roundup of other bookmarked and tested recipes.

October 2, 2008

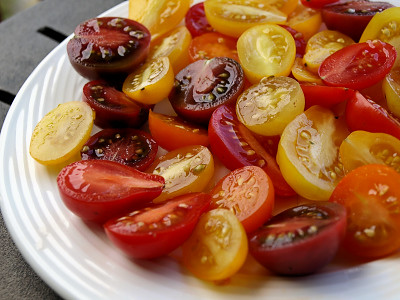
Kale with Shiitake Mushrooms and Cherry Tomatoes

We relaxed all day today which is something we haven't done much of on our recent trips up north. I did still make John look at books of light fixtures, but he was no help. The day before I had picked up some groceries including shiitake mushrooms, red Russian kale and mixed cherry tomatoes. I picked these three items because they all looked beautiful and were grown locally but I hoped that they would work well together. Since I'm not in my own kitchen the preparation is super simple but the result was flavorful. I really loved the black cherry tomatoes. They were wonderfully sweet and balanced the kale's slight bitterness. I think I crowded my pan when cooking the shiitakes but they still gave the umami flavor I wanted. They just didn't have the texture I wanted. I'll be making this combination again and working on the technique. Here's what I did:

Kale with Shiitake Mushrooms and Cherry Tomatoes
Makes enough for two people as a meal or 4 as a side

Prep:
Take 1 bunch of kale and strip the leaves from the stems. Wash the kale leaves well and chop them roughly, leave the water that clings to the leaves. Remove the stems from approximately 2 cups of shiitake mushrooms. Brush away any dirt. If the mushroom caps are large then slice them into strips or halve them. I had very small caps so I left most whole. Peel and slice 3 cloves of garlic. Wash and halve 1 pint of cherry tomatoes.

Cook:
Heat a large frying pan over medium high heat. When hot add 1 tablespoon of olive oil, coat the pan and add the mushrooms. Allow the mushrooms to cook and brown slightly. Add the garlic and kale and season with salt and pepper. Turn the heat down to medium and allow the kale to wilt just a little. Add the tomatoes and turn off the heat. Toss to distribute the tomatoes and warm them slightly. Serve with a drizzle of olive oil and a sprinkle of flaky salt.

Local cherry tomatoes:
sun gold, black cherry, red pear, yellow pearMy lunchtime view of East Grand Traverse Bay

It was blustery but beautiful.

August 2, 2008

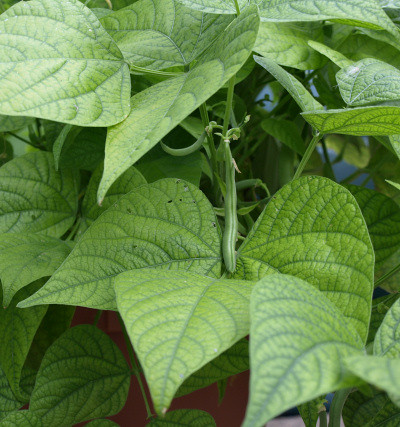
Green beans from my garden

Beans are one of the most forgiving plants in the kitchen garden. Pole beans are great for their long period of productivity but I've always preferred growing bush beans. There are many lovely, tender varieties available and there is no need to worry about creating a structure for them to grow on. The big seeds of beans make them easy for little hands to plant. The big, noticable shoots sprout quickly to reward the younger gardener that is short on patience. A short stature also comes in handy when harvesting since the dangling beans are easier to spot from underneath the canopy of leaves.

Alex is fond of eating just the seeds from green beans which means I have to let at least some get past the delicate, thin haricot vert stage. I couldn't wait and had to pick the first batch for myself. Here is how I had them:

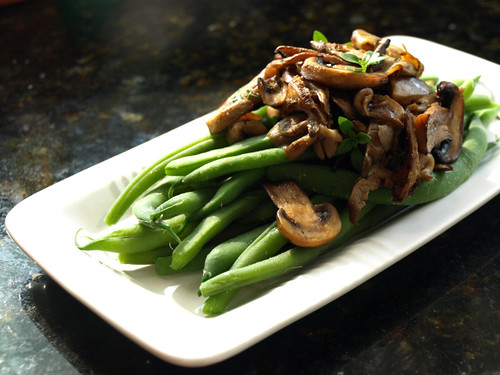
Green beans with mushrooms and thyme
Serves 4-6
1 quart (4 cups) green beans
2 cups sliced mushrooms
1 tablespoon extra virgin olive oil
1/4 teaspoon smashed garlic
1 tablespoon fresh thyme leaves
salt and pepper

-Bring a large pot of water to a boil.
-Trim the stem ends and wash the green beans.
-When the water comes to a boil add ~1 tablespoon of kosher salt.
-Add the green beans and cook covered 3-5 minutes. Check the beans often, you want the beans to remain bright green but be completely tender. Cooked green beans should not be squeaky when you bite into them! As soon as the beans are done, drain them and leave them to cool. *If you want to insure the green color you can immediately shock them in ice water.
-Add the olive oil to a large hot skillet. Add the mushrooms and do not stir. When the mushrooms have caramelized a little on the first side then stir the pan and add the garlic and a little salt and pepper. Cook until the mushrooms are fully cooked.
-Add the thyme and the green beans to the mushrooms and toss. Taste to see if additional salt and pepper is needed. Serve warm or room temperature.
My container of herbs with thyme,
notice the stray bean planted by Alex

May 16, 2008

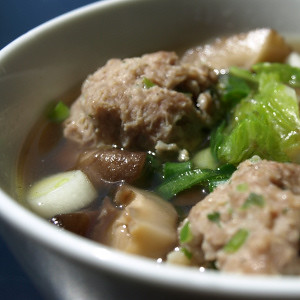
Pork Meatball Soup with Mushrooms and Cabbage

I'm generally not one to worry about spending a little more money on food but some of the prices lately are a little shocking. I was at the meat counter trying to decide what to get that was inexpensive and not my standby, chicken leg quarters. I saw some pork steaks and thought they'd do well for soup. Using the bones for the stock and grinding the meat for meatballs was a way to fully utilize the three dollar purchase and stretch it into enough soup for several meals. I used Stephanie's Top Chef recipe for meatball soup as inspiration and borrowed some directions from this photo recipe for wonton soup. My version gives you Asian flavors with less work and using items I usually have on hand. I already had dried mushrooms, green onions, cilantro and some savoy cabbage in my kitchen. You could definitely make use of other vegetables and any mushrooms you have on hand for a similar effect. If you can't find bone-in pork steaks you use any pre-made stock and enhance it with mushrooms and make the meatballs from ground pork. The smell of the broth simmering had my mouth watering but I know from first hand experience that you can cheat and make any old vegetable stock ten times better by adding in dried mushrooms.
Here's the recipe, best eaten while watching Tampopo:

Cabbage and Pork Meatball Soup
Rich mushroom scented broth, flavorful pork meatballs and crunchy cabbage.
Serves 4-6

1 1/2 lbs bone-in pork steaks or 1 lb ground pork + 3 1/2 quarts of pork or vegetable stock
1/2 cup dried wood ear mushrooms (my package calls them dried black fungus)
1 cup dried shiitake mushrooms
3 tablespoons finely chopped cilantro
2 teaspoons of grated ginger
1 teaspoon toasted sesame oil
1 tablespoon soy sauce
2 teaspoons fish sauce
1/2 teaspoon salt
1 teaspoon freshly ground pepper
2-3 cups cabbage (savoy or napa are best), shredded
5 scallions, thinly sliced
more salt and pepper to taste

-If you are using pork steaks: remove the meat from the bones and place in a 6-quart pot. Cover the bones with 3 1/2 quarts of cold water and bring to a simmer. Simmer for at least one hour, skimming the foam/scum from the surface. Grind the pork meat in a meat grinder or food processor.
-If you are using premade stock: bring 3 quarts of the stock to a simmer in a 6-quart stock pot
-Mix the cilantro, ginger, sesame oil, soy sauce, fish sauce, 3/4 teaspoon salt and pepper into the pork. You can microwave a small ball to taste for seasoning and adjust accordingly. Refrigerate this mixture covered until the stock is ready.
-Soak the dried mushrooms in hot water for at least 15 minutes. Remove the mushrooms from the water and add the mushroom water to the stock. Make sure you leave out any grit that is at the bottom of the mushroom liquid. Remove the stems from the shiitake mushrooms and chop into quarters. Add the shiitake mushrooms to the stock pot and cook for at least a half hour. Slice the wood ear mushrooms into ribbons and set aside, throw away any tough looking parts.
-When the shiitakes have cooked in the stock for at least a half hour remove the bones and add the wood ear mushrooms and bring to a good simmer. Add at least 1 teaspoon of salt and a few grinds of pepper, taste for seasoning and add more salt and pepper if needed.
-Spoon in balls of the meat mixture into the simmering broth one at a time, stirring occasionally. I made balls about 1 1/2 tablespoons each but you can make any size. Add the cabbage and bring back to a full simmer.
-Add the scallions and serve.
-Optional: If I had them I would have used bean sprouts as a garnish. Other vegetables and/or noodles would be good as well.