Showing posts with label Recipes: vegetarian. Show all posts

February 1, 2012

Dark Days Smoked Paprika Turnips and Kale

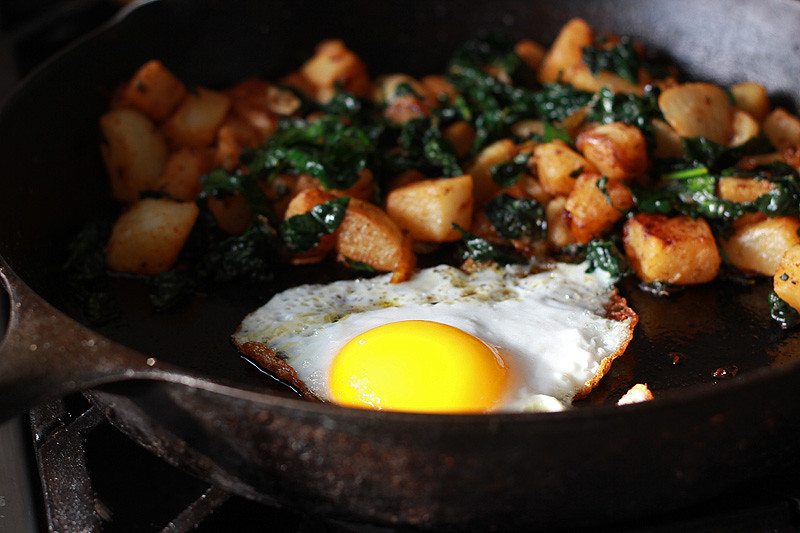
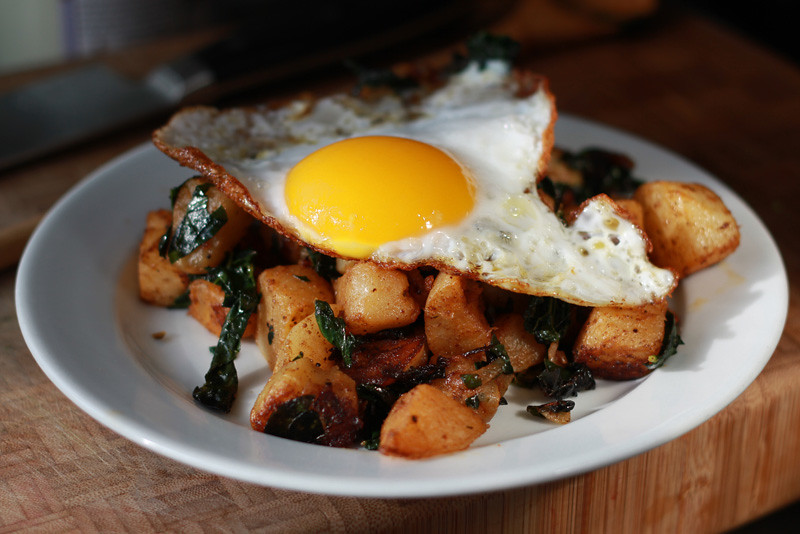
To complete this week's Dark Days challenge I made lunch today using turnips, kale and onions from my 9 Bean Rows winter CSA share.  I saw this recipe for Smoky Roasted Turnips on The Food Lover's Primal Palate but didn't feel like waiting for the oven to heat up. I then started thinking about bubble and squeak and so added kale.  A fried egg from our ducks seemed like a good bump of protein.  I had bacon fat on hand but thought the flavor of olive oil would be good with the pimenton and so I used oil from Higher Grounds.  It was delicious and when Penny noticed me eating she ran over and stole a bunch even though there was enough hot pimenton to give a little burn.  She's my little firecracker!
Smoked Paprika Turnips and Kale (with an egg)
Add peeled and cubed turnips to salted boiling water and cook just until tender.  Drain immediately and allow the extra steam to evaporate off.  Soften some sliced onion in olive oil in a cast iron pan.  Add the turnips and sprinkle hot pimenton (smoked paprika) and cracked black pepper to taste.  Cook over medium/high until the turnips and onions are caramelized.  Add in chopped kale and toss to wilt.  Push the vegetables over to one side and add a little more olive oil to the empty side.  Crack in an egg and cook to your taste, I love crispy edges!  Serve with the egg on top for runny yolk awesomeness.
Visit Not Dabbling In Normal on Sundays for the round up of Dark Days meals. You can also visit our coordinator at Unearthing this Life to see some of our Midwest group entres.  

Penny's rainbow nose
Paint covered hands!
I may regret reading this book to her a few days ago.

December 5, 2011

Chewy Molasses Cookies (redone grain free)

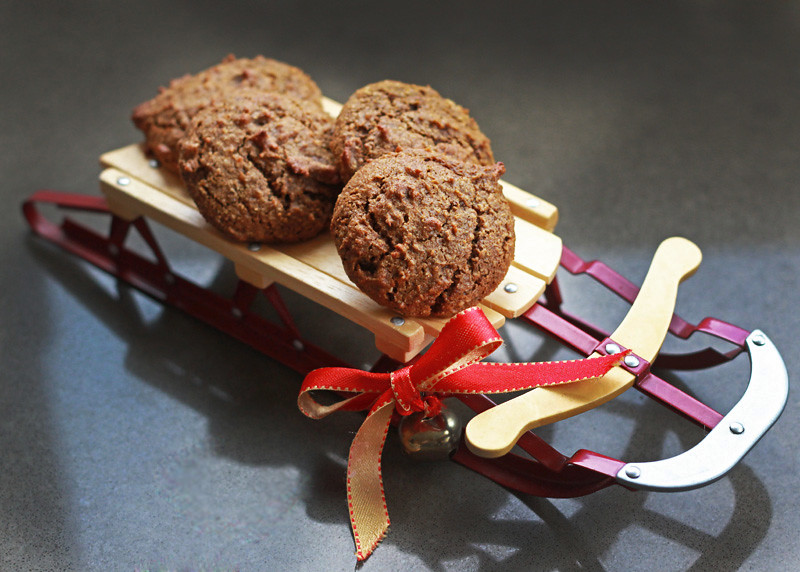
When I was younger I teased my mother for eating dried dates by saying they look like cockroaches. It had something to do with the translucence and papery skin, which I still find a little eerie, but recently dates have come to my rescue.  In this year's attempt to tackle wheat free baking I have found that dates, and date paste, are my favorite secret weapon for making good grain-free cookies.  This recipe is the first of two cookies that make use of my current favorite method. Using my ever evolving baking strategies I updated a favorite Christmas cookie of ours, the Chewy Molasses Cookie.  The flavor is still there though the sweetness is toned down to match our current tastes.  In my opinion this allows the zing of the spices and molasses to shine brighter.  I suppose I could still compromise and coat the outside of these in sugar but since they were so well received by both kids I think I'll keep them as is.   One experiment I would like to try is to double bake them at a low temperature like biscotti to see if I can get a crisp version as well as this chewy one.

Chewy Molasses Date Cookies 
Makes ~3 dozen small cookies, made using a 1 tablespoon scoop

7 ounces date paste (or ~1 1/3 cup packed pitted dates)*
3 ounces coconut oil (~1/3 cup + 1 tablespoon)*
2 large eggs
1 tablespoon molasses
1/2 cup almond meal*
2 tablespoons coconut flour
1 teaspoon baking soda
1/2 teaspoon baking powder
1/4 teaspoon fine sea salt
1 1/2 teaspoons ground ginger
1 teaspoon ground cinnamon
1/4 teaspoon ground cloves

-Preheat your oven to 350 degrees F and line your baking sheets with parchment.
-It is best to have all your ingredients at room temperature.  Add your dates, coconut oil, eggs and molasses to a food processor and pulse until you have a smooth paste.  If you are using pitted dates double check them for pits and expect this to take a little longer.
-In a small bowl whisk together all your dry ingredients.  Add the dry ingredients to the date mixture and process until combined, scraping the bowl as needed.
-Spoon tablespoons of dough onto your lined baking sheets leaving at least an inch and a half of spreading room.
-Bake for 8-10 minutes until puffy.  Cool the cookies on the baking sheets before removing.  It's best to release the cookies with an offset spatula before removing.  
-Baked cookies freeze well but I have found that coconut flour baked goods like these tend to not store well for long periods at room temperature.

*Ingredient information:  I get my date paste from Country Life Natural Foods.  It is relatively dry compared to most homemade versions I've seen but it's great for baking.  My kids prefer no coconut flavor and so we use the expeller pressed oil from Wilderness Family Naturals.  I've used both Bob's Red Mill and Honeyville almond flour/meal in these and both work fine.

November 12, 2011

"Gremolata" Balls for the Freezer

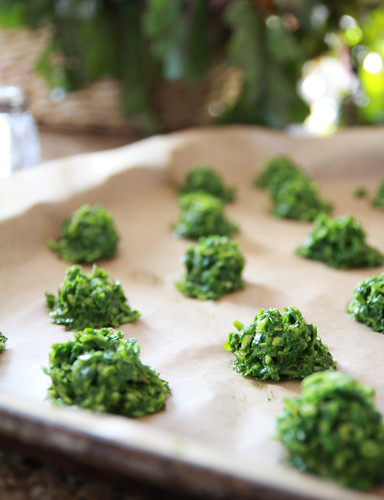
To stash the last of my fresh parsley from my garden I made this. It's only sort of gremolata because I added lemon juice and olive oil in an attempt to have it last better in the freezer.  I tried it out on top of roasted beef marrow bones and it was fantastic!  The verdant and piquant flavor cut through the richness of the marrow.  I plan on using the rest of my stash to garnish stewed meat or soup, similar to the uses for gremolata on osso bucco or like pistou in soup.

"Gremolata" Balls for the Freezer
Take a couple of cups of fresh parsley and pulse in a food processor with a couple cloves of garlic.  Add the zest from one lemon and the juice from 1/2 lemon with enough olive oil to moisten.  Salt and pepper to taste and add more garlic or oil until you like the flavor.  Scoop tablespoons onto a cookie sheet, freeze until solid, then store in an airtight container (zip bag, etc).  Serve on top of stewed meat or as a last minute addition to perk up a bowl of winter soup.  To serve: place a still frozen ball in soup or allow one to defrost slightly and then spread on top of stewed meat.  Also very good in place of parsley salad with roasted marrow bones.

July 26, 2011

DB Fresh Frasier (or rather Framboises)

Jana of Cherry Tea Cakes was our July Daring Bakers’ host and she challenges us to make Fresh Frasiers inspired by recipes written by Elisabeth M. Prueitt and Chad Robertson in the beautiful cookbook Tartine.

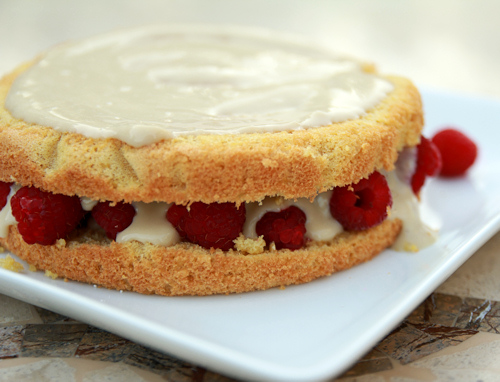
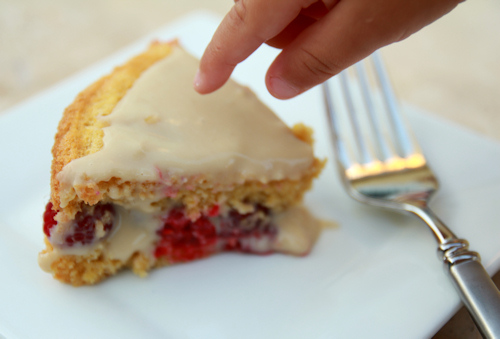
Daring Baker time!  This month's creation was chiffon cake filled with fresh fruit and pastry cream, a Fresh Frasier.  I chose to use fresh raspberries, made the gluten-free chiffon cake from Penny's birthday, used coconut milk for the pastry cream (alas no stabilized whipped cream for us) and sweetened it all with maple sugar. I overcooked the pastry cream a bit and I think I'm getting to a point where even maple sugar is too much for me.  I'd rather just have the berries plain or the berries with a splash of coconut milk and skip the cake.  But the cake was put to use and served some kind friends that put up with my experimental desserts.  Penny loved hers but Alex balked at the coconut milk cream.  He's my picky one.  Thanks for the challenge Jana!

Links:
-For the full original recipe visit our host Jana at Cherry Tea Cakes or see the pdf recipe.
-I made this gluten-free chiffon cake but this time used maple sugar.  I made the pastry cream from Jana's recipe but replaced the whole milk with full fat coconut milk and left out the whipped cream.
-Her recipes are based on those of Elisabeth M. Prueitt and Chad Robertson from the cookbook Tartine.
-Other participants for this challenge are listed in the Daring Baker Blogroll.

Penny had no patience for my picture taking.
Her new hobby is flower picking.  This week Queen Anne's Lace is the favorite.

June 17, 2011

Mint and Melon

This month's Spice Rack Challenge is mint.  I have my vegetable garden planted and school done for the summer so I should be able to find a few moments to blog here and there.  I have my two favorite mint combinations blogged already, mint/chocolate and mint/lamb so I had to think of what else I like to do with mint.   I think mint is wonderful in any fruit salad and mint and melon are especially good together. Here is my non-recipe for fruit and mint, of course it's simple but I need a baby step right now.

Mint and Melon
  1. Seed, peel and cube melon
  2. Chiffonade fresh mint leaves
  3. Toss with citrus juice and a little zest (I like orange or lime for this)
  4. Eat
My other mint recipes:
Mint Coconut Milk Ice Cream with Gluten-free Chocolate Cones
Quinoa and Blood Orange Salad
Candy Cane Cocoa
Winter Mint Cookies
DB Lavash Crackers w/ Moroccan Carrot Dip
Heartnut and Wild Rice Salad
Cherry Tomato and Mint Salad on Lamb Steaks

May 27, 2011

DB Chocolate Marquise (done dairy-free and honey sweetened)

 The May 2011 Daring Bakers’ challenge was hosted by Emma of CookCraftGrow and Jenny of Purple House Dirt. They chose to challenge everyone to make a Chocolate Marquise. The inspiration for this recipe comes from a dessert they prepared at a restaurant in Seattle.

This month I've been far too busy to do much blogging.  There has been gardening, Alex's school, houseguests and trips downstate, 15 new birds (9 new ducks and 6 chickens), lots of poking around outside looking for morels-- plus I seem to be terribly accident prone this month.  I usually rack up a number of burns, cuts and bruises but this month I've added a smashed shower door, a sunburn and a punctured foot to my list.   Let's hope I piled all of this into May and will have a pleasently uneventful, productive and relaxing summer.

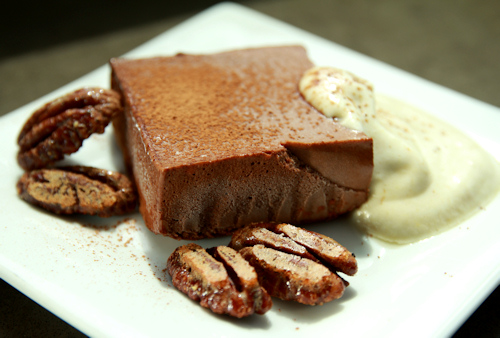
Somehow I did manage to whip up this month's Daring Baker challenge.  Looking at the recipe I initally was annoyed and frustrated.  Recipes for mousse are so tough to do dairy-free, especially if you are also mostly soy-free as well like us and don't have the option of using silken tofu.  Then I went through a pouty phase where I complained in my head that the hosts chose a recipe that didn't even have a mandatory baked item.  It's supposed to be Daring *Bakers* not Daring Desserts!  But eventually I came up with a game plan and forged ahead.  I've been eating almost no refined sugar since the beginning of the year so the first change I made was to use honey to sweeten all the components.  I also substituted unsweetened baking chocolate for the bittersweet and swapped carob powder for the cocoa.  For that tricky heavy cream I gave extra chilled coconut cream a try and I spiced my mousse and nuts with ginger and black pepper.

The changes ended up being fairly simple and the result was pretty decent.   The ginger and pepper went well with the honey flavor and yet dark chocolate was still the star.  The mousse texture was a little grainy when still hard but smoothed nicely when I let the squares warm up a little more.  With all the egg and yolks they still were light and creamy.  But the best part was the nuts--they are fantastic!!  I'll be making batches (and batches and batches) of them again.  So thanks for the challenge Emma and Jenny, as always I'm happy to be a Daring Baker and give something I would never try to make a chance.

Here are my altered ingredient lists. All of these are scaled to make 1/4 of the original recipes or 6 servings each with 1 (2"x2") cube of marquise.  Instructions and original ingredient lists found here on the Daring Kitchen.
Chocolate Marquise
3 large egg yolks at room temperature
1 large egg
3 tablespoons honey
Chocolate Base, barely warm (ingredients follow)
½ cup coconut cream*
½ cup carob powder (for rolling or dusting)
*By coconut cream I mean I took can of coconut milk and placed it in the fridge unopened overnight. I then scooped out only the thick cream and left the watery liquid to be used in another application. I chilled the measured amount of cream in the fridge and whipped it like heavy cream using chilled beaters and a chilled bowl. It doesn't get the volume of heavy cream but does get fluffier. I then combined the whipped coconut cream with the chocolate base before folding it into the egg/yolk mixture.  This is the opposite of the instructions which have you mix the base with teh yolk mix first.  This way the egg mixture is able to transfer as much volume and air as possible to the finished dish.

Chocolate Base
3 oz (85 grams/ 6 tablespoons) unsweetened chocolate
1/3 cup + 2 teaspoons coconut cream
1/8 teaspoon salt
1/2 teaspoon black pepper
1 teaspoon ground ginger
1 tablespoon tequila
2 tablespoons honey
1/4 teaspoon vanilla
1 tablespoon carob powder
1/4 oz (1/2 tablespoon/8 grams) coconut oil, softened

Torched Meringue
3 large egg whites
3 tablespoons honey
Splash of apple cider vinegar
1/8 teaspoon ground ginger

Honeyed Spiced Pecans
2 tablespoons honey
1 teaspoon ground ginger
1/2 teaspoon black pepper
1/4 teaspoon salt
1/2 large egg white
1/2 cup pecans, ideally soaked and dehydrated first

Links:
-For the instructions to go with my ingredient lists, or the original recipes, visit our hosts Emma of CookCraftGrow and Jenny of Purple House Dirt.  Or see the complete recipe here on the Daring Kitchen site.
-Emma and Jenny learned how to make this marquise dessert when they worked together at a Seattle restaurant. The recipe is adapted from one developed by Bennie Sata, a Seattle-area pastry chef who introduced the city to one of its iconic chocolate desserts. They also included vegan recipes which were created by Ashlae of Ladycakes.
-Visit the Daring Kitchen to see the baker blogroll and other treats made this month.

My favorite Instagram shot from this month
Alex and Penny drawing together
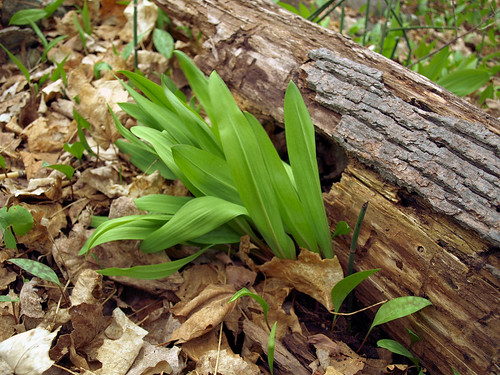
Penny sitting in a patch of ramps.  She was stealing cooked ramp greens from my plate just yesterday.
I'm adding this to Simply Sugar and Gluten Free's Slightly Indulgent Tuesdays

April 30, 2011

DB Bacon Cups

The April 2011 Daring Bakers’ challenge was hosted by Evelyne of the blog Cheap Ethnic Eatz. Evelyne chose to challenge everyone to make a maple mousse in an edible container. Prizes are being awarded to the most creative edible container and filling, so vote on your favorite from April 27th to May 27th at http://thedaringkitchen.com!
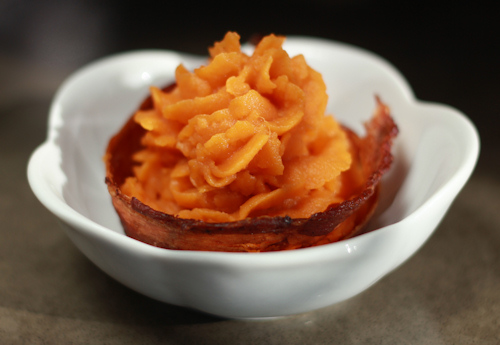
We took this week off of school and lazed around so much that I put off making this recipe until after it was supposed to be posted.  Alex loved the bacon cups and I can see myself making them again for him.  Wrapping the bacon so that it doesn't shrink and leave big holes is tricky and you do have to watch them to make sure they don't overcrisp.   I filled my cup with my own maple syrup sweetened mashed sweet potatoes instead of trying to make a dairy-free mousse.  Penny loved the mash.

Links:
-Our host this month is Evelyne of the blog Cheap Ethnic Eatz.  See her blog for all the recipes.
-The bacon cup recipe was inspired by not martha and 59kilos.
-Visit the Daring Kitchen to see all the creative edible containers and vote for your favorite.

April 22, 2011

Lemon-Dilly Cashew "Sour Cream" Dip


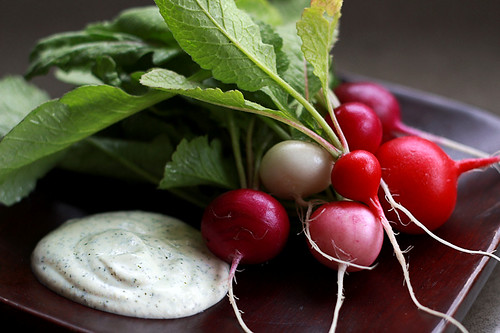
I've been experimenting with cashew sour cream since Christmas.  It started with a few holiday batches of french onion dip.  This was trouble with a capital T and as you know T rhymes with P and the french onion dip was best enjoyed with Potato chips.  In the new year, I experimented with milkless ranch dressing but none of the recipes I tried wowed me or met with Alex's approval.  I gave up for awhile but then picked up the soaked cashews again in honor of this month's Spice Rack Challenge, dill.  Here is dill in a tasty dip made with cashew "sour cream".

*Note the Easter Egg radishes in the top photo, they are from my 9 Bean Rows CSA box from this week.

Lemon-Dilly Cashew "Sour Cream" Dip
Makes about 2 cups

1/2 cup raw cashews + water for soaking
2/3 cup cold water
juice from 1 lemon
2 teaspoons dried dill weed
1 teaspoon finely grated lemon zest
1/2 teaspoon granulated onion
1/2 teaspoon salt
1/4 teaspoon freshly ground pepper

-Cover your cashews in water and soak on the counter for a few hours, then change the water and soak in the refrigerator overnight.
-Drain the cashews and add to a blender with all the other ingredients.
-Blend until perfectly smooth and creamy.  Adjust seasonings to your taste, adding more lemon or salt and pepper as desired.
-Serve with fresh vegetables or crackers.  Also works well as a salad dressing, thin as needed.

Variation:
Add some grated and drained cucumber along with a small clove of garlic and a little olive oil for a tzatziki style sauce.  This cucumber version is very good on salmon burgers.

And now for the obligatory kid pictures..
Penny being cute talking to her giraffe

Both kids being cute
Alex being a lunatic
I am SO looking forward to next week's Easter vacation!

April 1, 2011

Airy Oat Waffles (gluten-free, soaked oats)

We managed to survive last week's rehash of winter (Mother Nature, did we really need another 8 inches of snow?) only to have the whole family struck with a new case of the gloppy nose and cough syndrome.  I clearly tempted the fates by thinking that we were done with that garbage.   So I have two kids who haven't really been interested in food other than the extra-garlic fortified chicken broth I've been foisting on them.

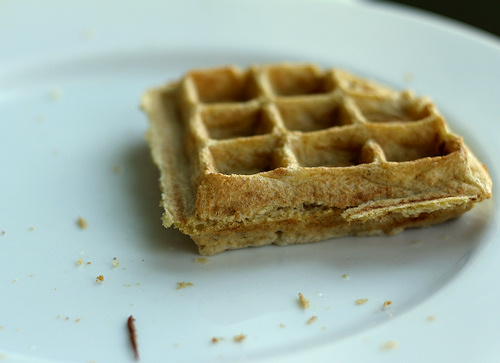
But, I had already soaked some oats and had to do something with them.  Thinking they wouldn't be eaten, I chose to make waffles which would be easier to freeze and reheat in the toaster.  I adapted a pancake recipe but my freezer saw no action because they were devoured as fast as I could make them.  The lone waffle pictured above was all that was left.

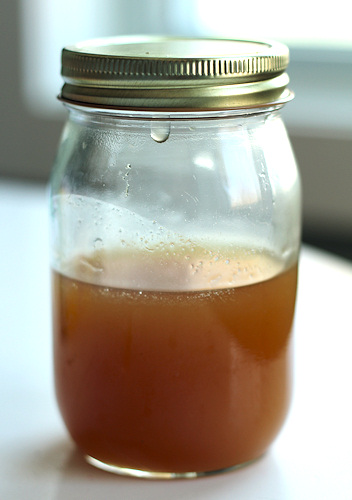
This may have been because they were really that good--light and airy and perfectly crispy on the outside, or it might be due to the fact that I served them with my latest batch of homemade maple syrup.  After losing a huge batch of syrup because I was busy doing schoolwork with Alex (there was smoke, a scorched pan and some tears) I have been much more attentive to my syrup and have made 2 quarts without crystals.  I think that calls for some more celebratory waffles!

Update: I changed the amount of water because I added a little more and liked the result better because they still cooked up great but the batter was easier to blend.  Orginal amount of water was 1 cup.


Airy Oat Waffles
Based on the recipe for Soaked, Flour-Free Oatmeal Pancakes from Nourishing Days
Makes about 4 (8 inch square) Belgian waffles

1 1/2 cup rolled oats*
1 1/4 cup water
1 teaspoon apple cider vinegar
3 eggs
1 tablespoon sweetener of your choice (I used coconut sugar)
1 teaspoon vanilla extract
1 teaspoon baking powder*
1/4 teaspoon baking soda
1/4 teaspoon salt
oil for waffle iron
*gluten-free versions as needed for your situation

-Add the water and vinegar to your oats and soak at least overnight on the counter.
-Separate your egg whites into a clean mixing bowl.   Set aside for now.
-Place the egg yolks, the oats with their soaking liquid and all the other ingredients (except the egg whites) into a blender jar.  Blend until smooth.
-Whip your egg whites to firm peaks, not super stiff or they won't mix as easily.  Fold one third of the whipped whites into your oat mixture and then gently fold the remaining whites.
-Cook according to your waffle iron's instructions (*see my iron at the end of this post.)   Coat the iron with oil before each addition of batter, coconut oil spray works well or brush on melted coconut oil with a pastry brush.
-Serve with a small pat of coconut oil and maple syrup or fruit and whipped coconut cream.

One of my smaller batches of successful syrup, see my previous practice batches at Maple Tapping '11
The sick kids took a bath.  I hadn't planned on letting Penny in but she insisted and Alex was a good sport.
Of course he did stick Lego minifigs in her hair
And he can be such a goof with his crazy expressions!
I'm adding this to Go Ahead Honey, It's Gluten-Free. This month's host is another Maggie who blogs at She Let Them Eat Cake, the theme is Springtime Brunches and I think these waffles would be perfect.
*Notes on waffle irons: I really like the control of a stovetop waffle iron.  They take up way less storage space and can get hotter than most electric models but they do have a learning curve.  The NordicWare model is the one I own but I really want to get the Rome's Cast Iron one to try.
 

March 26, 2011

Penny is One! (gluten-free chiffon cake)

Today was all about Penny.  We woke up in bed together and almost immediately Alex, her older brother, came bounding in.  After a little snuggling Alex snuck off to help John/daddy wrap a present.  Once her gift was opened we rounded out our day with a lot of play time, some picture taking, dress-up, a little baking, a nap (which I also took) and of course singing and the cake ceremony.  Penny was eager to have tastes of frosting and nibbles of cake all morning.  After the actual singing she carefully tasted icing and a little more cake but wanted out of the chair so that she could play once more.  The rest of the cupcake fell to the ground and was quickly devoured by Karmal, our beagle mutt. 
I struggled with choosing a cake to make today but in the end decided to go ahead and give her a little white sugar.  The frosting was decent but nothing to write home about but this chiffon cake came out perfectly.  Ethereally light, just sweet enough and by no means compromised by not having wheat flour in it.  It is a keeper recipe. I plan on making them again for strawberry shortcakes when Michigan finally gets fresh strawberries.  Or maybe I don't have to wait that long and could serve them with rhubarb instead!

Gluten-free Chiffon Cake
This was good frosted but I think it would be best with a fruit compote or sauce or even plain.  Based on the recipe from Chocolate and Zucchini, please take a look there for a wheat flour version.
 Makes 7 cupcakes

4 tablespoons brown rice flour
2 tablespoons potato starch, not flour
2 tablespoons tapioca starch
1/4 teaspoon gluten-free baking powder
a pinch of fine salt
3 eggs
6 tablespoons sugar
1 teaspoon vanilla extract
4 tablespoons coconut oil, melted but not hot*
2 tablespoons water

*Many coconut oils will give a strong flavor.  I like the expeller pressed oils from Tree of Life and Wilderness Family Naturals, both will give you richness but no strong coconut flavor.

-Preheat your oven to 350 degrees F.  Set 7 cups on a baking sheet.  You can choose to use oven-safe mugs lined with parchment or unwaxed paper cups to tear away.
-Sift the brown rice flour, potato starch, tapioca starch, baking powder and salt.  Sift twice more and set aside.
-Separate your eggs.  The yolks should go into a stand mixer bowl with a whisk attachment and the whites into a clean medium-sized mixing bowl.
-Add three tablespoons of sugar to the yolks and beat with the mixer until pale yellow in color, scrape the sides as needed.
-Beat the whites until they reach soft peaks and then start adding your remaining sugar (3T) bit by bit whisking in between each addition.  This can be done by hand with a balloon whisk or with an electric hand mixer.
-Add the vanilla, water and oil to your beaten yolks and sugar and beat to blend together.  Then add in your sifted dry ingredients and mix until smooth.
-Fold in a third of the beaten egg whites and then after they are incorporated fold in the rest of the whites.  Carefully pour the batter into your prepared cups. 
-Bake for 25-30 minutes, until they pass the toothpick test.  Cooking time may vary depending on your choice of cup.
-After removing the cups from the oven invert them on a cooling rack.  When they are cool run a knife around the inside of the cup and give them a shake to release the cakes.

Penny's perfect lips
Lots of attention from Big Bro today

*More 1st birthday photos on this Flickr set
**To see my chiffon cake history check out these Mead Chiffon Cupcakes. I missed the honey flavor but liked the richer cake that the above recipe had. Perhaps a combination of the two is in order?

March 21, 2011

In anticipation of spring-- and Ramps!

Michigan's Spring has just barely poked her toe out from under the blanket of winter.  So when Shayne of fruitcake or nuts asked us to post about our favorite spring food it all had to come from memory.  As much as I'm enjoying tapping our maple trees what I really long for is the first green things sprouting up and one of the first is ramps!

In past years ramps have become something of a foodie cliche because of their rabid fans, but I think most of the adoration is well deserved.  Fresh and green with that pungent combined garlic/onion flavor, who could hate this gift that pops up from under the leaf litter.  My favorite part is the leafy greens.  Like garlic scapes, they have a verdent flavor that I love.  Here is my favorite quick meal to make with them.

Ramps and Beans 

Rinse and spin or pat dry a bunch of ramps.  Chop your ramp stems and bulbs separately from your greens.  Add the chopped bulbs and stems to a pan with a couple of glugs of good olive oil and salt and pepper.  Cook until softened.  Add in about two cups of cooked white beans (navy or cannelini) and cook to warm up the beans.  Add in the ramp greens and cook just until they are tender.  Add a splash of lemon juice, more olive oil and more salt and pepper to taste.  Great served with a fried egg on top or spooned onto crusty bread.

*See the other favorite spring foods on the group blog for Michigan Lady Food Bloggers at the end of this month.
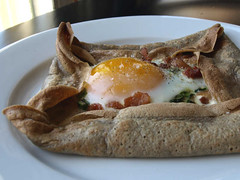
**I'll also be remaking these Buckwheat Crepes with Ramps this year, but this time around I'm going to hunt down a wheat-free all buckwheat crepe recipe. 
***And since I have no pictures of the food, here's a little video of Penny pushing around her toy shopping cart.  (Please ignore the voice over at the end contributed by her annoying older brother.)

March 5, 2011

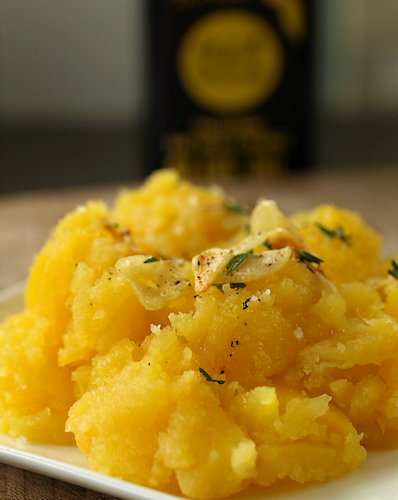
Rutabaga Mash with Crispy Garlic

Rutabagas should not be relegated to the job of unidentifiable cube in soups and pasties, though the latter is not the same without them.  This excellent storage root, also known by the name Swede, is delicious roasted or mashed.  Penny is a big fan of them cooked in beef broth but I wanted something different for myself so I made this.  The rutabagas and thyme both came from my winter 9 Bean Rows CSA.

Rutabaga Mash with Crispy Garlic
Makes 4 side dish servings

4-6 small to medium rutabaga roots*
3 cloves of garlic
2 tablespoons of good extra virgin olive oil
a few sprigs of thyme
flaky salt and freshly ground pepper

*regular grocery rutabagas are usually huge and you might only need one or two, aim for ~3 cups of chopped root

-Bring a large pot of water to a boil.  Peel and chop your rutabagas.  Salt your water like you were cooking pasta in it and add the rutabagas when it comes to a boil.
-Bring the water and rutabagas back to boil and cook until tender throughout.
-While the rutabagas are cooking, peel and thinly slice your garlic.  Add the garlic and olive oil to a cold pan and warm over medium-low heat.  Cook until fragrant and just beginning to get golden brown on the edges.  Pull the leaves off of the thyme and stir it into the hot oil.
-Drain and roughly mash your rutabagas.  Spoon the warm oil and garlic over the top and add flaky salt and pepper to finish.  Serve immediately to enjoy the crunch of the garlic.

Extra: For those of you who partake in dairy try this recipe for rutabaga souffle, Consider the Rutabaga
Dog Hill update: Penny is a full-time walker now
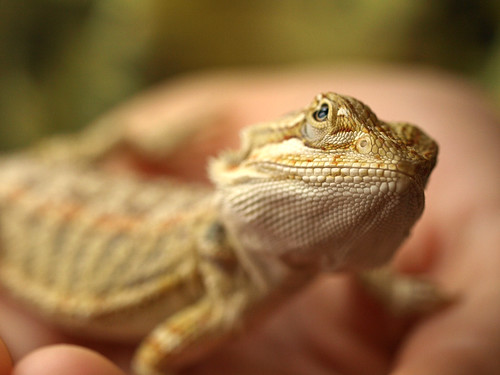
Flamey, Alex's bearded dragon is getting bigger.  I love his thoughtful expressions.
And Perfect is REALLY growing like a weed.
She doesn't sit still for pictures, you have to sneak up on her.

February 18, 2011

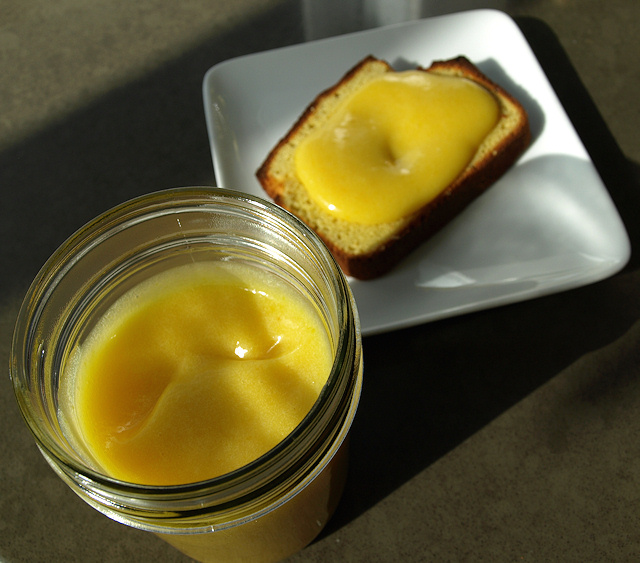
Dairy-free Citrus Curd

This month's Spice Rack Challenge featured citrus.  At first I racked my brain over the whole idea of dried citrus rind.  What do you use it for, just in place of fresh?  Why would you buy it in the first place when most citrus fruits are so easy to find year round?   Then I gave up pondering and tried making a almond shortbread cookie inspired by these Orange and Dark Chocolate Scones from Joy the Baker.  I liked the texture but hated the flavor, so I pitched them.

I found myself on the last day to post and all I had in the house was a really sad dried up lemon and two slightly beaten up grapefruit, I never did buy or make any dried peel.  Instead of throwing in the towel I decided to make grapefruit curd.  Lemon curd is so insanely good and addictive that I've never bothered to make a curd with other citrus fruit.  For awhile I made homemade dairy-free lemon curd with Earth Balance margarine but then I found out it is even better made with coconut oil.  Lemon curd sweetened with honey and made with coconut oil is my favorite.  But since grapefruits were what I had, I gave grapefruit curd a try.

Well, I may be won over.  The grapefruit curd was excellent on toast.  For the bread I made this coconut flour bread, except I used coconut oil in place of the ghee and maple butter instead of honey.  It tastes like poundcake without all the crazy sugar and was the perfect foil for the sweet curd. (And now that I'm thinking about it, the coconut bread would be great with a little citrus zest added to it.)  The curd was also great on fruit, try dipping strawberries in it!, and of course straight from the jar.  

Dairy-free Citrus Curd
Thanks to Straight Into Bed Carefree and Dried and Martha Stewart
Makes ~1 1/2 cups

3 egg yolks (egg quality really counts)
zest from 1 fruit
4 tablespoons sugar (or honey)
1/4 cup citrus juice
4 tablespoons coconut oil

-Place your yolks, zest, juice and sugar (or honey) in a small saucepan and cook over medium heat while whisking.
-Cook until the mixture thickens and can coat a spoon.
-Turn off heat and whisk in the coconut oil one tablespoon at a time.
-Strain through a fine metal sieve and whisk again if any oil begins to separate out.
-Cool and use.  Store any remaining in a glass container in the refrigerator. 

February 13, 2011

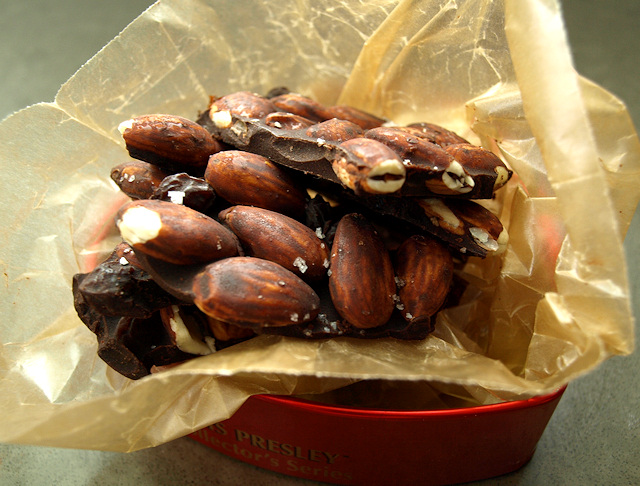
Carob Fruit and Nut Bark

Though I'm still full of my typical end of winter griping about dark days and slippery roads, I am noticing that February has been flying by. Tomorrow is Valentine's Day and I'm still trying to lay off sugar and wheat and grains in general. But that's a topic for another post, which I'm too scatterbrained to write at the moment, so here's a recipe I've been working on.

John and I have been upping the ante with our chocolate lately. I've long been a fan of the dark stuff and look for at least 70% cocoa (the bare minimum) but with my current dietary changes I'm even finding things like these brownies too sweet. So we search for darker chocolate for snacking and that results in eventually even liking unsweetened chocolate, if combined with fruit and nuts. The trouble is that chocolate has caffeine and though my tolerance is way higher than John's a little too much snacking ends with me up all night.

So John suggested carob (yes honey, I'm actually giving you credit) and at first I scoffed. Have you ever had those carob covered nuts from the bulk section? Or a carob bar? They are so insipid and gross with a weird chewy quality but John likes them anyway. I remembered seeing carob powder, also called carob flour, at the co-op so I agreed to give that a try. I had some cocoa butter around to try and make homemade dairy-free white chocolate and thought, "Hey I could make carob chocolate and it wouldn't be an oxymoron!"

For my first attempt I went completely sugar free and it was wonderful! Of course you have to be used to eating very low sugar/high cocoa chocolate but if you are the kind of person who can snack on cocoa nibs than you might really love this and it won't keep you up at night. Plus, carob may have other health benefits and it's much less bitter and therefore requires less sweetness to be delicious. I've played with the recipe further, added a little dried fruit for a smidgen more sweetness and a little coconut oil so that I don't have to worry about tempering the cocoa butter. The variations are endless but I like this Chunky bar homage with raisins and almonds.

Carob Fruit and Nut Bark

This is for super low sugar chocolate lovers. If you can't handle nibbling on cocoa nibs or 90% chocolate then either use a higher percentage of dried fruit or try adding a little stevia. 
Makes about a pound

3 oz (~3/4 cup) cacao butter*
2 oz (7 tablespoons) roasted carob powder*
8 oz (2 cups) almonds, ideally soaked/dehydrated*
3 oz (3/4 cup) raisins*
1/4 ounce (~1 1/2 teaspoons) coconut oil
1 teaspoon flaky sea salt

-Melt the cacao butter in a double boiler add the carob powder and coconut oil and whisk until smooth.  You could also melt the cacao butter in the microwave but it seems to take forever so I prefer a double boiler for this.  Of course a double boiler does not have to mean anything more than a heat proof bowl that fits on a saucepan with a little water in the saucepan.
-Add the almonds and raisins and stir to coat.  Spread on a parchment lined baking sheet and sprinkle with salt.
-Chill in the freezer for 10 minutes and then remove and break apart.

*Ingredient notes:  Cacao butter is the same thing as cocoa butter but be sure not to skimp on this. I've found cheaper stuff that has off flavors and tastes like soap and it's awful!  Carob powder is also called carob flour.  Of course any combination of nuts with/without any combination of dried fruit would be good. 

**Other notes:  I think a variation with some spice would be excellent and there is an interesting Cinnamon Spiced Coconut Bark on Diet, Dessert and Dogs.  Also, I'd love to try some filled chocolates with this carob chocolate mixture and plan on using this recipe for Double Chocolate Hazelnut Candies as inspiration.

***Note to mom: Hey, check out the Russell Stovers Elvis box, that thing has really gotten a lot of reuse!

January 27, 2011

DB Entremets with Patterned Biscuit Joconde


The January 2011 Daring Bakers’ challenge was hosted by Astheroshe of the blog accro. She chose to challenge everyone to make a Biscuit Joconde Imprime to wrap around an Entremets dessert.

This month's Daring Baker challenge was an exceptionally fun one.  I've wanted to try making patterned joconde, almond sponge cake, since I saw this Love Cake last year.  How cool is it to decorate a cake, WITH cake!  Alas with the wheat free restriction I put myself on for this month and the fact that I was generally steering clear of all grains and sugars, I couldn't revel in the challenge as much as I'd like.

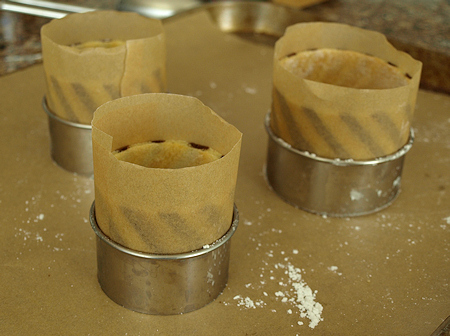
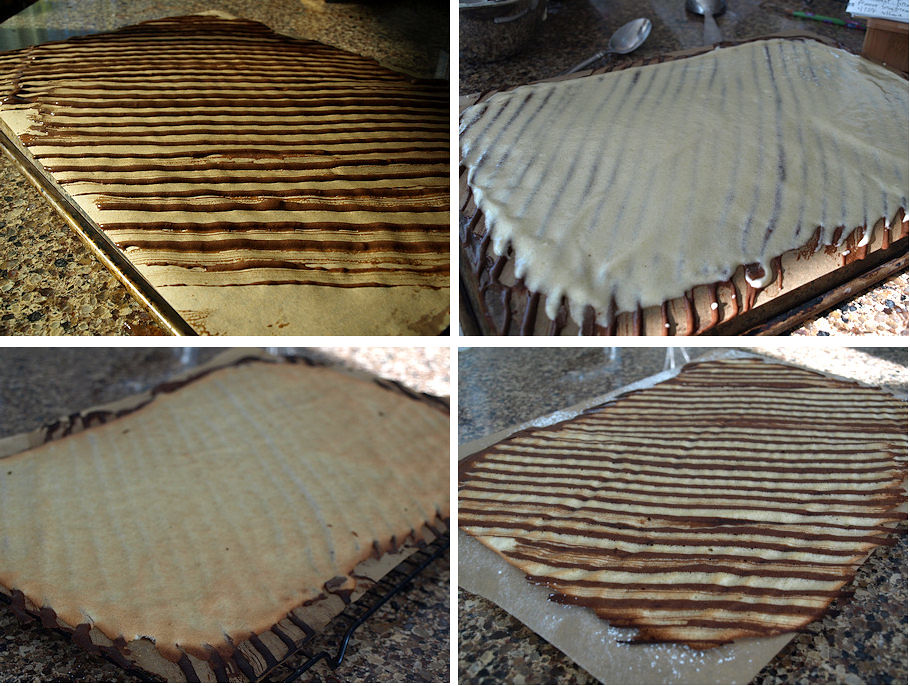
To not tempt myself too much, I made a third of a batch for just a few small individual entremets.  There is so little wheat flour in both the decor paste and the joconde especially in proportion to the amount of eggs involved so I didn't worry too much about the type of flour I replaced it with.  For the joconde I used 2/3 tapioca starch and 1/3 sweet rice flour and I used all tapioca starch for the decor paste.  In place of the melted butter, I used a little Earth Balance margarine. Otherwise these recipes didn't need to be messed with.  To make my pattern I cut a few notches in a piece of cardboard and used it to create diagonal stripes.  I ended up with enough decor paste to prep two sheet pans but only enough joconde batter for one pan.  Well, it turns the decor paste out is pretty much the same as tuile batter so I baked off the second pan to make cookie sticks for decoration.  Both the joconde and the tuile sticks needed significantly less time than the recipe calls for, ~ 5 minutes for the joconde and a little less for the tuiles.  I think I spread it thinner than it was supposed to be and that would account for my altered baking time.

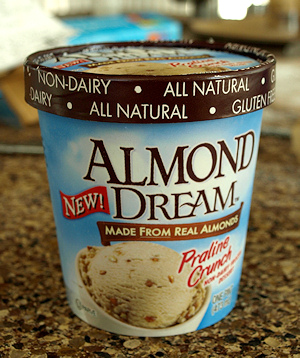
For my fillings, I wanted to go as nutrient dense as possible to not completely blow my plan for the month.  I made this avocado pudding and combined it with soaked cashew creme sweetened with maple syrup. For some texture I soaked/dehydrated/toasted pecans and coated them in chocolate.  I couldn't quite sell Alex on the pudding, though Penny liked it.  So I filled one of the entremets with Alex's new favorite ice cream and a couple of layers of chocolate coated pecans.

In all, this was a fun technique to try out.  Even though I felt a little heady from the sugar in the joconde it was a very tasty cake and so easy to work with.  The possiblities for decorating full sized cakes and making little entremets are endless!  And Alex especially liked the chocolate tuile sticks I made from the decor paste-- perhaps some chocolate ice cream cones should be in his future.  Thanks for the great challenge Astheroshe!
 
Links:
-Check out our host Astheroshe on her blog, accro.  She has the complete recipe along with her spumoni inspired fillings, HERE.  See above for my wheat-free/dairy-free adaptations.
-I filled my entremets with this avocado pudding from Jenn, The Leftover Queen
-I didn't use a recipe for the cashew creme.  I just took well soaked cashews and blended them with a little water and a touch of maple syrup and vanilla extract until they were whipped.
-For a fun example of this technique see Gesine Bullock-Prado's Love Cake.  I really loved her book, Confections of a Closet Master Baker.  It's a must read for food lit lovers of the baking persuasion.  And she has a new cookbook called Sugar Baby due out in April, which looks very cool.
-As always, if you'd like to join in the baking fun visit the Daring Kitchen and look to the Daring Baker Blogroll for other examples of this technique.

The decor paste, decor covered in joconde batter, baked patterned joconde before flipping to reveil the pattern and after
Patterned joconde lined molds
Alex's ice cream filled entremet
His new favorite ice cream, Almond Dream Praline Crunch