Showing posts with label Recipes: pies and tarts. Show all posts

November 27, 2010

DB Autumnberry Crostata

The 2010 November Daring Bakers’ challenge was hosted by Simona of briciole. She chose to challenge Daring Bakers’ to make pasta frolla for a crostata. She used her own experience as a source, as well as information from Pellegrino Artusi’s Science in the Kitchen and the Art of Eating Well.
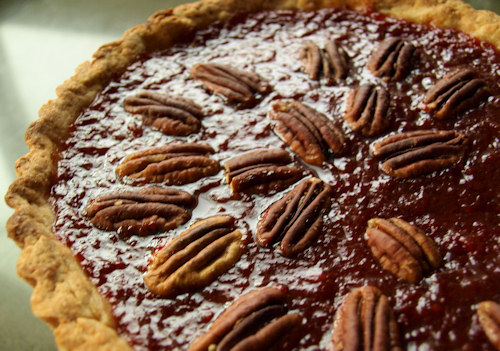
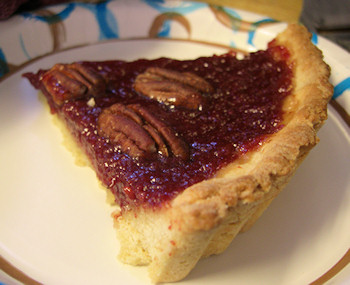
Ever in search of a better pie crust I was trilled to try out this month's recipe for pasta frolla, Italy's contribution to the pastry dough world.  I made our host's variation that adds in coconut flour and whole wheat pastry flour to supplement the all-purpose flour.  For the fat I used a combination of two thirds solid extra virgin coconut oil with one third Earth Balance margarine.  I filled my tart with the spiced autumnberry jam I made earlier in the month.  Then because Alex and I nibbled too much on the scraps, which were very tasty, I added some pecans on top for crunch and decoration.  It was a simple but tasty tart that I brought along to a Black Friday lunch with my parents.  Thanks for the challenge Simona!

Links:
-Go to our host Simona's blog briciole for her two pasta frolla recipes and her aunt's pastry cream recipe.
-Simona used the recipes for pasta frolla from the book Science in the Kitchen and the Art of Eating Well, follow the link to read it on Google books.
-Come across any autumn olive berries (autumnberries) still left on bushes in the woods?  Make a batch of this jam.  The berries are even sweeter after the frost. 
-Visit the Daring Kitchen and see more crostatas made this month by browsing the Daring Baker Blogroll.

A slice of autumnberry crostata
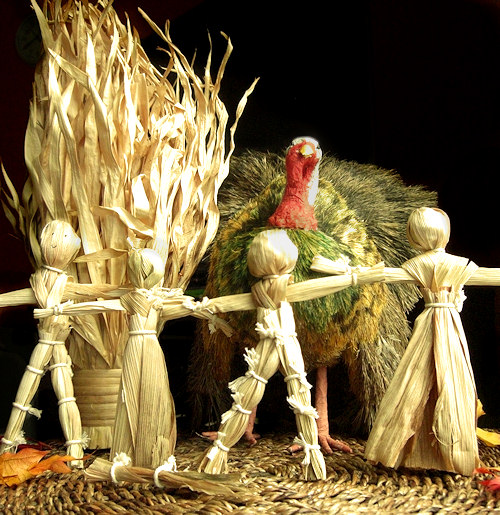
 This Thanksgiving my son Alex and I made corn husk dolls using husks from our homegrown Bloody Butcher corn.  The corn itself is drying for our next project of grinding it into cornmeal. 

July 3, 2010

Red Currant-Cornmeal Tart

Around this time last year I found myself in in one of the big box stores, Home Depot or Lowe's.  As their garden centers get picked over and beaten down by the reflected heat of the asphalt you can sometimes come across good bargains.  That day I scored a pair of viburnums, four lilacs and three red currant bushes.  All of them were in sad shape: pot-bound, only a few leaves left, and looking ragged without any deadheading or trimming.

I'm happy to say that all of those plants are doing quite well this year.  The viburnums are almost double in size and the lilacs are growing nicely--despite the fact that the spotted knapweed plants are crowding them terribly.  And I find myself fighting with my son Alex to get my share of the red currants.

The currants are tart, slightly tannic with crunchy seeds inside.  John thought they were a lot like pomegranate seeds but I think that was their bursting quality and seeds more than their flavor.  They don't seem to have a very distinctive taste but they do have a striking red color and look lovely on their stems.  Unfortunately the stems are bitter and you have to be careful removing the berries because they are thin-skinned and delicate.

I thought a cornmeal crust would be good because the seeds are less noticeable against a crunchy dough.  Instead of using a pastry recipe, I decided to adapt a cornmeal cookie recipe I had bookmarked so that I would have a sweeter, sturdier crust.  Here is what I made:

Red Currant-Cornmeal Tart
Crunchy cornmeal shortbread crust with hints of anise and orange filled with tart red currants.  I'd also like to try this dough with an egg added to make thumbprint cookies.
Makes (1) 7 3/4 inch tart

2/3 cup all-purpose flour
1/3 cup cornmeal
7 tablespoons sugar, divided
1/2 teaspoon finely grated orange zest
1/4 teaspoon ground anise seed
1/4 teaspoon salt
4 tablespoons extra virgin coconut oil, solid
2-3 tablespoons ice water
7 oz (~1 1/3 cups) red currants, washed and stems removed
1 1/2 teaspoons cornstarch

-Mix together the flour, cornmeal, 3 tablespoons of the sugar, zest, anise seed and salt.
-Spoon the coconut oil on top of the flour mixture and then place the whole bowl in the freezer for 2-3 minutes.
-Cut in the chilled coconut oil with a pastry cutter or a fork until there are no pieces of oil larger than a pea.
-Add the water one tablespoon at a time and mix to make a cohesive dough. 
-Press the dough into a tart pan and then cover and refrigerate for at least one hour.
-When you are ready to bake preheat your oven to 375 degrees F.  Spray your tart pan with oil or grease with more coconut oil.
-In a small bowl carefully mix the currants with the cornstarch and remaining 4 tablespoons of sugar.
-Spoon in the currant mixture into the prepared tart shell.
-Bake for ~35 minutes until the center of the currants bubble and the crust is golden brown.
-Allow the tart to cool for at least 5 minutes before attempting to slice and/or remove the outer ring.

Inspirational help:
Feeding Maybelle: Red Currant Mini-Cheesecakes
Simmer Down!: mushroom tart for a bordeaux wine tasting
Martha Stewart's Cornmeal-Cherry Cookies
Maybe next year Alex will share enough to let me make some currant jam.

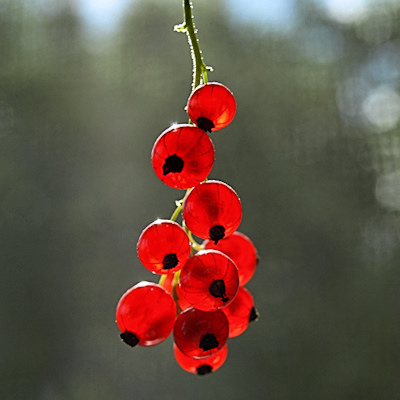
Red currants on the bush
Lines on the berries show the currant's relation to gooseberries
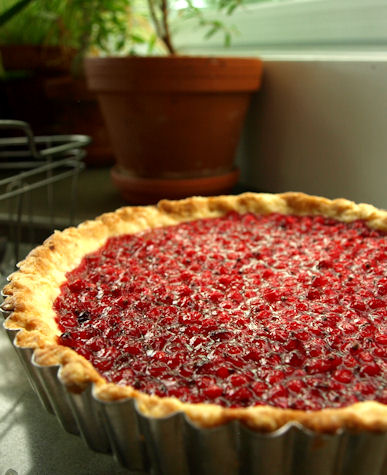
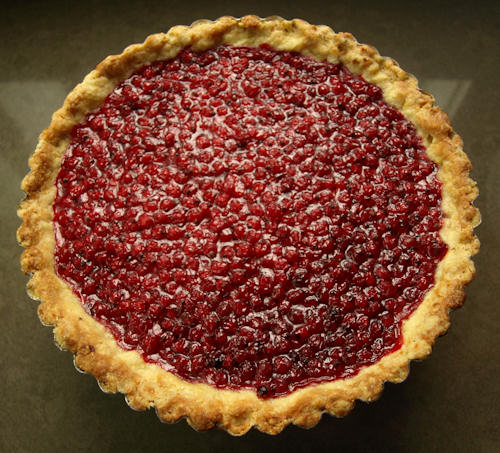
The whole tart
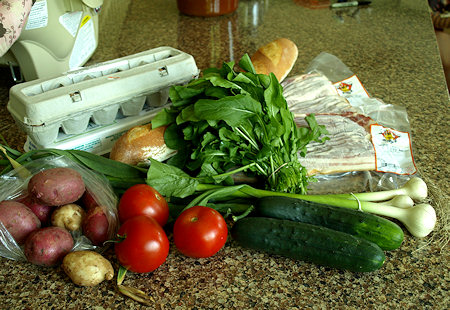
With the Cherry Festival in town my usual downtown farmers market was occupied by cotton candy stands and tilt-a-whirls, so I went to the Sutton's Bay farmers market instead.  I was excited to find a pastured pork producer near us to try as well as these other goodies. Garlic and potatoes from Bare Knuckle Farm, arugula and eggs from Second Spring Farm, tomatoes and cucumbers from Leelanau Produce, two types of bacon from Jonali Farm and a baguette from 9 Bean Rows.

April 27, 2010

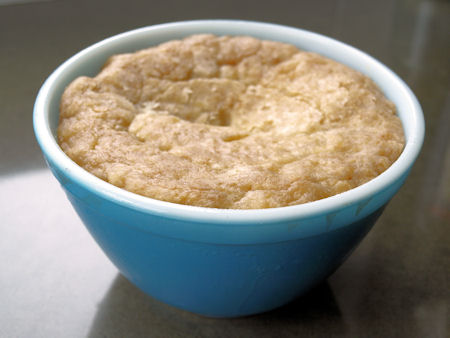
DB Across the Pond Pudding (vegan)

The April 2010 Daring Bakers’ challenge was hosted by Esther of The Lilac Kitchen. She challenged everyone to make a traditional British pudding using, if possible, a very traditional British ingredient: suet.

First off, I'd like to say thanks for all the good wishes! Not withstanding the expected lack of sleep we're all doing well. Of course it would be a grand understatement to say this hasn't been my month for cooking. Since Penny's birth I've been eating reheated meals from the freezer supplemented only by eggs fried by my husband. He's quite good at frying but for heaven's sake don't ask him to poach you one--and definitely don't offer him any advice while he's doing it!

Even though I've been trying to take it easy I still wanted to attempt this month's Daring Baker challenge. I've had steamed sponge (steamed cake) puddings before but not the type with suet crust and filling. Since our household is a dairy-free, meat-eating one I did try to procure some suet. But, since I'm tied down to the couch nursing I had to send my husband out--and the suet never happened. So a vegan pudding was to be.

I chose to swap in extra virgin coconut oil for the suet and the recipe I picked was Sussex Pond Pudding. The citrus and caramel filling sounded like a good bet to please my son, whose favorite flavors are lemon and caramel. To make the recipe more my own I used a small bunch of kumquats in place of the lemon. They have been hiding in the bottom of a fruit drawer for long enough without any purpose. I also halved the recipe since I'm already trying to implement a post-baby diet and don't need copious leftovers tempting me.

Well I loved the results!! The coconut oil worked very well, giving a flaky exterior crust with a spongy interior that soaked up just enough of the caramel sauce. The kumquats gave everything a beautiful aroma and I liked the bite of sour and bitter as a contrast to the rich and sweet crust and sauce. The best part was Alex couldn't be kept away once he saw the caramel sauce run out. He gobbled up his serving but left his kumquats on the plate. I was pleasantly surprised at how easy this dessert was. I didn't even have to fuss with the steamer! I just set it up and it was fine for the time needed. I can easily see myself playing around with this recipe and making it for dinner parties, when I'm ready for that sort of thing again. You could prep the pudding before guests arrive and have a piping hot dessert without having to run around the kitchen or worrying about anything getting over-baked. And somehow this spring I'll just have to find room in my diet to try the delicious sounding rhubarb version. Thanks Esther for the fun challenge!!

Across the Pond Pudding
Here are my adaptations to the recipe for Sussex Pond Pudding. The original pudding recipe came from Esther of The Lilac Kitchen as part of the April 2010 Daring Bakers Challenge.
Makes 1 (2 cup) pudding, serves 4

6 oz (~3/4 cup) all-purpose flour
1 teaspoon baking powder
1/4 teaspoon salt
3 oz coconut oil, solidified
~1/2 cup soy milk or water
2 1/4 oz Earth Balance Margarine
2 1/4 oz Demerara or Turbinado sugar
8 kumquats or half a lemon

-Find an appropriately sized heat proof bowl and prep a pot big enough to hold it for steaming. The steaming pot must be able accommodate the bowl along with a steamer basket or rack and have a fitted lid.
-Mix together the flour, baking powder and salt in a bowl. With a pastry cutter or fork, cut in the coconut oil until it forms large crumbs. Add enough milk or water to form a dough.
-Take three quarters of the dough and roll it out to a circle large enough to line the inside of the steaming bowl, the 2 cup heat proof bowl. Line the inside of the bowl with the dough.
-Mix together the margarine and sugar and place half in the lined bowl. Add the kumquats or lemon half and cover with the remaining sugar mixture.
-Roll out the remaining quarter of dough to form a lid. Pinch the edges of the lid to the lining and prick a vent in the center.
-Cover the steaming bowl with a layer of waxed paper combined with a layer of aluminum foil. Pleat to make a single expansion fold and tie tightly with string.
-Get your steaming pot going and place the covered bowl inside. Steam for 3 1/2 hours, checking the water level occasionally.
-Remove the bowl from the steaming pot carefully and take off the foil and paper. Invert a rimmed plate on top of the bowl and then quickly flip to unmold the pudding.
-Slice and serve.

Links:
-Our host this month is Esther from The Lilac Kitchen. Visit her site for recipes for Sussex Pond Pudding and other suet-type puddings.
-Esther based the recipes for this month from the following sources: Delia Smith’s Complete Cookery Course, The pudding club (www.puddingclub.com), Mrs Beeton’s Book of Household Management and the Dairy Book of Home Cooking and her own family’s recipe notes!
-I used Tree of Life coconut oil this month and really liked it. It was a lot milder in coconut flavor compared to some of the other brands I've had.
-Visit the Daring Kitchen and see all the other puds made this month by browsing the Daring Baker Blogroll.

Penny and her very proud big brother AlexWrapped up pudding after steaming
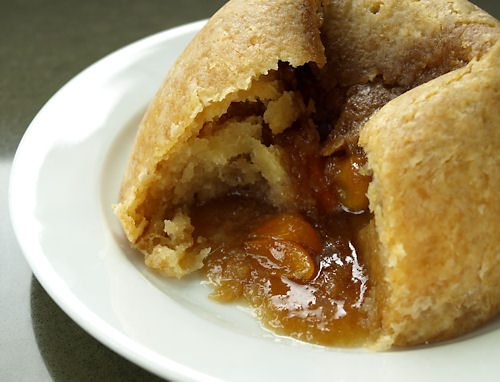
Unwrapped finished puddingUnmolded pudding before cutting

June 27, 2009

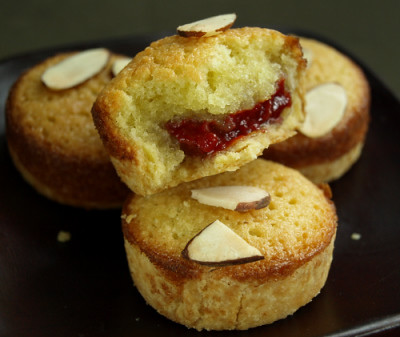
DB Bite-sized Bakewells w/Autumn Olive Berry Jam

The June Daring Bakers' challenge was hosted by Jasmine of Confessions of a Cardamom Addict and Annemarie of Ambrosia and Nectar. They chose a Traditional (UK) Bakewell Tart... er... pudding that was inspired by a rich baking history dating back to the 1800's in England.

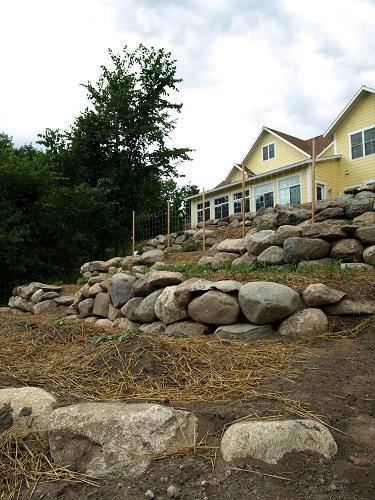
This month represents several Daring Baker firsts for me: my first Bakewell tart (a first taste as well as my first ever baked) and my first challenge completed on the posting day. Distractions from the new house still have me disconnected from the blogging world. We were lucky enough to close a deal on our old house in the Metro-Detroit area--which was no small feat in this economy! This lead to a big clean out and our second Uhaul move with the furniture and flotsam we left for staging. Moving is exhausting work but more enjoyable hard work has been occupying me in my newly built vegetable garden!! It's off to a late start and so it's hard for me to spend even a single day lit hour not poking around in it. In Michigan, if you blink too long you can miss summer completely.

I was very interested in the Bakewell tart/pudding. Most British desserts are an enigma to me and this was one I hadn't even heard of before. I love working with almond meal and have been sneaking it into quick breads and cookies to up their nutritional density. How could I resist the chance to make a tart that revolves around almonds? A Bakewell tart requires jam but I only just bought strawberries to begin preserving this morning so I used the last half of the final jar of autumn olive jam from last year.

Since I didn't have a use for a whole tart today, I made mini tarts using a mini cheesecake pan (I used it for tarts here as well). I halved the pastry dough to insure I would have enough, rolled it out and cut 2 1/2 inch diameter circles for each compartment. I only made a third of the frangipane and used 1/3 cup of jam which worked out to a little more than a teaspoon of jam per tart and a little over a tablespoon of frangipane topping each. My divisions created a full 12 tarts and each was a perfect 2-3 bites. I loved how light both the pastry and the frangipane were and the touch of almond extract in both was lovely. I will definitely be digging out that bottle of extract more often. I would have liked a little more jam for more tart contrast but I think the autumn olive berry jam color looked great in these.

I do have a few things to post because it would be a crime to not use my new kitchen but I can't bear to sit at the computer when there are other things to be done. Maybe we'll finally get some rain...or fall and winter will come eventually and I'll have more time on my hands.

Links:
-Our hostesses this month are Jasmine of Confessions of a Cardamom Addict and Annemarie of Ambrosia and Nectar
-Visit the Daring Kitchen to join in and take a look at the Daring Baker Blogroll for the other versions of this month's recipe.
-The complete recipe can be found here. Due to my son's dairy allergies I replaced the butter called for with Earth Balance margarine. I also downsized the recipes as described above and cut the baking time down to 17 minutes.

My newly built and planted vegetable garden
Abbie gets supervised outings. She likes sniffing around for chipmunks.

January 13, 2009

Vegan Orange Cream Tarts w/ Almond Crusts

Last year I was excited to hear about a new dairy-free yogurt made with coconut milk, though it was awhile before it finally made it to stores in Michigan. I jumped at the chance to buy some when it first showed up in our local Whole Foods. At first, the only flavors I could find were plain, vanilla and passion-mango. The vanilla was a hit with my husband and I loved the passion mango but Alex, my dairy allergic son, wasn't interested in any of them. Finally this December, I got a hold of some of the blueberry and raspberry and Alex loves it. I think it's great that he can have yogurt, get the probiotics and not add yet another soy-based product to his diet.

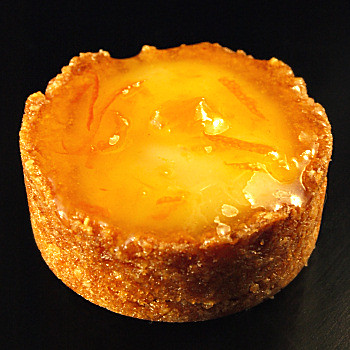
I've been thinking for some time about how I could use this yogurt in a recipe. Then I saw a blog event on Tony Tahhan's site. The event is A Taste of the Mediterranean and the first month's host is Fanny of Foodbeam. The theme is tarts and I knew I could use the yogurt as a tart filling. My hope was that the vanilla flavor, with faint hint of coconut, would work well with orange in a custard filled tart. I used an almond tart shell recipe I've been working the kinks out of and it came out great this time. I tore apart my pantry looking for that little box of agar for the filling but alas it has gone the way of single socks in the dryer. Instead of waiting until I could get new agar, I chose to thicken the custard with cornstarch. To top it all off, I used up the last of gifted marmalade from my parents. These were toasty, creamy, crunchy and sweet and best of all reminiscent of an Orange Julius. It'll take some experimenting but coconut milk frozen yogurt is now just on the horizon. Any other ideas that I should try?
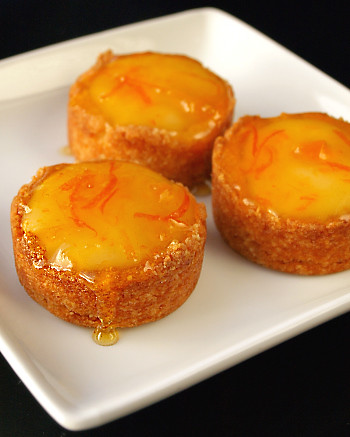

Vegan Orange Cream Tarts with Almond Crusts

Makes 12 mini (1 1/2 inch) tarts

1 (6oz) container of So Delicious Vanilla Coconut Milk Yogurt
1 tablespoon Earth Balance margarine
a pinch of salt
1 tablespoon orange juice
1 1/2 teaspoons corn starch (or tapioca starch)
1 teaspoon finely grated orange zest
4-5 tablespoons orange marmalade
1 batch of baked almond mini tart shells (recipe follows)

-Prepare tart shells as directed and allow to cool most of the way. Warm 1 tablespoon of the marmalade in the microwave (~10 seconds) or warm in a pan. Brush the inside of the empty tart shells with marmalade and set aside.
-Add the yogurt and margarine to a small saucepan. Stir together the orange juice and cornstarch until there are no lumps and then add to the pan and stir everything together.
-Heat over medium high heat until the mixture comes to a boil. Cook for ~1 minute or until the mixture thickens.
-Remove from the heat and add the orange zest. Cool for 10-15 minutes stirring occasionally.
-Spoon the filling into the tart shells and chill. You could use the refrigerator for ~30 minutes but I popped them in the freezer for 10 minutes, just until the custard sets some on top.
-Warm the remaining marmalade and spoon a small puddle on top of each tart.
-Store in the refrigerator. **Update: These are even better the next day!

Almond Tart Crust
Makes enough for 12 mini (1 1/2 inch) tart shells

5 tablespoons almond meal (blanced ground almonds)
4 tablespoons sugar
2/3 cup all-purpose flour
1/2 teaspoon salt
4 tablespoons Earth Balance margarine (or butter)
1 teaspoon of flax seed mixed with 2 teaspoons of warm tap water
1 teaspoon vanilla extract
1/4 teaspoon almond extract

-Preheat your oven to 400 degrees F and mix together your flax seed meal and water.
-Pulse the almond meal, sugar and flour in a food processor until evenly mixed together. Or whisk together in a bowl.
-Add the margarine (or butter) and pulse until sandy and there are no large lumps of margarine or butter remaining. This can also be done with a pastry cutter or two forks.
-Stir together the extracts with the flax seed mixture and pour over the top of the flour mixture and process until larger clumps form. Or stir together with a spoon.
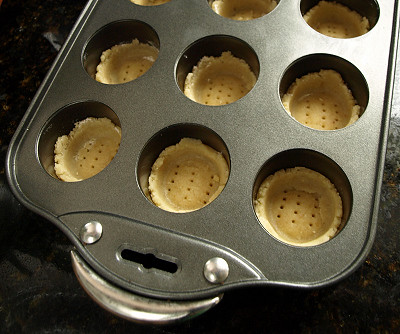
-Place a heaping tablespoon of the dough in each tart and then evenly distribute any extra dough. Tamp down the dough with a clean, floured spice jar or use your fingers or a spoon.
-Dock the tart shells, IE prick several times with a fork. Bake for 11-13 minutes until golden brown on the edges.
-Cool and fill.

Tamped and docked tart shells before baking
Links:
Tony Tahhan
Foodbeam
So Delicious Coconut Milk Yogurt
Norpro Mini Cheesecake Pan, the pan I used.

December 6, 2008

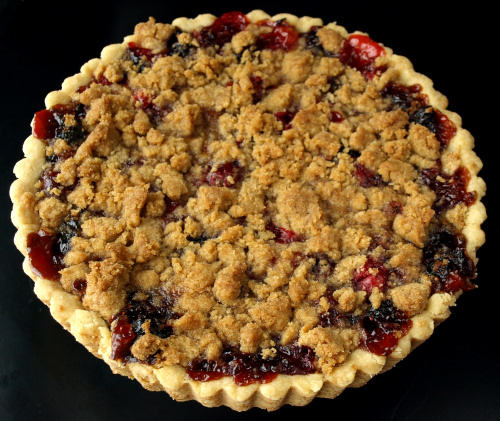
Cranberry-Cherry Tart with Ginger and Orange

My Thanksgiving didn't go quite as planned and I wasn't able to do all of the cooking I wanted to do. This left me with a glut of fresh Michigan cranberries. Coincidentally, I have had time to catch up on my food magazine reading. The cover recipe for cranberry-cherry lattice pie in the latest free magazine from Whole Foods Market caught my eye as the perfect use for my extra cranberries.
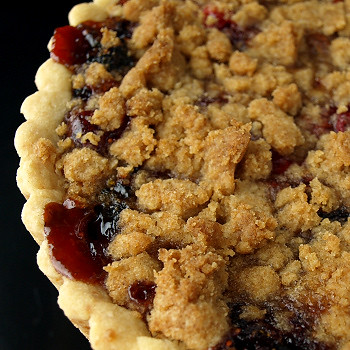
Today we were celebrating my father-in-law's 80th birthday. (Happy Birthday Pappou!) I had already offered to make a chocolate cake but I decided to make a small tart for those who weren't big on cake. (Yes, it may sound crazy but I'd almost always pick pie over cake.) I used the super easy oil crust from Mother's Kitchen, swapped out the lattice for crumb topping, and added fresh ginger and a pinch of cinnamon. I loved the ginger flavor and the sweetness from the dried cherries. Favor the pie lovers in your life and make this!

Just to let you know what's up with my lack of posts:
The past few weeks I've been dealing with an ectopic pregnancy. It's been an emotional and stressful time and I've needed to take a break from a lot of things including my computer. I can't put into words the disappointment, uncertainty and fear I've been feeling. My family and friends have been great support and I can't thank them enough. I hope to be feeling better and cooking and blogging like crazy soon.

Cranberry Cherry Tart
I made my tart with Michigan cranberries and Michigan dried cherries. Both are easy to find this time of year. The recipe fills a 7 1/2 inch tart pan which is one of my favorite baking pans. It's the perfect size to make a small dessert for 4-6 (or 8 when there is cake too). I can't remember where I got mine but you can buy one online at Kitchen Fantasy. To make this recipe in an average pie pan I would suggest doubling the recipe.

Filling
Adapted from Cranberry-Cherry Lattice Pie in Nov/Dec 2008 Whole Foods Market magazine
Makes enough to fill an 7 1/2 inch tart shell
2 cups fresh cranberries
3/4 cup sugar
1/2 teaspoon orange zest
1 teaspoon freshly grated ginger
a pinch of cinnamon
1/2 cup sweetened tart cherries
3 tablespoons orange juice

-Preheat your oven to 350 degrees F and prep your tart shell.
-Process 1 cup of the cranberries with the sugar, orange zest, ginger, cinnamon and cherries until the cranberries are roughly chopped.
-Add the remaining whole cranberries and the orange juice and stir with a spoon/spatula until all the ingredients are well combined.
-Fill the prepared tart crust and top with the crumb topping.
-Bake for 50 minutes, or until the tart crust is golden brown and the filling is bubbling.
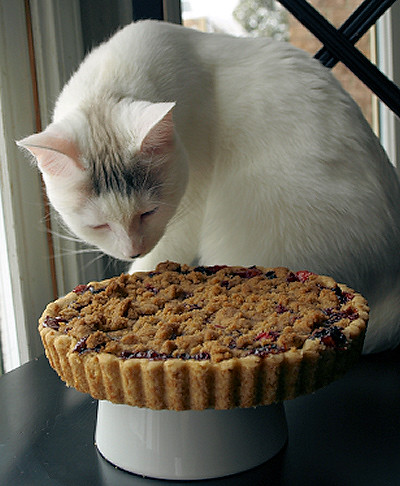
-Cool for 5 minutes and then place the tart pan over an inverted bowl or glass to remove the outer ring. Carefully press down on the outer ring so that it drops down. Allow the tart to cool completely and serve. Removing the outer ring while the tart is still warm prevents any bubbled over juice from sealing the crust to the outer ring. It is an optional step but I find it very helpful for creating presentable, easy to slice tarts. Check out the photo of my cat Abbie with the tart on an inverted bowl at the end of this post.

Tart Crust
Adapted from Mother's Kitchen
1 cup all purpose flour
1 tablespoon sugar
1/2 teaspoon salt
1/4 cup neutral oil (I use grape seed)
2 teaspoons milk

-Mix all the ingredients together.
-Press into the tart pan until evenly covered.
-Chill in the fridge while you prepare the filling (~10 minutes, but more is fine).

Crumb topping
1/4 cup all purpose flour
3 tablespoons brown sugar
2 tablespoons butter (Earth Balance margarine in our house)

-Smash the ingredients together with a fork until combined. Then rub the mixture with your hands to get good crumbs. Set aside to top the tart.

Another kitten-approved recipe
I hope my family will still be willing to eat my baked
goods after seeing this. I swear I didn't let her touch it!

July 16, 2008

Sour cherry picking and pocket pies

This past Saturday my family decided to brave the threatening weather and go cherry picking. After a short drive in the country we ended up at Blake's cider mill. They have pick-your-own Bing, Rainier and sour cherries. Best of all they have a pitting machine!

We headed out to the sour cherry trees and started picking but shortly it began to rain. We all tried to stay dry under the trees but it kept coming down and we had to give up and run for the cars. Since my parents and I both had a full bucket we decided to call it a day and head to my house where my peach Danish was waiting for us.
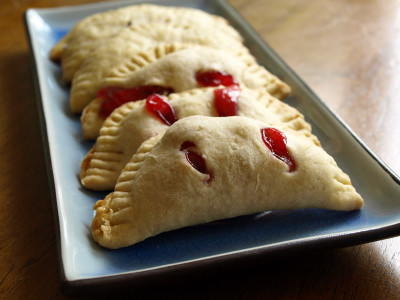
In past years, I've made lots of sour cherry preserves but we're really not jam eaters and I hate how much sugar preserve recipes have. I've made dried cherries but they take a lot of cherries and get eaten up too fast. I even canned cherries in light syrup one year but let my jars cool too much and had a glass filled mess. While I was debating what to do with the cherries my husband John was working his way through my bucket making cherry-soymilk smoothies and I was eating a bowl of micro-stewed cherries for breakfast every day. I finally settled on using the last of the bucket to make homemade pie filling. The stuff in the cans always tastes like metal to me and the cherries are over sweetened and overcooked. I started with a simple recipe. When you have cherries pitted sitting around they give off a lot of juice. So, I skipped some steps, eliminated the lemon juice and lowered the amount of sugar to my tastes. The resulting pie filling was delicious! I had planned on freezing half of the filling but it was so good with yogurt I barely had enough to make some pocket pies.

I remembered seeing a Good Eats episode on pocket pies and thought Alex would love them. I make him dairy-free calzone with Food for Thought mozzarella and they are one of his favorite foods. Alton Brown makes a chocolate filling on the show that I wanted to try to make dairy-free in addition to filling some pies with the cherry filling.
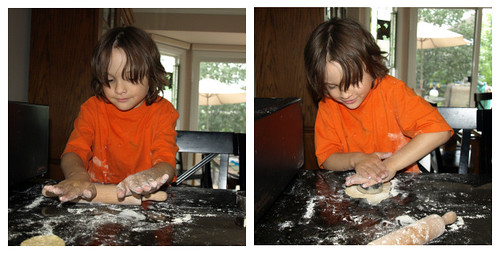
When I started making the dough, Alex noticed what I was doing and came to help. He got the scraps of dough and made some teeny-tiny pies and cinnamon sugared animals. I rolled out my dough and mixed up the chocolate filling with Earth Balance as the butter substitute. I filled the first batch with chocolate filling and put them in the oven. Then I got to work on the cherry filled pies.
When the timer sounded a surprise awaited me. Most of the chocolate filling had oozed out of the pies! Alex heard my exclamation and ran over to see what had happened. He started laughing and told me that my pies had diarrhea. While this was an apt description his six year old mind was a little fixated on the scatological idea and he cackled and repeated the statement for at least 10 minutes. We then found that the "diarrhea" was chewy and delicious and pulled away from the pies without too much damage to them. There wasn't as much chocolate filling still inside as I would have liked but they were still really good.

I'm not sure if I didn't seal them well enough or put too much filling inside. Maybe I need to add something else to make the Earth Balance set? Flaxseed meal, cornstarch, or flour are options I'm going to try when I make these again. And I will make these again. The dough came together really quickly and easily and was easy to work with. The cherry filling bubbled out a little but otherwise they were perfect; fresh tasting and not overly sweet.

I'm sure I'm going to make more pocket pies with other fillings and work on getting the chocolate filling to stay inside. Using up my picked sour cherries as pie filling was new for me and I think it would be a good way to save the fruit while it is in season. I'd like to make more and try freezing individual portions to top yogurt or hot cereal with. The whole time I've been thinking about how next year we'll be living 100 feet from a sour cherry orchard. I really can't wait for the move!

I've been meaning to post an entry to Jen from Modern Beet's Fresh From the Farmer's Market Blog Carnival and this entry seems perfect. Be sure to check out the other posts on her blog in the beginning of August.

Here are the recipes with my alterations:

Sour Cherry Pie Filling
This was great with yogurt or hot cereal and worked beautifully in my pocket pies.
Makes ~5 cups

4 cups (1 quart) pitted sour cherries
1/2 cup juice from the cherries
3 tablespoons corn starch or tapioca starch
3/4 cup sugar
pinch of salt

-Add the juice from the cherries to a large saucepan. Stir in the sugar and cornstarch until there are no lumps of cornstarch left.
-Add the cherries and bring to a boil. Only boil it until it thickens so you retain the cherries fresh taste.
-Remove from heat and cool. Store in the fridge or freeze. Can be used like canned cherry pie filling.

Pocket Pies
My dairy-free version of Alton Brown's Good Eats Pocket Pie Recipe. If you'd like directions on how to deep fry or pan fry these pies look to the original recipe.
Makes 10-15 pies

9 1/2 oz all-purpose flour (~2 cups)
2 teaspoons baking powder
3/4 teaspoon kosher salt
2 1/2 oz shortening (~6 tablespoons)
3/4 cup soymilk
1 egg beaten with 1 teaspoon of water, or just water
  1. Preheat your oven to 350 degrees F. Have your fillings ready.
  2. Place the dry ingredients into a large bowl and mix together well with a wire whisk.
  3. Cut in the shortening with a pastry cutter until the shortening is the size of flakes of oatmeal.
  4. Add in the milk all at once and stir together.
  5. Turn out onto a lightly floured surface and knead 10-20 times.
  6. Roll the dough out to 1/3 to 1/2 inch thick and cut out 2 1/4 inch circles of dough.
  7. Form pies by taking a circle of dough and rolling it to a thin disk 4-6 inches across. Brush one edge with egg wash or with water. Add 1-2 tablespoons of filling and fold over the other side. Crimp with a fork and snip 2-3 holes in the top for venting. Transfer to a baking sheet.
  8. Bake for 20-25 minutes until golden brown. Cool and eat.

May 30, 2008

Key Lime Pie Truffles

This month's Royal Foodie Joust features the ingredients: almond, lime and raspberry. Elle chose these ingredients after winning last month's joust with her delicious looking Mango Buffalo Wings.

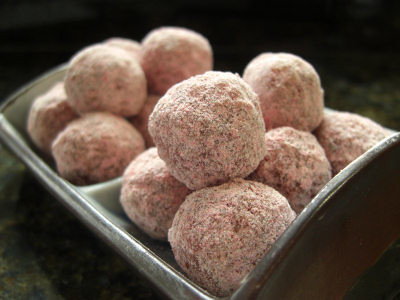
I was very happy she picked almonds since I was already on a mission to clean out the nuts in my freezer. I also immediately knew I wanted to play with one of Alex's favorite snacks, Just Raspberries. These tart dried raspberries were the inspiration for my no-bake, mostly raw, almond "truffles". There is always leftover raspberry dust after Alex has eaten the whole ones and I've thought it would be great to coat the outside of cookies. I based my recipe loosely on this raw chocolate fudge and the Midwest favorite buckeye balls. The balls themselves are sweetened only with dates but I added a little sugar in the raspberry coating to buffer the tartness. The resulting tangy snacks remind me of key lime pie made into a pretty, pink, crispy-centered truffle. They are best stored in the freezer so the rice krispies stay crisp but I'm proud to say it wasn't even two days before mine were all gone. My husband John was a big fan.

Key Lime Pie Truffles
Tart and crispy no-bake treats that remind me of key lime pie.
Makes 36 balls

1/2 cup Just Raspberries* (freeze dried raspberries)
3 tablespoons powdered sugar
1/2 teaspoon cinnamon
1 cup raw almonds
3/4 cup chopped dried dates, pits removed
2 1/2 teaspoons key lime zest
3 tablespoons key lime juice
1/4 teaspoon salt
2 cups crisp rice cereal
*You can find Just Raspberries in health food stores, Whole Foods and many larger grocery stores in the health food section. You can also buy them direct here.

1.) Pulse the raspberries, sugar and cinnamon in a food processor until they form a light pink powder. Tap the top of the food processor bowl and allow the dust to settle before opening. Pour the powder into a bowl and set aside. Wipe out the food processor bowl, washing is not necessary.
2.) Add the almonds to the food processor and pulse until they form a coarse meal. Add the chopped dates, lime zest, lime juice and salt. Process until it comes together like a cookie dough and the dates are distributed evenly.
3.) Scrape down the bowl if needed and add half of the rice cereal. Process until incorporated. Add the remaining cereal and repeat. This gives you some smaller cereal crunch and some larger.
4.) Form teaspoon sized balls and roll in the raspberry mixture.
5.) Freeze any uneaten balls. They are great right out of the freezer.

February 21, 2008

My first "Sugar High Friday"

If you don't often read food blogs you might want to go here to learn what a "Sugar High Friday" is.

This month's theme is Pies That Evoke Your Dreams.
Sound delicious? Make a contribution to a non-profit helping to transform the world of food through pie- Pie Ranch. Please specify "Pie Ranch/Green Oaks Fund” in the "Designation" field of the online donation form (Pie Ranch is fiscally sponsored by the Rudolph Steiner Foundation) at: http://tinyurl.com/3bmn4c
You can also see all the other pie contributions at the round-up which will be published on February 29th at vampituity.blogspot.com.

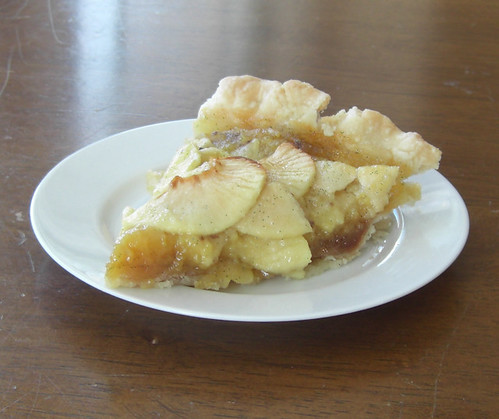
I decided to play around with a variation on apple pie. I found a recipe for apple custard pie that used brown sugar flavored corn syrup. I thought Lyle's Golden Syrup would be a good change. (Alex loves golden syrup on his pancakes!) Then I added seeds from a vanilla bean to give the custard a strong vanilla taste. The result is a VERY rich pie similar to a butter tart with apples. (Butter tarts are deliciously evil, sweet, corn syrup, egg and butter concoctions found primarily in Canada). Improvements I would make are: I think it would have made individual tarts and added walnuts or pecans. I also would have made sure to press the top layer of apples into the custard, I pressed a little but not enough.
Enjoy!

Apple Custard Pie
Makes 1 pie, crust recipe follows.
1/2 cup sugar
1/3 cup corn starch
Seeds from one vanilla bean
3 eggs
1/2 cup butter OR margarine, melted (I used Earth Balance tub)
3/4 cup golden syrup
1/4 cup milk (I used Silk soymilk)
1/2 teaspoon vanilla extract
3 large cooking apples, peeled and thinly sliced
1 (9-inch) unbaked pie crust*
2 tablespoons chopped walnuts, optional
1.Preheat oven to 375°F.
2.Combine sugar and corn starch and vanilla seeds in medium bowl.
3.Whisk in eggs. Stir in butter, golden syrup, milk and vanilla.
4. Fold in half of apples. Pour into pie crust.
5. Place remaining apples in overlapping circle on top of pie. Press down gently until custard covers the top layer of apples a little. Sprinkle with walnuts, if desired.
6. Bake for 50 minutes or until center of pie is set. Check and cover crust edges with foil if they get too golden.
7. Cool on wire rack. Eat. Refrigerate leftovers.

The Crust:
Enough for a double-crust pie or two single-crust pies. You could halve this recipe if you have no use for the extra dough.
12 tablespoons (1 1/2 sticks) Earth Balance Buttery Spread*
3 cups all-purpose flour**I used White Lily AP Flour which is still softer than most
3/4 teaspoon fine sea salt
1 tablespoon sugar
1/3 cup very cold vegetable shortening
6 to 8 tablespoons (about 1/2 cup) ice water
*The stick Earth Balance seems to work a lot better in pie crust than the tub version. I suspect it has more palm oil due to a slightly higher saturated fat content.
**I used White Lily AP Flour which is still softer than most AP brands.

1. Dice the fats and place them in the freezer while you prepare the flour mixture. (But not more than 3-4 minutes)
2. Place the flour, salt, and sugar the food processor pulse to mix.
3. Add the chilled fats and pulse 8 to 12 times, until the largest piece of fat is the size of a pea.
4. Simultaneously, pour the ice water down the feed tube and pulse the machine until the dough begins to form a ball.
5. Wrap in plastic wrap and refrigerate for 30 minutes.
6. Cut the dough in half. Roll one half on a floured board into a circle and place in a pie pan. Chill the dough in the pie pan for 30 minutes.