Showing posts with label Recipes: nuts. Show all posts

January 8, 2012

Chicken Livers and Onions

In addition to following the Whole 30 rules for January I also pledged to eat at least one meal a week with organ meats.  Why should you consider eating organ meats?  A big reason for me is wanting to respect the animal that gave its life for you by wasting as little as possible but there are also plenty of health benefits.  While I will eat beef liver occasionally and I liked the beef heart we got with our quarter steer, my favorite and one of the easiest organ meats to find and prepare are chicken livers.

When I was a kid my parents served chicken livers in their spaghetti sauce and I still love them that way, although now on top of sauteed zucchini.  While in college and while dating John I was coming out of my vegetarian years and learned a new way to eat chicken livers. The Metro Detroit area is teaming with good Middle Eastern restaurants and a favorite of ours back in "the dating years" was the Pita Cafe in Oak Park, MI.  At the corner of Greenfield and 696, we passed this restaurant on the way to and from our two homes too many times to count.   Great hummus, good lentil soup (smooth or chunky), juices, and fantastic chicken livers made up our meals there.

They served their chicken livers fried with onions, jalapenos, and lots of olive oil with a side of rice pilaf topped with parsley and toasted almonds.  Lemons were served on the side to squeeze on. You had to be careful to ask for the dish "mild" or they would blow your head off with the jalapenos!   I've updated this to use my Sorta Gremolata from my freezer and keep the dish Whole 30 compatible.  I'm also an even bigger wuss about spicy food now but feel free to overload yours with jalapenos!

Chicken Livers and Onions
Rinse and dry your chicken livers well.  Lately I soak them in a brine for a few hours but I haven't decided if it makes a big enough difference in the taste.  Slice a couple of sweet onions.  Heat up a skillet and add fat of your choice.  I used chicken fat but have used olive oil in the past.  Fry the onions with salt and pepper until caramelized.  Remove the fried onions from the pan and set aside.  Add more fat if needed and fry the chicken livers until done.  Don't forget to season them and don't overcook them!   Toss the onions and livers together and top with defrosted "gremolata" balls.  *If you don't have the "gremolata" you could substitute some chopped parsley with garlic, lemon zest and juice. Finish with some toasted chopped almonds and a squeeze of lemon juice. Wonderful served with a green salad dressed with lemon juice and olive oil.

November 24, 2011

DB Filipino Desserts

Catherine of Munchie Musings was our November Daring Bakers’ host and she challenged us to make a traditional Filipino dessert – the delicious Sans Rival cake! And for those of us who wanted to try an additional Filipino dessert, Catherine also gave us a bonus recipe for Bibingka which comes from her friend Jun of Jun-blog.

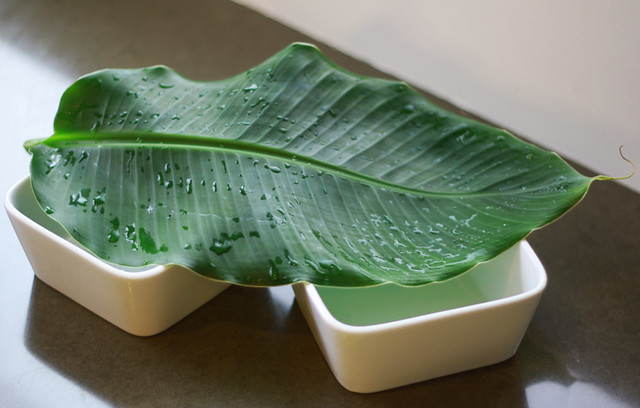
Filipino desserts were chosen to be this month's Daring Baker challenge.  Already wheat-free with lots of eggs and low dairy these recipes were a fun adventure that began with making salted duck eggs.  Raw duck eggs sat on my pantry shelf, curing in a salt brine, for over 20 days before they were boiled and used as a garnish for the sweet rice cake, Bibingka.  The salted eggs weren't that strange in flavor but the texture was unusual.  To complete the authentic flavor, the rice cake bowl was lined with a banana leaf I clipped from my own banana plant.   It was an interesting combination but not something I loved.  The Sans Rival was a more familiar recipe for a chocolate nut meringue, cashew in the original recipe/almond in mine, layered with French butter cream.  The meringue was wonderful, chewy and nutty and a tad crispy.  The lack of real butter in my butter cream was disappointing but mattered little to the kids who haven't had anything frosted in a while.  It was fun to try some new things.  Thanks for the challenge Catherine!

Links:
-For the complete challenge recipes visit our host, Catherine, at her blog Munchie Musings.  The Sans Rival recipe is her creation.  For the original Bibingka recipe and more Filipino food take a look at the site Jun-blog.
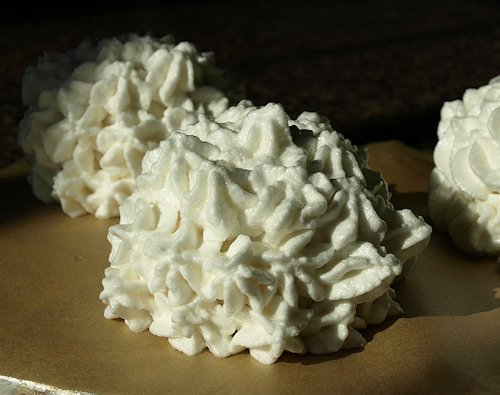
-My alterations this month were simple.  Coconut oil in place of the butter in the Bibinka and no cheese.  I used Spectrum Butter Flavor shortening in the butter cream, remember that it is unsalted and so you need to add salt to the egg yolks so that it will dissolve.  The butter cream was flat tasting without any salt and added later it didn't dissolve.  If I were to try this butter cream again I would try  adding a single tablespoon of milk (almond or coconut) to cut the waxiness of the shortening.  It did pipe beautifully though!

The chocolate Sans Rival
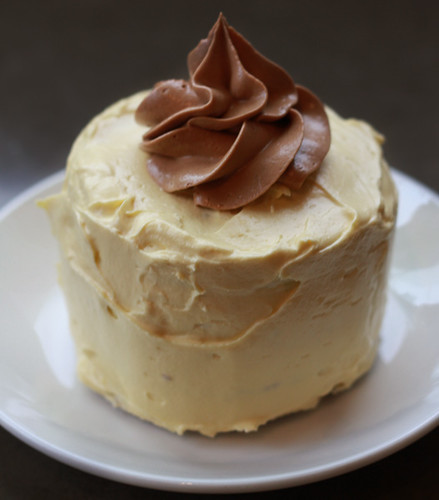
A vanilla frosted version requested by Alex
My banana plants
Their sacrificial leaf
My flock feasting on $1ea after Halloween pumpkins.  
They graciously provided the eggs for this challenge.
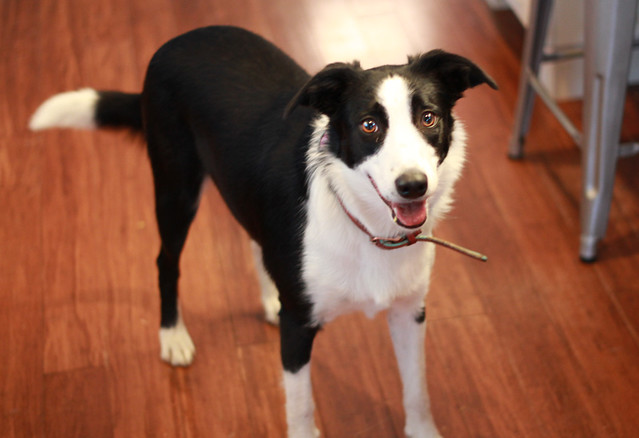
Our dog Perfect, I'm recently trying to get her out with the poultry with the hope that I can train her to help in some way.  Of course I have no idea what I'm doing but she is smart and obedient and starting to get over her puppy craziness.

June 27, 2011

DB Baklava (gluten-free and wheat versions)

Erica of Erica’s Edibles was our host for the Daring Baker’s June  challenge.  Erica challenged us to be truly DARING by making homemade  phyllo dough and then to use that homemade dough to make Baklava.

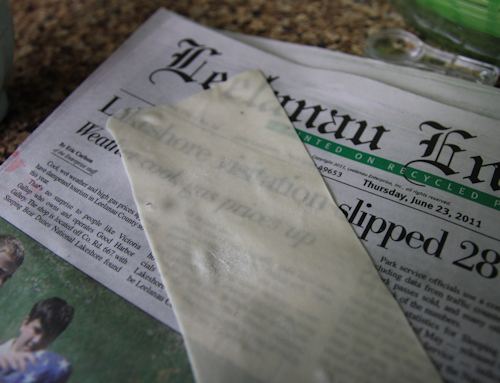
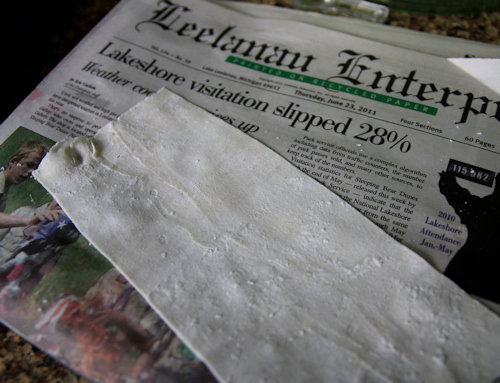
It was just my luck that I'd still be avoiding wheat when the Daring Bakers decided to make homemade phyllo.  It's been on my To Try list for a long time and so I couldn't resist making both a wheat flour and a gluten-free version of this dessert.  The wheat phyllo wasn't as hard as I thought it would be though I think I made it a lot less challenging by baking a small batch, small sheets are much easier to roll out.  The gluten-free recipe we were offered required a specific brand of flour mix and so I just chose to make a mini batch and wing it.  I used a combination of tapioca flour, sorghum flour and cornstarch but it really wasn't much of a success. It couldn't be rolled thin enough, was too tough in the finished product and didn't brown properly.  Apologies for the top picture, I just never got around to getting a shot of the cut slices.  But you can see the gluten-free phyllo is in the smaller pan and clearly not the golden brown I intended.  It was still edible and the honeyed nut filling was delicious.  For both of my baklava, I left out the sugar in the nuts and used a combination of almonds and walnuts.  I spiced them with cinnamon and cardamom and made the syrup with honey, lemon juice and a splash of orange flower water.  My wheat baklava went to friends we had over for dinner and for my first try at homemade phyllo I thought it was alright.  I did notice that it needed more syrup because it wasn't as sticky as I would have liked.  But there is always room for improvement and now I can check off an attempt at homemade phyllo, what next?

Lately we're busy trying to make the most of the sunny days we get.  My vegetable garden is coming along nicely and our new ducks and chickens are getting all grown up.  Alex had a fun birthday and loves being free from school.  Penny is growing like a weed and learning to climb up on everything-- couches, beds, chairs, tables!!  I try to give her lots of time outside so we can avoid that.  She and Alex are kept busy picking strawberries, fighting over the hose and hunting for frogs around our pond.  Right now we have over a dozen green frogs, 5 or 6 painted turtles and several generations of tadpoles in the pond John had dug last fall.  What Alex really wants to find is a salamander so we've been poking under all the rotting logs in our woods.  Summer is grand!  I hope yours is going as well as ours.

Links:
-For the full recipe visit our host Erica at her site,Erica’s Edibles.   Or view the recipes HERE in a PDF version.
-Erica based her recipe on those found in the book Kaffeehaus: Exquisite Desserts from the Classic Cafés of Vienna, Budapest, and Prague and the Baklava recipe from Alton Brown.
-I think if I'm ever eating gluten-free and crave baklava these Baked Apples "Baklava" would be a better choice than trying gf phyllo.
-Other participants for this challenge are listed in the Daring Baker Blogroll.

The wheat phyllo, see how you can read the paper through it.
My attempt at gluten-free phyllo, thin but I couldn't get it transparent.
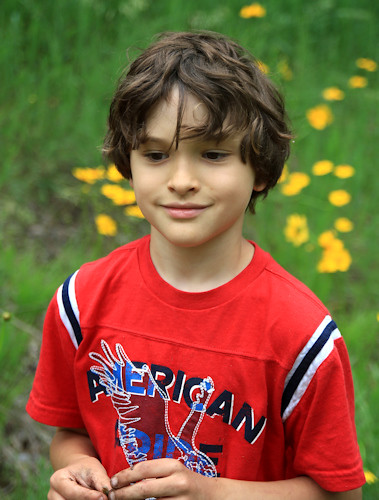
My big NINE year old boy
Penny on a salamander hunt

May 27, 2011

DB Chocolate Marquise (done dairy-free and honey sweetened)

 The May 2011 Daring Bakers’ challenge was hosted by Emma of CookCraftGrow and Jenny of Purple House Dirt. They chose to challenge everyone to make a Chocolate Marquise. The inspiration for this recipe comes from a dessert they prepared at a restaurant in Seattle.

This month I've been far too busy to do much blogging.  There has been gardening, Alex's school, houseguests and trips downstate, 15 new birds (9 new ducks and 6 chickens), lots of poking around outside looking for morels-- plus I seem to be terribly accident prone this month.  I usually rack up a number of burns, cuts and bruises but this month I've added a smashed shower door, a sunburn and a punctured foot to my list.   Let's hope I piled all of this into May and will have a pleasently uneventful, productive and relaxing summer.

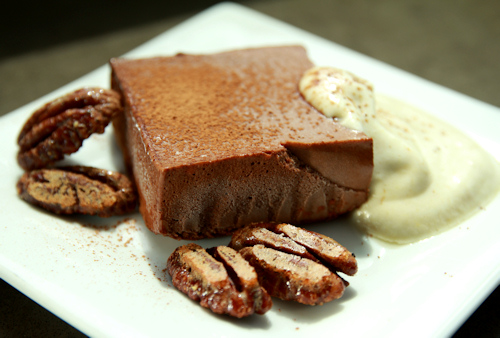
Somehow I did manage to whip up this month's Daring Baker challenge.  Looking at the recipe I initally was annoyed and frustrated.  Recipes for mousse are so tough to do dairy-free, especially if you are also mostly soy-free as well like us and don't have the option of using silken tofu.  Then I went through a pouty phase where I complained in my head that the hosts chose a recipe that didn't even have a mandatory baked item.  It's supposed to be Daring *Bakers* not Daring Desserts!  But eventually I came up with a game plan and forged ahead.  I've been eating almost no refined sugar since the beginning of the year so the first change I made was to use honey to sweeten all the components.  I also substituted unsweetened baking chocolate for the bittersweet and swapped carob powder for the cocoa.  For that tricky heavy cream I gave extra chilled coconut cream a try and I spiced my mousse and nuts with ginger and black pepper.

The changes ended up being fairly simple and the result was pretty decent.   The ginger and pepper went well with the honey flavor and yet dark chocolate was still the star.  The mousse texture was a little grainy when still hard but smoothed nicely when I let the squares warm up a little more.  With all the egg and yolks they still were light and creamy.  But the best part was the nuts--they are fantastic!!  I'll be making batches (and batches and batches) of them again.  So thanks for the challenge Emma and Jenny, as always I'm happy to be a Daring Baker and give something I would never try to make a chance.

Here are my altered ingredient lists. All of these are scaled to make 1/4 of the original recipes or 6 servings each with 1 (2"x2") cube of marquise.  Instructions and original ingredient lists found here on the Daring Kitchen.
Chocolate Marquise
3 large egg yolks at room temperature
1 large egg
3 tablespoons honey
Chocolate Base, barely warm (ingredients follow)
½ cup coconut cream*
½ cup carob powder (for rolling or dusting)
*By coconut cream I mean I took can of coconut milk and placed it in the fridge unopened overnight. I then scooped out only the thick cream and left the watery liquid to be used in another application. I chilled the measured amount of cream in the fridge and whipped it like heavy cream using chilled beaters and a chilled bowl. It doesn't get the volume of heavy cream but does get fluffier. I then combined the whipped coconut cream with the chocolate base before folding it into the egg/yolk mixture.  This is the opposite of the instructions which have you mix the base with teh yolk mix first.  This way the egg mixture is able to transfer as much volume and air as possible to the finished dish.

Chocolate Base
3 oz (85 grams/ 6 tablespoons) unsweetened chocolate
1/3 cup + 2 teaspoons coconut cream
1/8 teaspoon salt
1/2 teaspoon black pepper
1 teaspoon ground ginger
1 tablespoon tequila
2 tablespoons honey
1/4 teaspoon vanilla
1 tablespoon carob powder
1/4 oz (1/2 tablespoon/8 grams) coconut oil, softened

Torched Meringue
3 large egg whites
3 tablespoons honey
Splash of apple cider vinegar
1/8 teaspoon ground ginger

Honeyed Spiced Pecans
2 tablespoons honey
1 teaspoon ground ginger
1/2 teaspoon black pepper
1/4 teaspoon salt
1/2 large egg white
1/2 cup pecans, ideally soaked and dehydrated first

Links:
-For the instructions to go with my ingredient lists, or the original recipes, visit our hosts Emma of CookCraftGrow and Jenny of Purple House Dirt.  Or see the complete recipe here on the Daring Kitchen site.
-Emma and Jenny learned how to make this marquise dessert when they worked together at a Seattle restaurant. The recipe is adapted from one developed by Bennie Sata, a Seattle-area pastry chef who introduced the city to one of its iconic chocolate desserts. They also included vegan recipes which were created by Ashlae of Ladycakes.
-Visit the Daring Kitchen to see the baker blogroll and other treats made this month.

My favorite Instagram shot from this month
Alex and Penny drawing together
Penny sitting in a patch of ramps.  She was stealing cooked ramp greens from my plate just yesterday.
I'm adding this to Simply Sugar and Gluten Free's Slightly Indulgent Tuesdays

April 22, 2011

Lemon-Dilly Cashew "Sour Cream" Dip


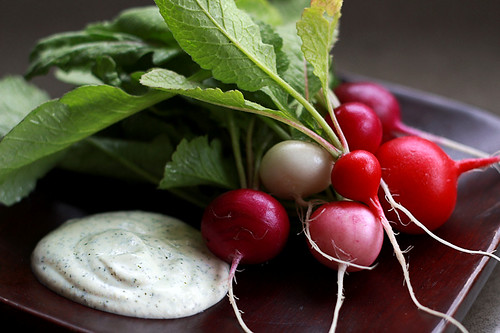
I've been experimenting with cashew sour cream since Christmas.  It started with a few holiday batches of french onion dip.  This was trouble with a capital T and as you know T rhymes with P and the french onion dip was best enjoyed with Potato chips.  In the new year, I experimented with milkless ranch dressing but none of the recipes I tried wowed me or met with Alex's approval.  I gave up for awhile but then picked up the soaked cashews again in honor of this month's Spice Rack Challenge, dill.  Here is dill in a tasty dip made with cashew "sour cream".

*Note the Easter Egg radishes in the top photo, they are from my 9 Bean Rows CSA box from this week.

Lemon-Dilly Cashew "Sour Cream" Dip
Makes about 2 cups

1/2 cup raw cashews + water for soaking
2/3 cup cold water
juice from 1 lemon
2 teaspoons dried dill weed
1 teaspoon finely grated lemon zest
1/2 teaspoon granulated onion
1/2 teaspoon salt
1/4 teaspoon freshly ground pepper

-Cover your cashews in water and soak on the counter for a few hours, then change the water and soak in the refrigerator overnight.
-Drain the cashews and add to a blender with all the other ingredients.
-Blend until perfectly smooth and creamy.  Adjust seasonings to your taste, adding more lemon or salt and pepper as desired.
-Serve with fresh vegetables or crackers.  Also works well as a salad dressing, thin as needed.

Variation:
Add some grated and drained cucumber along with a small clove of garlic and a little olive oil for a tzatziki style sauce.  This cucumber version is very good on salmon burgers.

And now for the obligatory kid pictures..
Penny being cute talking to her giraffe

Both kids being cute
Alex being a lunatic
I am SO looking forward to next week's Easter vacation!

February 13, 2011

Carob Fruit and Nut Bark

Though I'm still full of my typical end of winter griping about dark days and slippery roads, I am noticing that February has been flying by. Tomorrow is Valentine's Day and I'm still trying to lay off sugar and wheat and grains in general. But that's a topic for another post, which I'm too scatterbrained to write at the moment, so here's a recipe I've been working on.

John and I have been upping the ante with our chocolate lately. I've long been a fan of the dark stuff and look for at least 70% cocoa (the bare minimum) but with my current dietary changes I'm even finding things like these brownies too sweet. So we search for darker chocolate for snacking and that results in eventually even liking unsweetened chocolate, if combined with fruit and nuts. The trouble is that chocolate has caffeine and though my tolerance is way higher than John's a little too much snacking ends with me up all night.

So John suggested carob (yes honey, I'm actually giving you credit) and at first I scoffed. Have you ever had those carob covered nuts from the bulk section? Or a carob bar? They are so insipid and gross with a weird chewy quality but John likes them anyway. I remembered seeing carob powder, also called carob flour, at the co-op so I agreed to give that a try. I had some cocoa butter around to try and make homemade dairy-free white chocolate and thought, "Hey I could make carob chocolate and it wouldn't be an oxymoron!"

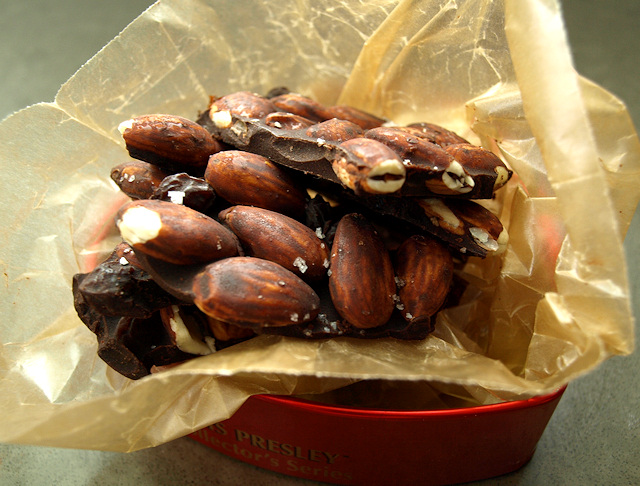
For my first attempt I went completely sugar free and it was wonderful! Of course you have to be used to eating very low sugar/high cocoa chocolate but if you are the kind of person who can snack on cocoa nibs than you might really love this and it won't keep you up at night. Plus, carob may have other health benefits and it's much less bitter and therefore requires less sweetness to be delicious. I've played with the recipe further, added a little dried fruit for a smidgen more sweetness and a little coconut oil so that I don't have to worry about tempering the cocoa butter. The variations are endless but I like this Chunky bar homage with raisins and almonds.

Carob Fruit and Nut Bark

This is for super low sugar chocolate lovers. If you can't handle nibbling on cocoa nibs or 90% chocolate then either use a higher percentage of dried fruit or try adding a little stevia. 
Makes about a pound

3 oz (~3/4 cup) cacao butter*
2 oz (7 tablespoons) roasted carob powder*
8 oz (2 cups) almonds, ideally soaked/dehydrated*
3 oz (3/4 cup) raisins*
1/4 ounce (~1 1/2 teaspoons) coconut oil
1 teaspoon flaky sea salt

-Melt the cacao butter in a double boiler add the carob powder and coconut oil and whisk until smooth.  You could also melt the cacao butter in the microwave but it seems to take forever so I prefer a double boiler for this.  Of course a double boiler does not have to mean anything more than a heat proof bowl that fits on a saucepan with a little water in the saucepan.
-Add the almonds and raisins and stir to coat.  Spread on a parchment lined baking sheet and sprinkle with salt.
-Chill in the freezer for 10 minutes and then remove and break apart.

*Ingredient notes:  Cacao butter is the same thing as cocoa butter but be sure not to skimp on this. I've found cheaper stuff that has off flavors and tastes like soap and it's awful!  Carob powder is also called carob flour.  Of course any combination of nuts with/without any combination of dried fruit would be good. 

**Other notes:  I think a variation with some spice would be excellent and there is an interesting Cinnamon Spiced Coconut Bark on Diet, Dessert and Dogs.  Also, I'd love to try some filled chocolates with this carob chocolate mixture and plan on using this recipe for Double Chocolate Hazelnut Candies as inspiration.

***Note to mom: Hey, check out the Russell Stovers Elvis box, that thing has really gotten a lot of reuse!

January 29, 2011

Flaxseed Brownies

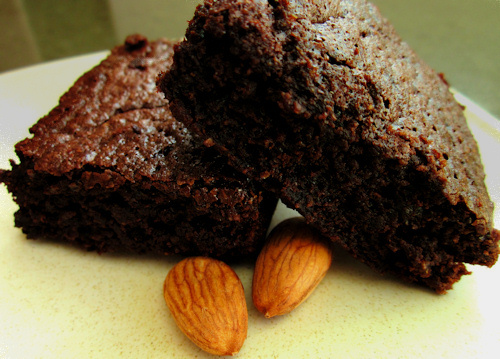
Alex has been snacking on lots of soaked/dried almonds this week, as well as corn chips and salsa and rice krispie/marshmallow bowls.  But I thought he needed a homebaked treat and "chewy" brownies were his request.  I sent him out in the snow this morning and made a batch of flax seed brownies and hot cocoa.  They turned out so good!!   Really moist, on that edge between chewy and almost gooey and though they were super sweet for me since I'm not eating sugar all week they aren't sickeningly sweet.  After Alex nibbled on another two this evening I stashed them in the freezer so that he can have all the rest without them tempting me.  He loves gnawing on frozen baked goods and they'd be perfect rewarmed in the microwave and served hot with ice cream!

Update: I couldn't resist making a second batch sweetened with honey.  I used 1/4 cup of honey in place of the brown sugar and left out the water.  They needed to be baked a little longer (28-30 minutes) but were wonderful.   Ideally, I'll try these in the future using unsweetened chocolate and with a little more honey to make them completely refined sugar free. -Maggie (1-30-11)

Flaxseed Brownies
Based on a recipe I made ages ago and can't find online anymore and these brownies, which are made with buckwheat and sweetened with honey. I would love to try this recipe with honey.  When I do I plan on trying it with only 1/4 cup of honey in place of the 1/3 cup brown sugar. Maybe next week...
Makes one 9-inch square pan (9-12 brownies)

3 ounces (~6 tablespoons) coconut oil
4 ounces (~2/3 cup) semi-sweet chocolate chips
1/2 cup flaxseed meal
1/4 cup almond meal
3 tablespoons cocoa powder
1/4 teaspoon fine salt
1/8 teaspoon baking soda
1/3 cup packed dark brown sugar
2 large eggs, room temperature
2 tablespoons hot water
1 teaspoon vanilla extract

-Preheat your oven to 325 degrees F and line a 9 inch square baking pan with parchment paper (or grease and dust the pan with almond meal.)
-Microwave the coconut oil and chocolate together for 30 second increments (1:30 usually does it) until the chocolate is melted.  Or you could get out a double boiler and melt the two together that way.  Mix the oil and chocolate together and set aside to cool slightly.
-Mix together the flax meal, almond meal, cocoa, salt, and baking soda, a whisk is the best tool for this job.  Set aside.
-Add the brown sugar to the oil/chocolate and whisk in.  Add in the eggs one at a time and mix well.  Add the vanilla and hot water and whisk until smooth.
-Add your dry ingredients to your wet and stir until combined.  Pour into the prepped pan.
-Bake for 22-28, until a toothpick test gives you just a few crumbs clinging.
-Cool 10 minutes, slice and serve.


January 22, 2011

Wheat free, week three

Another week went by and not only did I resist wheat's siren song but I also found it much easier to limit my other grains, rice and oats.  Big this week were kale snackers, more soaked and dehydrated nuts, smoothies combining coconut milk and coconut milk kefir and the favorite for this week-- this celery soup.   I feel that soup had a doctrine of signatures like association with the snowy weather that was very soothing to my soul.  I snatched up a couple more celeriac roots at the co-op this morning to make more and this time I'm getting my share before John gets to it.

But in spite of those triumphs, this week will henceforth be renamed "The Backlash of the Dried Pineapple" because of how sore my mouth was all week after overindulging in the fruit last weekend.  By Monday I was regretting it greatly and it took all week to feel completely better.  I've portioned out the rest of the bag and vacuum sealed them to protect myself.

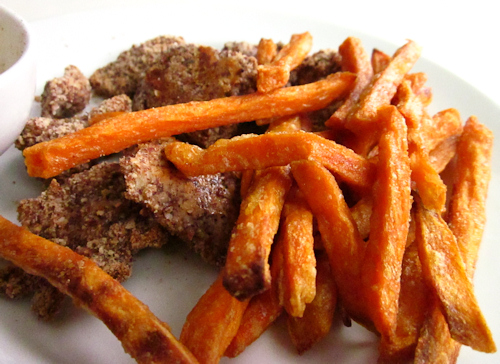
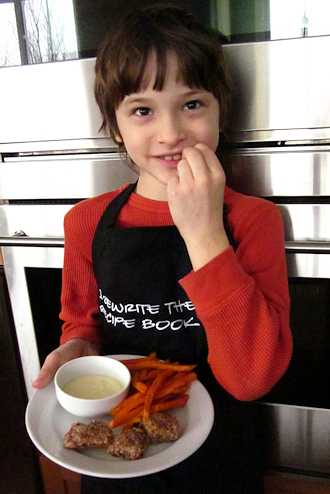
I was better enough to enjoy a mystery package that arrived Friday from Alexia Foods and Foodbuzz.  The box contained a cute black apron and a coupon for a free Alexia product.  Though I do make my own sweet potato fries, Alex especially likes the crisp, thin-cut version Alexia makes and they are wheat-free to boot.  So today we had them for lunch with some almond crusted baked cod nuggets.  A delicious combo, thanks Alexia!


Almond-crusted Cod Nuggets
Makes 3 generous servings

Heat your oven to 400 degrees F and line a baking sheet with parchment paper or foil, spray or grease with oil.  Take two pie plates.  Fill one with ~1 1/2 cups whole almond meal + 2 teaspoons dried lemon thyme and 1 teaspoon salt and stir to mix.  Beat 1 egg in the other pie plate.  Separate and cut into equal sized pieces, 1 pound Alaskan cod (or other firm white fish), toss the pieces in the egg and then coat each piece in almond meal.  Lay out the pieces on the baking sheet, spaced evenly.  Bake for 10-15 minutes and remove when cooked through.

Alex in the Alexia apron, it says "I rewrite the recipe book"
Visit Alexia on their Facebook page, like them and vote on the newest fry to get a $1 off coupon

January 20, 2011

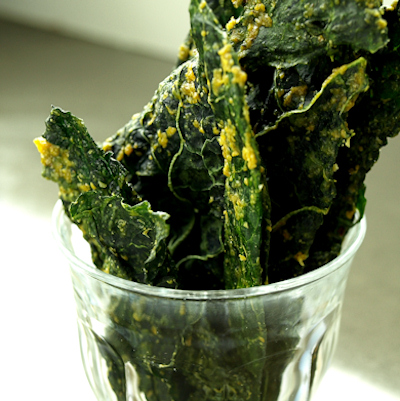
Kale Snackers

Here's my take on Cheezy Earth Chips.  The orginal is great but I knew they could be easy to make and I thought it could use a little less coating and less intense yeast flavor.  I playing with the ingredient list, tweaked and found the flavor I liked best.

I used Coconut Secret Coconut Aminos to make them soy free but soy sauce or wheat-free tamari would work as well.  You may have to adjust the amount because I find the coconut aminos are less salty than even low sodium soy sauce.  Really I suggest tasting the coating before you dress your kale and adjusting to your taste.  This is a guideline recipe nothing hard and fast.  I just wish I had these back in college when I did awful things to industrial sized containers of goldfish crackers.  *shudder*

Kale Snackers
Makes 2-4 servings

2 bunches kale (lacinato/dinosaur works best)
4 tablespoons raw cashew butter
4 tablespoons nutritional yeast flakes
2 tablespoons coconut aminos (or slightly less soy sauce or tamari)
1/4 teaspoon dehydrated garlic powder
1/4 teaspoon ground tumeric
1/4 teaspoon freshly ground black pepper (or a good pinch of cayenne pepper)
1/4 teaspoon flaky sea salt

-Remove the thick part of the stems from the kale and tear into large pieces.  Rinse well and spin or pat as dry as possible.
-In a large mixing bowl stir together the cashew butter, yeast, aminos, garlic, tumeric and pepper.
-Add the dried kale leaves and scrunch around with your hands to get them evenly coated.  Don't worry about crushing the kale too much.  It'll smash down some but dehydrate fine.
-Spread the coated kale on your dehydrator sheets in a fairly thin layer.  If you let it double up it will be fine but produce a thicker chip and take longer to dry.  Sprinkle over the flaky sea salt. 
-Dehydrate at 112 degrees F for 7 hours or 125 degrees F for 2-3 hours.  I haven't yet tried these in the oven, let me know if you do. 

I'm going to try a honey mustard version next.  Or maybe since I have the dehydrator out I'll whip up some BBQ Flax Crackers.

August 30, 2010

DB Baked Alaskas

The August 2010 Daring Bakers’ challenge was hosted by Elissa of 17 and Baking. For the first time, The Daring Bakers partnered with Sugar High Fridays for a co-event and Elissa was the gracious hostess of both. Using the theme of beurre noisette, or browned butter, Elissa chose to challenge Daring Bakers to make a pound cake to be used in either a Baked Alaska or in Ice Cream Petit Fours. The sources for Elissa’s challenge were Gourmet magazine and David Lebovitz’s “The Perfect Scoop”.

I know August was here because I have a number of new freckles, unloaded pictures on my camera and sand in my purse to prove it, but usual there was more to do than time to do it in.  In spite of my grandiose plans to wow all with my dairy-free baked Alaskas I instead bring you my thrown together, last minute attempt at this month's Daring Baker challenge.

We were given a brown butter cake recipe and I was enamored of our host's tag line, "Nutty and toasty meets cool and creamy."  However, margarine is not the kind of thing that improves with browning.  I instead played with the given pound cake recipe to make it toasted almond flavored.   I made a test loaf with the recipe quartered so I would only need one egg and could bake it in a mini loaf pan for just a few individual Alaskas.  I replaced the butter with coconut oil plus two tablespoons of almond flour.  Then I followed the butter browning and cooling directions with my coconut oil/almond flour mixture to get the most nutty flavor out of the ground nuts.  When I added the vanilla extract I also added in an eighth of a teaspoon of almond extract.  The resulting mini loaf was delicious!!  

I stuck with the ice cream recipe from Speedbump Kitchen I used last month but I flavored it with a real vanilla bean in addition to vanilla extract.  My only major trouble came when I beat my egg whites for the meringue cover.  They looked nice and glossy and not overbeaten when I finished beating them but in the time it took to turn around and get the piping bag ready they took on a slightly curdled texture.  Maybe it was the heat?  Either way I loved the cake and my son appreciated another baking challenge that included ice cream.  Thanks Elissa!  

Links:
-You can find the challenge recipes at our host Elissa's site, 17 and Baking.  She collaborated with Jen of Sugar High Fridays.
-Or you can go to original sources.  Elissa got her ice cream recipe from The Perfect Scoop: Ice Creams, Sorbets, Granitas, and Sweet Accompaniments and the Brown Butter Pound Cake recipe from Epicurious
-The ice cream recipe I made was the "The World's Easiest Dairy-Free and Egg-Free Vanilla Ice Cream" from Speedbump Kitchen (click to see all her other ice cream flavors.)
-I replaced the soy creamer with So Delicious Coconut Milk Creamer.  I tried using the Original flavor this month but I recommend using the French Vanilla flavor instead. 
-Visit the Daring Kitchen and see other ice cream treats made this month by browsing the Daring Baker Blogroll

Naked Alaskas
Unbaked Alaskas
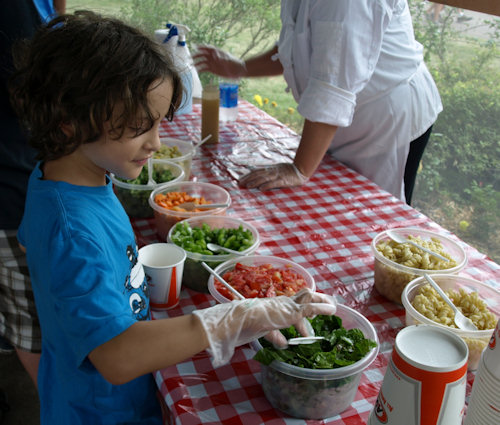
Alex at the NW Michigan Fair at the Cooking the Kids event making a sandwich wrap
And vegetable pasta salad
And blowing bubbles at the Buckley Old Engine Show.
Abbie has been murdering mice all summer
Sadly our duck Coco was killed by a predator while we were on vacation.  We suspect a weasel.
The others are doing well and free ranging more now that the dogs are back to protect them.
Penny is smiling and laughing.
And trying to wear all the cute clothes she got as gifts before the summer ends.
And she started rolling on our vacation to South Carolina and travels across the rooms getting into mischief.
Enjoy the rest of the summer all!

This is the almond flour I used, the cups I formed the Alaskas in and the cutters I used to cut out a slice of cake.  Love 'em all!

December 22, 2009

Gingerbread Caramels (vegan/dairy-free)

At last my Christmas baking and candy making is done! The last batch of cookies (oatmeal chocolate chip) are cooling on the counter as I type. To add something new to this year's line up, I was inspired by an Edible Gifts post on the ultimate vegan sweets blog Bittersweet-- I just had to try my hand at making gingerbread caramels!

After I made the prerequisite batch of my normal vegan caramels for my son Alex, I looked at a few gingerbread variations online and came up with a plan to modify my recipe. I also decided to try adding some toasted walnuts to half the batch, leaving half plain since Alex isn't a walnut fan. This was a halfway good idea...the caramels with walnuts were AWESOME!!! but the plain ones were just good and Alex much prefers his regular caramels. The nut version reminds me of kicked up Wha Guru Chews; which if you've never had are pretty fantastic and highly addictive. I had to add a pack of these to each of my Christmas gift bags to ensure I too many weren't left in the house. Here's the recipe for those interested in giving candy making a try this year.

Gingerbread Caramels (vegan/dairy-free)
A combination of my vegan caramel recipe and the Gingerbread Caramel recipe from Martha Stewart.com.
Makes ~60-75 large pieces of candy

2 cups sugar
2 cups soy milk
1 cup margarine (Earth Balance tub is my choice)
1/2 cup corn syrup (Wholesome Sweeteners brand if you can get it)
1/2 cup molasses
1/2 teaspoon ground cinnamon
1/2 teaspoon ground ginger
1/4 teaspoon grated nutmeg
1/8 teaspoon ground cloves
1/4 teaspoon salt
1 teaspoon vanilla extract
1 1/2 cups toasted walnuts, optional but highly recommended

*Please double check your ingredients to verify that they suit your dietary needs (IE vegan, dairy-free, etc) or the needs of those you are cooking for.

-Line an 8 inch x 8 inch baking pan with parchment paper and set aside. In a small bowl stir together the spices and salt and set aside. Measure out your nuts to have ready as well.
-Add the sugar, soy milk, margarine, corn syrup and molasses to a large saucepan, 4 quart minimum. You don't want this hot sticky stuff boiling over!
-Bring to a boil stirring often and then continue cooking over medium heat while stirring until the candy reaches 245 degrees F.
-Remove the pan from heat and stir in the spice mixture and vanilla. Stir very well to distribute the spices evenly. Then add the nuts and mix them in.
-Pour into your lined baking pan.
-Allow the caramel to cool completely. With a clean and oiled pair of kitchen scissors, snip the caramel into pieces. Wrap each piece individually with cellophane, waxed or parchment paper.
-Give at least two thirds away or you'll end up eating the whole batch!

October 28, 2009

DB French Macaroons

The 2009 October Daring Bakers’ challenge was brought to us by Ami S. She chose macarons from Claudia Fleming’s The Last Course: The Desserts of Gramercy Tavern as the challenge recipe.

This is a last minute effort but I'm glad I gave it at least a quick try. Of course I got no feet, the little base that all French macaroons should have, and they didn't puff as much as I would have liked. However the cinnamon in the batch I made went over extremely well with my son Alex. Another day and I *will* try these again...

Links:

-Get yourself a copy of The Last Course: The Desserts of Gramercy Tavern by Claudia Fleming for this recipe and more.
-Or see the recipe at our host's site, Baking Without Fear
-If you'd like to join in on the fun visit the Daring Kitchen. There you can also check out all the participants by browsing the Daring Baker Blogroll.

In case you're wondering what I've been doing since I clearly wasn't busy perfecting my macaroon technique,
here's my son Alex in his haunted tree Halloween costume.

Since it's relevant, there is a super cute commercial I posted last year that's for my husband's game Chuzzle and it features macaroons! *BTW, Chuzzle for iPhone/iPod Touch will hopefully be out before Christmas for those interested.

March 29, 2009

Vegan Cupcake Trio for the Mammafish Project

When I read that Shelly of Musings from the Fishbowl was looking for volunteers to help create a birthday surprise for her mom I knew I had to join in. Shelly is a vegan foodblogger and former Michigander who currently lives in France. Her mom's 60th birthday was coming up and she still lives in my neck of the woods in MI. I don't think you could get me to turn down an opportunity to bake a birthday surprise for someone.

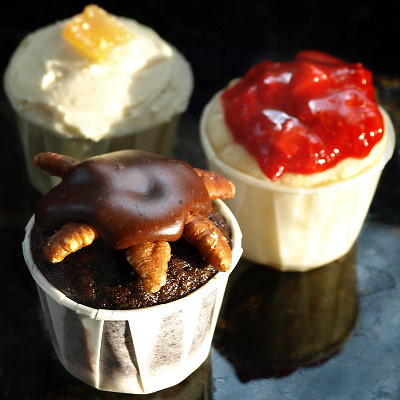
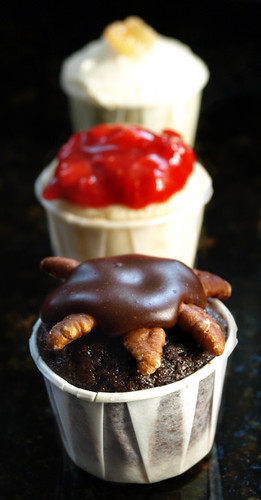
Shelly gave me the clues that her mom used to like turtle candies and wasn't a big fan of lots of butter cream. Even though I do bake with eggs and eat meat occasionally, I wanted to play the surrogate daughter and bake some vegan cupcakes in Shelly's place. With my husband as a sounding board I came up with a turtle cupcake with a pretzel crust bottom for saltiness, chocolate cake, my vegan caramel cooked softer for a filling, freshly toasted pecans, and a blob of fudge frosting for the turtle body. Since my son was hanging around looking for samples I made a vegan version of the yogurt cake he's been so fond of lately. Half I flavored with lemon and half I added matcha (powdered green tea) to. The matcha got Alex's new favorite frosting, dairy-free white chocolate ganache, and a little slice of candied ginger to make them pretty. The lemon cakes I topped with strawberry filling reminiscent of pie filling. Great strawberries are finally coming in, though it's still months before they are the best local ones. I grabbed a bunch of fragrant organic ones on my last trip up north.

My favorite cupcakes were the strawberry/lemon ones. They are brightly-flavored and make me think of spring and summer on the way. Alex loved the lemon cake but would have preferred the white chocolate ganache with it. I guess I have an Easter cake pairing all set there. The matcha cakes still needed a little more green tea flavor and I would chop the ginger into finer pieces next time because the bite with the ginger was just perfect. Alas, I was only somewhat satisfied with the turtle cupcakes. The caramel was lighter than I would have liked and the flavor was lost in the chocolate cake. The pretzel crust was tasty but it needed a little more margarine and sugar to be perfect. My husband John isn't eating sweets right now but I made sure to freeze some of the extras so he can try them and give me a solid critique. The turtle cupcakes will be getting a second run with a different caramel method, improved pretzel crust and vanilla cake. I'll post the recipe when I'm happy with it. Until then here are pictures of my baking and the recipe for the strawberry/lemon cakes.
Happy Birthday Mammafish!
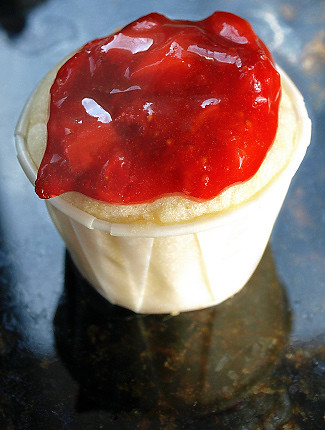
Strawberry-Topped Vegan Lemon Mini Cupcakes
Inspiration taken from the FatFree Vegan Kitchen recipe Strawberry Snack Cake and the Tofu for Two recipe Fragrant Lemon Cake.
Makes 12 mini cupcakes

Cake ingredients:
1/4 cup Earth Balance margarine
1/2 cup powdered sugar
3 ounces (1/2 container) vanilla So Delicious Coconut Milk Yogurt
1 tablespoon lemon juice
1 tablespoon soy milk
1 teaspoon lemon zest
1/2 teaspoon vanilla extract
3/4 cup all-purpose flour
3/4 teaspoon baking powder
1/4 teaspoon baking soda
1/8 teaspoon salt
2 tablespoons almond meal

Strawberry topping ingredients:
8 ounces strawberries, hulled and diced
1/4 cup sugar
1 tablespoon corn starch
1-2 teaspoons fresh lemon juice

-Preheat your oven to 350 degrees F. Line a mini cupcake pan with papers or lay out your mini nut cups on a baking sheet. I use Wilton Mini Nut Cups and I always snip the rolled edge in two spots so that the papers can be ripped off easier. Make the snip just through the edge and you won't be able to tell. You will have to inform the recipients to pull at the snipped spots.
-Prepare the strawberry topping by placing the strawberries, sugar from the topping ingredient list and cornstarch in a cold saucepan. Gently toss the strawberries in the sugar and cornstarch to coat. Place the saucepan over medium-high heat and cook, stirring occasionally gently, until the strawberries release some of their juices and the juices bubble and thicken. Remove from heat and add the lemon juice to taste. Cooked strawberries lose some of their brightness and the lemon juice will pick that back up. Place the strawberry topping in a bowl, cover and refrigerate. You want the topping cold or it will slide off the cupcakes.
-Begin making the cupcake batter by beating the margarine and powdered sugar in a stand mixer until light and fluffy.
-Add the yogurt a tablespoon at a time, beating between each addition. Add the soy milk, lemon juice, lemon zest and vanilla one at a time and beat again until everything is incorporated well and the mixture is fluffy like frosting. You will need to scrape the bowl a couple of times.
-In a separate bowl, whisk together the flour, baking powder, baking soda, and salt. Add half of the flour mixture to the margarine mixture and beat until mostly incorporated. Add the rest of the flour mixture and beat just until smooth.
-Fold in the almond meal. Spoon (or scoop with a small disher) the batter into the snipped nut cups or lined mini cupcake pan. Fill each cup three quarters full.
-Place in the center of the preheated oven and back for 14-17 minutes, until a toothpick inserted in the center comes out clean. Cool completely. The cakes will fall some while cooling.
-Top each cooled cupcake with a spoon of strawberry topping and serve.

The Mammafish cupcake project: (clockwise from top left) the trio of vegan cupcakes, laying out the pecan turtle legs, the matcha cupcake w/ white chocolate ganache and candied ginger, prepping the pretzel crust for the turtle cupcakes