January 29, 2009

DB Sweet and Savory Vegan Tuiles

This month's challenge is brought to us by Karen of Bake My Day and Zorra of 1x umruehren bitte aka Kochtopf. They have chosen Tuiles from The Chocolate Book by Angélique Schmeink and Nougatine and Chocolate Tuiles from Michel Roux.

The grand Daring Baker saga continues this month with tuiles. Our hosts were kind enough to give us a choice of making either regular sweet tuiles, nougatine (shaped caramelized sugar with nuts) or savory tuiles. We were told to pick one of the batters, shape the tuiles and pair them with something light. I wanted to do something interesting with the shaping but knew that my son and husband wouldn't be impressed with pretty butterflies or flowers. In a spur of the moment baking session with Alex, my son, I made my first batch of spiders and snake shaped tuiles. I had made the decision to go vegan this month after using eggs in a couple recent DB challenges, so I chose the veganized recipe from Vegan Yum Yum. I loved that it uses my favorite egg replacer, flax seed meal, and that it was so simple. The practice tuiles were delicious and fun to make however I realized that my son would be more interested in something that could hold ice cream than a cookie shaped like a snake.

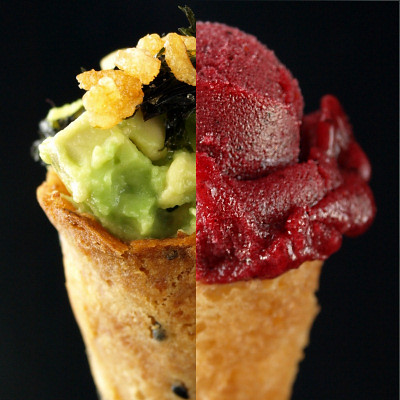
So I made another batch in the daytime, when I knew I could get a decent photograph. For this batch I made cones and combined them with a mixed berry sorbet. They were a HUGE hit!! With my son's dairy allergies he's never had ice cream in a waffle cone or sugar cone, only the premade Styrofoam-like cake cones. Suddenly a whole new world of ice cream pleasure was open to him. They were sweet and I let them caramelize more than the cookies which paired perfectly with my homemade sorbet, which I keep on the tart side. This success spurred me to make another batch to bring to a "Summer in January" event, along with plum sorbet made with my horded frozen local plums.

I felt that my skills were advancing enough that I had to try my hand at the savory tuiles as well. Our savory tuile recipe comes from The French Laundry Cookbook. I have a copy on my shelf and flip longingly through it's pages thinking, "Today will be the day I attempt this." But I rarely do. Also, I'm a huge fan of non-fiction food books that aren't cookbooks and the descriptions of Phoebe Damrosch in Service Included struggling on her open oven door with these tuile cornets challenged me further. However, I still really wanted to commit to the vegan path this month. So I did the unthinkable and messed with a Thomas Keller recipe. The savory tuiles were as challenging as Phoebe describes and that's with my precaution of cooking only two at a time. However I did get a good half dozen that were suitable for the camera.

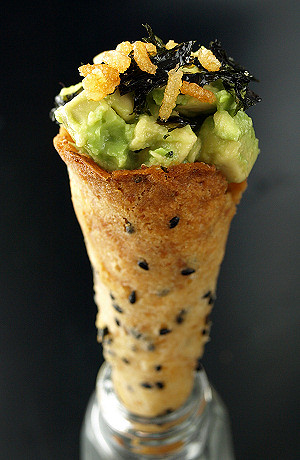
To fill the savory cornets I made a refined version of a salad I eat quite often. It's essentially the flavors of an avocado and cucumber maki roll without the rice. I dress diced cucumber with seasoned rice vinegar, mix them with chopped avocado and top it all with sesame seeds and seasoned seaweed. I usually just haphazardly chop everything and throw it in a bowl but for the cornets I carefully diced the cucumber and avocado. For the seaweed I recommend Sea's Gift (photo at the end), which is awesome stuff! I also attempted this soy caviar recipe but as written it uses a huge amount of soy sauce. I couldn't divide it properly and my kitchen scale doesn't read in tenths of a gram. The "caviar" was a bust but I know it's my fault. With the pressure of remaking a Thomas Keller recipe, I felt I had to do something more so I took some precooked rice and deep fried it (a la sizzling rice soup). That made the final toasty addition to my cornet.

I can't thank Lolo of Vegan Yum Yum enough. I love the sweet tuile cones and see myself making them often. Once you get a hang of the timing and gentle touch needed, making them goes fast--though a little burning of your thumb and forefinger is required. While I liked the savory cornets well enough I think the recipe still could use some adjusting. Another filling might work better as well. The avocado was a little too rich combined with the savory tuile, which came out like a very buttery cracker. I do want to conquer that soy caviar too! I just need to get myself a better kitchen scale.

Links:
-For the complete, original versions of this month's recipes visit our hosts at: Bake My Day and 1x umrühren bitte.
-For the excellent sweet tuiles please use Vegan Yum Yum's Tuile Recipe
-For a good read try, Service Included: Four-Star Secrets of an Eavesdropping Waiter
-And, as always, please check out the Daring Baker Blogroll

My Basic Method for Sorbet
Makes ~1 quart, which goes fast in my house
1 1/2 pounds of fruit (blueberries, raspberries, strawberries, plums, cherries, etc)
1/2 to 1 1/4 cup sugar (every batch is different)
1/4 cup water
1 tablespoon vanilla vodka*, optional (or replace with appropriate liquor of your choice)
tiny pinch of salt
*This adds some flavor but also anti-freeze properties, which help keep the sorbet softer.

-If the fruit is frozen, defrost on the counter. If you are using plums or fresh blueberries I suggest adding the sugar and water and cooking just until the fruit starts to break down. I think you get more flavor this way. This is not necessary for frozen blueberries.
-Process the fruit (along with any juice left from defrosting) with 1/2 cup of sugar, the water, vodka and salt. Process til pureed and taste to see if additional sugar is needed, add if necessary. -Continue processing for a few minutes. Often you can get the fruit to foam, which will make a lighter product in the end. Sometime it won't happen much.
-Strain the puree to remove seeds. If you used cooked fruit then chill the mixture for at least 3 hours.
-Follow your ice cream maker's directions.

Savory Tuile Cornets*
Adapted from the recipe in Thomas Keller's The French Laundry Cookbook
*This is not a final recipe but just what I did if you want to experiment with it. I think that a little less of the flax seed meal and water mix might work better. Please let me know if you have any success with it.

8 tablespoons all-purpose flour
1 tablespoon plus 1 teaspoon sugar
1 teaspoon kosher salt
8 tablespoons Earth Balance margarine
1 tablespoon flax seed meal mixed with 1/4 cup water, set aside for at least 5 minutes
~2 tablespoons black sesame seeds

-Preheat your oven to 400 degrees F. Make paper cones and secure with masking tape. Also make a 4-inch circle stencil with cardboard (like the kind that makes cereal boxes).
-Mix together the flour, sugar and salt.
-Beat the margarine until light and fluffy.
-Add flax seed meal mixture and beat together again until light and fluffy.
-Fold the flour mix into the margarine mixture.
-Place the stencil down onto a parchment lined baking sheet. Sprinkle the inside of the stencil with a little sesame seeds and spread batter on top. I suggest doing two at a time but if you are brave make more. Leave at least 1 inch between each circle.
-Bake 4-6 minutes and then take out and mold on your cone molds. This can be done on the door of the oven to keep the tuiles pliable. Or you can just do a few at a time.
-Place seam side down and bake again for 3-4 additional minutes until golden brown.
-Cool slightly (~30-45 seconds) and remove molds.
-Cool the rest of the way and fill.

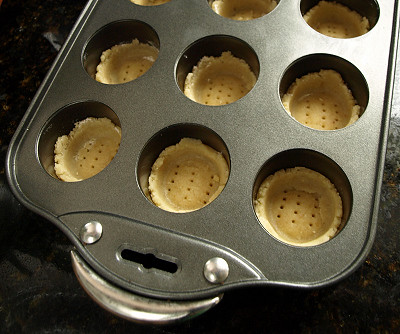
My sous chef Alex and our practice tuilesMore practice tuiles
If you are a seaweed lover try this! It's finely shredded, sesame oil coated, sweetened seaweed
and is great on top of rice
or my combination of cucumber and avocado dressed with rice vinegar.

January 25, 2009

Summer in January

The local Michigan Lady Food Bloggers (MLFB) got together yesterday for a "Summer in January" event. There was a ton of great food and do-it-yourself Mojitos!

If you'd like to find out what I brought, I'm blogging here today.

Other MLFB events:
Tea at Warda's
Heartnut and Wild Rice Salad and a Blogger Potluck

*Check out my Michigan blog list on the sidebar to see links to the MLFB sites and other Michigan blogs I like.

January 22, 2009

Mead (Honey Wine) Chiffon Cupcakes

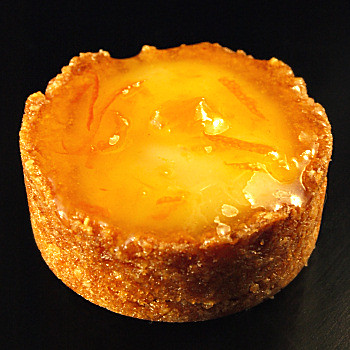
Yes, it's Iron Cupcake Earth time again. The theme for this month is wine. I knew immediately that I had to do a mead or honey wine flavored cupcake. Back in December, there was an article in Hour Detroit magazine that fascinated me. It was called "Mad About Mead" and featured a meadery called B. Nektar. Based in Ferndale, Michigan, the founding couple started off homebrewing mead and the hobby lead to opening their own meadery. I'm always interested new local products and liked the varieties of flavors they produce. For the Iron Cupcake challenge I made special trip to Champanes, a warehouse sized wine shop in Warren with a real stuffed lion in the entryway (quite the eyebrow raiser).

Of the B. Nektar meads I bought, their award winning Vanilla Cinnamon seemed the most appropriate for flavoring a cupcake. It was quite sweet, like an ice wine or Sauterne, and the honey flavor was very pronounced. I chose to adapt a chiffon cake recipe so that the honey flavors wouldn't be overwhelmed. Then I kept the frosting light as well with a meringue flavored with more mead and sweetened with honey. The cakes on their own would be good for kids because the fermented aspect of the mead flavor dissipates in the baking. All that's left is a wonderful honey fragrance. I think they would be great topped with some fruit puree. The frosting is more suited to adult tastes because you do get the yeasty, winy flavors from the mead. The frosted cupcakes were an ethereal puff of honey sweetness with nuances of fermentation. Thanks Iron Cupcake for encouraging me to play with another new cupcake flavor.

In this recipe I used:
Sleeping Bear Farms Star Thistle Honey
B. Nektar Meadery's "Vanilla Cinnamon (mead) A light colored and semi sweet wine made with whole cinnamon sticks and vanilla beans. The beans are sliced open by hand before being added to the mead to ensure maximum flavor extraction.This mead won a silver medal at the 2007 AHA National Homebrewing Competition."
*If you live in the Detroit area B. Nektar has tastings at their Ferndale meadery on the first Friday of every month, see their website for more information.


Mead Chiffon Cupcakes
Based on Alton Brown's Chiffon Cupcake recipe
Makes less than a full dozen (~9-10 cupcakes)

1/2 cup all-purpose flour
1 tablespoon cornstarch
1/2 teaspoon baking powder
1/4 teaspoon kosher salt
a small pinch of cinnamon
2 eggs, separated
5 tablespoons sugar
1/4 teaspoon cream of tarter
2 tablespoons mead
2 tablespoons neutral oil

-Preheat your oven to 325 degrees F and line a cupcake tin with paper liners.
-In a small bowl, stir together the flour, cornstarch, baking powder, salt and cinnamon. Set aside.
-Beat together the egg yolks and 4 tablespoons of the sugar until very light yellow, ribbon stage.
-In a very clean bowl, beat the egg whites with the cream of tarter until frothy. Gradually add the remaining tablespoon of sugar to the egg whites, beating in between each small addition. Continue beating the egg whites until they form shiny, stiff peaks.
-Add the mead and oil to the egg yolk mixture and stir until combined, then add the flour mixture again stirring until combined.
-Stir a third of the beaten egg whites into the egg and flour mixture. Then gently fold in the remaining egg whites.
-Fill the cupcake papers two thirds of the way full with the batter.
-Bake 25-30 minutes, until a toothpick poked into a cupcake comes out clean.
-Cool and frost.

Honey and Mead Meringue Frosting
Makes enough to lightly frost 10 cupcakes, double the recipe for generous frosting

1 egg white
1/4 cup sugar
3 tablespoons mead
1/4 cup honey

-Beat the egg white, sugar and mead over a simmering double boiler until soft peaks form. *I would strongly suggest using a hand mixer for this.
-Add the honey in small amounts and beat in.
-Continue beating over the heat for at least 7 minutes until the frosting forms strong peaks.
-Remove from heat and beat for another minute to allow the frosting time to cool slightly.
-Spread your desired amount of frosting on a cupcake with a spatula and then tap the frosting lightly while turning to create spiky peaks/curls. Repeat with remaining cupcakes.

This month's voting will begin Thursday, January 29 at 8 p.m. at No One Puts Cupcake in a Corner and ends Wednesday, February 4 at 12 noon.
The January Prize Pack includes prizes from: Dogbone Art, Lots of Sprinkles, Cakespy and Sweet Cuppin Cakes Bakery and Cupcakery Supply.
Prizes also come from these corporate providers:
Head Chefs by Fiesta Products, Hello Cupcake by Karen Tack and Alan Richardson, Jessie Steele Aprons, The Cupcake Courier, and Taste of Home Books
Iron Cupcake:Earth is sponsored in part by 1-800-Flowers and Upwithcupcakes.com

January 20, 2009

My favorite children's books with food

As our move north draws closer, I'm trying to start sorting and getting ready-- unsuccessfully so far. I donated a lot of our adult books a few years back in a fit of cleaning, I'm not a big rereader. However, our children's book stash is ever growing and much harder to part with. There could someday be another child, and hopefully someday grandchildren!! When I read a post on The Greasy Skillet listing their Top 5 Children's Books that Play with Food it got me thinking about our children's book collection and how many of our children's books deal with food. Both my husband's favorite children's book and my own are food related. I wanted to come up with a master list from our bookshelves and here it is. Please add more favorites in the comments.

Cloudy with a Chance of Meatballs, a favorite from my husband's childhood about the wild land of ChewandSwallow where food falls from the sky. We have the copy from when he was a kid but had to buy a second copy because this got read so often.

The Giant Jam Sandwich, a favorite from my childhood about a town plagued by wasps and the townpeople's solution to the problem. We have my original copy of this too.

In the Night Kitchen, fussed over for it's "scandalous" little boy parts this is a great book about a little boy's surreal dream.

Watch Out for the Chicken Feet in Your Soup, for those whose grannies were from the old country.

The Popcorn Book, I loved Tomi DePaola as a kid! This is out of print but we have an original copy from my childhood.

The Pooh Cookbook, my son Alex wasn't interested in the Pooh stories but I poured over these recipes as a child. Hint: There's lots of honey.

Green Eggs and Ham, probably the most popular pick, who hasn't read this?

The Story of Cherry the Pig, a cute story from Japan about a baking pig who doubts herself.

Chicken Soup with Rice, a great rhyming book to sing to little ones that teaches the months. Also see the video at the end of the post.

Pickle Chiffon Pie, a charming fairytale about true princes and crazy sounding pie.

Nate the Great and the Monster Mess, the Nate the Great series is full of wonderful short chapter books and I like any book with recipes for cookies in it.

Peter Rabbit's Giant Storybook, Peter makes vegetables sound extra tasty. This big storybook got a lot of use.

Babar Learns to Cook, I had a lot of Babar books. This one has the little elephants making a mess in the kitchen and made me crave cucumber soup as a kid.

Curious George Makes Pancakes, we like it when Curious George makes good trouble.

The Pigeon Finds a Hot Dog!, we prefer Knuffle Bunny and Today I Will Fly! by Mo Willems but this is his book that deals with food. It's fun to do Pigeon's voice.

If You Give a Mouse a Cookie, I'm not a big fan of the sequels to this book but the first is a fun story about the escalating wishes of a hungry mouse.

The Very Hungry Caterpillar, a classic counting book.

The Gingerbread Man, the taunting cookie meets his inevitable end.

The Little Red Hen, an industrious chicken with unhelpful friends makes a loaf of bread the Martha Stewart way.

How Do Dinosaurs Eat Their Food?, gorgeous illustrations and a big hit with the dinosaur lovers.

How are you peeling? and Food for thought, real fruits and vegetables anthropomorphized. You'll never look at the ends of bell peppers the same again.

Fanny at Chez Panisse, the story of Alice Waters' daughter in the famous kitchen of Chez Panisse, with recipes. I think you might need a little girl to appreciate this one.

*Thanks to muddywaters of The Greasy Skillet from Kansas for the inspirational post, The Greasy Five: Children's Books that Play with Food. Go there to see four other books.

**The concocting kid drawing on the top was done by my husband. When I met him he was illustrating a children's book called Poppyseed Bread which sadly never was published. He did have illustrations published in one children's book before he moved on to making PC games. You can find his drawings in the book I Wanna Iguana.

***Update:  I found a great forum thread on Chowhound recently that has a whole bunch that I missed or didn't know about.  Check out the thread, Children's Books that Feature Food.  

****Update #2: For some more unique and nearly lost treasures, check out this Storybook Neverland at Rook No. 17

"Chicken Soup with Rice" sung by Carole King from 1975's Really Rosie cartoon.
I had this on cassette and played it all the time as a kid.

January 18, 2009

My Vegetable Chili, the nostalgic version

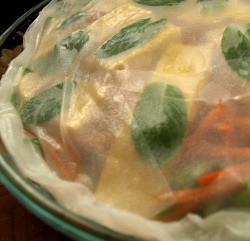
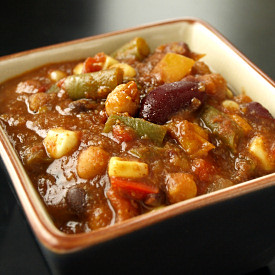
Back in the days when my now husband and I started dating one of our favorite restaurants was the Sourdough Cafe. Located only a few miles from his work in the an open court of Summit Place Mall in Pontiac, Michigan, we loved their soups in sourdough bread bowls and great salads. Ok, I probably was the one loving the salads; John loved the bread bowls. I was vegetarian at the time and there was always a vegetarian soup available but what we both really loved was their vegetarian chili.

I've since made a million versions of this chili taking cues from their combination of ingredients but I'd like to think that I'm improved on their recipe. The key to the versions I make at home is the textures. By adding a few of the ingredients towards the end you get a better finished dish. In my chili, I add fresh green beans and corn at the end. Another more recent change I've made is to use Mexican oregano. Mexican oregano is mintier than Italian oregano and different from Greek oregano, which is more resinous. It works so well with the chile powder it's worth getting a hold of. However, the batch of oregano I have has lots of woody stems that don't soften when cooked. So I crumble the oregano and rub it through a sieve before adding it to the pot. I do this to only the amount I need and just before using because the flavor stores better in larger pieces. For another version of my chili with a similar method see last year's Kitchen Cleanout Chili, but here is the variation that reminds me of those first months dating.

Mexican oregano (from right: as purchased, sifted, stems removed by sifting)

My Vegetable Chili
Inspired by the chili at the Sourdough Cafe Pontiac, Michigan circa 1995-96.
Makes ~6 generous portions

1 large onion, diced
1 stalk of celery, diced
1 red bell pepper, diced
1 yellow bell pepper, diced
1 green bell pepper, diced
4 cloves of garlic, finely chopped
1 tablespoon neutral oil
1 1/2 teaspoons kosher salt
3 tablespoons chile powder (not the kind with other ingredients, I like ancho)
1 1/2 teaspoons ground cumin
1 teaspoon hot smoked paprika (Pimenton de la Vera)
1 teaspoon Mexican oregano *see tip in text above
cayenne pepper to taste, optional
1 (28 oz) can of whole tomatoes
1 (15 oz) can of whole black beans, drained and rinsed
1 (15 oz) can of garbanzo beans/chickpeas, drained and rinsed
1 (15oz) can of kidney beans, drained and rinsed
4 cups water
1/4 cup polenta or grits
2 cups chopped fresh green beans
2 cups frozen sweet corn kernels

-In a large soup pot, cook the onion, celery, peppers and garlic with the oil and salt over medium heat. Stir often and make sure you cook these ingredients down until they are very soft and stop giving off liquid. This should take at least 10-15 minutes.
-Leave the heat on medium and add the spices. Stir to distribute the spices.
-Lower the heat and add the tomatoes, beans and water. Use your hands to crush and tear apart the tomatoes.
-Then add the polenta while stirring, to prevent lumps. The polenta adds a corn flavor as well as thickens. Taste for salt and heat, add more smoked paprika or cayenne for more heat.
-Bring to a boil and then immediately turn down to a strong simmer. Simmer uncovered at least 45 minutes.
-Shortly before you are ready to serve add the green beans. Bring the pot back to a strong simmer and cook until the green beans are tender, approximately 10 minutes.
-Add the corn, stir, taste again for seasoning and serve. The frozen corn does not need time to cook, it should remain crunchy to add a contrasting texture.

This is my entry to Weekend Herb Blogging, a food blogging event created by Kalyn's Kitchen. The event is now run and documented by Haalo of Cook (Almost) Anything Once.

This week's guest host is Rachel from The Crispy Cook. Visit her site at the beginning of next week to see the roundup of posts.

You can also find Rachel at Book Trout (her bookstore blog) and the Cook the Books Club. I read the Cook's the Books Club first book, La Cucina, but didn't have time to make a post about it. I'm now halfway through the second book pick, The Language of Baklava, and enjoying it tremendously. The hard part will be picking something to make from it, everything sounds so delicious.

January 17, 2009

Giveaway winner

I was feeling lazy this morning, browsed online for awhile and made some soup. But guilt got the best of me and I added up and numbered the email entries and the extra entries for posting about the giveaway. 102 entries! I'm feeling the love everyone...for chocolate! No really, thanks to everyone who entered and extra thanks to the ones that posted a link. And now...the winner is...
#24 Rachel

Congrats! I'll email you so I can get your shipping information.

*The cutting board image is my entry to the Flickr group 52 1/2 weeks of 2009. If you take a lot of pictures come and join in. This week's theme was a self portrait, next week is a lyric inspired photo. Click on the cutting board photo (or here) to see names of the ingredients in today's soup.

January 15, 2009

Candy Cane Cocoa

Up front I want to say that this is just my dairy-free, kid-friendly version of an already great recipe. You can find the original at Clumbsy Cookie under Peppermint Mocha Hot Chocolate. Her inspiration for this recipe came from a suitcase full of broken candy canes. My reason is the mug of candy canes that have been staring at me, softly calling "eat us" since Christmas. The pluses were I knew my milk allergic son would love to make this and the dairy-free versions of hot cocoa mix leave something to be desired.

The preparation did not disappoint. Have you ever heard candy canes in a food processor? My son loved it! The chocolate chips didn't make quite as much racket but stirring the big bowl of chocolaty smelling powder was a great activity for him. The resulting hot cocoa was rich, chocolaty with just a hint of mint. I snuck in a teaspoon of espresso powder in mine per the original recipe and it was even better! If you want to go all out, get this cheapo milk frother from Ikea and you'll have a nice mound of foam on top. My son uses this tool all the time to make chocolate milk, chase the cats, etc.

Candy Cane Cocoa Mix
An adaption of the Peppermint Mocha Hot Chocolate recipe from Clumbsy Cookie
Makes ~2 cups

6 candy canes, unwrapped and broken
100 grams (~1/2 cup + 2 tablespoons) chocolate (I used dairy-free chocolate chips)
1 cup soy milk powder (or other powdered milk)
1/2 cup sugar
1/4 cup cocoa powder
1/2 teaspoon of salt
1/4 teaspoon baking soda
1/4 teaspoon vanilla powder

-Place the candy canes in a food processor or blender and process into a powder. Place in a medium bowl (large if you are having a child mixing). **Please use your best judgement as to the appropriate age of children working the food processor. Those blades are sharp and the candy cane noise will get them all riled up.
-Process the chocolate into fine crumbs, pulsing so that they don't start to melt. Add the processed chocolate to the candy cane powder.
-Add the other ingredients to the bowl and stir together with a whisk. Store the mixture in a jar.
-Use one tablespoon per 8 ounces of hot milk (Silk Enriched Omega-3 for us). Stir with a spoon or mix with a milk frother.


I'm adding this to Bookmarked Recipes, an event started by Ruth's Kitchen's Experiments. Visit her site for the roundup of other bookmarked and tested recipes. And give some of your saved recipes a try and post about them!

January 13, 2009

Vegan Orange Cream Tarts w/ Almond Crusts

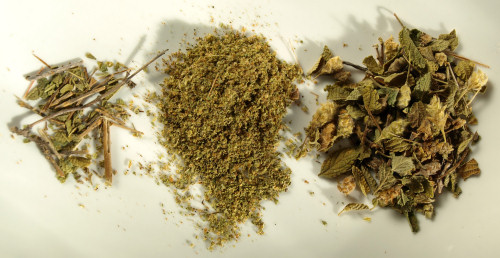
Last year I was excited to hear about a new dairy-free yogurt made with coconut milk, though it was awhile before it finally made it to stores in Michigan. I jumped at the chance to buy some when it first showed up in our local Whole Foods. At first, the only flavors I could find were plain, vanilla and passion-mango. The vanilla was a hit with my husband and I loved the passion mango but Alex, my dairy allergic son, wasn't interested in any of them. Finally this December, I got a hold of some of the blueberry and raspberry and Alex loves it. I think it's great that he can have yogurt, get the probiotics and not add yet another soy-based product to his diet.

I've been thinking for some time about how I could use this yogurt in a recipe. Then I saw a blog event on Tony Tahhan's site. The event is A Taste of the Mediterranean and the first month's host is Fanny of Foodbeam. The theme is tarts and I knew I could use the yogurt as a tart filling. My hope was that the vanilla flavor, with faint hint of coconut, would work well with orange in a custard filled tart. I used an almond tart shell recipe I've been working the kinks out of and it came out great this time. I tore apart my pantry looking for that little box of agar for the filling but alas it has gone the way of single socks in the dryer. Instead of waiting until I could get new agar, I chose to thicken the custard with cornstarch. To top it all off, I used up the last of gifted marmalade from my parents. These were toasty, creamy, crunchy and sweet and best of all reminiscent of an Orange Julius. It'll take some experimenting but coconut milk frozen yogurt is now just on the horizon. Any other ideas that I should try?


Vegan Orange Cream Tarts with Almond Crusts

Makes 12 mini (1 1/2 inch) tarts

1 (6oz) container of So Delicious Vanilla Coconut Milk Yogurt
1 tablespoon Earth Balance margarine
a pinch of salt
1 tablespoon orange juice
1 1/2 teaspoons corn starch (or tapioca starch)
1 teaspoon finely grated orange zest
4-5 tablespoons orange marmalade
1 batch of baked almond mini tart shells (recipe follows)

-Prepare tart shells as directed and allow to cool most of the way. Warm 1 tablespoon of the marmalade in the microwave (~10 seconds) or warm in a pan. Brush the inside of the empty tart shells with marmalade and set aside.
-Add the yogurt and margarine to a small saucepan. Stir together the orange juice and cornstarch until there are no lumps and then add to the pan and stir everything together.
-Heat over medium high heat until the mixture comes to a boil. Cook for ~1 minute or until the mixture thickens.
-Remove from the heat and add the orange zest. Cool for 10-15 minutes stirring occasionally.
-Spoon the filling into the tart shells and chill. You could use the refrigerator for ~30 minutes but I popped them in the freezer for 10 minutes, just until the custard sets some on top.
-Warm the remaining marmalade and spoon a small puddle on top of each tart.
-Store in the refrigerator. **Update: These are even better the next day!

Almond Tart Crust
Makes enough for 12 mini (1 1/2 inch) tart shells

5 tablespoons almond meal (blanced ground almonds)
4 tablespoons sugar
2/3 cup all-purpose flour
1/2 teaspoon salt
4 tablespoons Earth Balance margarine (or butter)
1 teaspoon of flax seed mixed with 2 teaspoons of warm tap water
1 teaspoon vanilla extract
1/4 teaspoon almond extract

-Preheat your oven to 400 degrees F and mix together your flax seed meal and water.
-Pulse the almond meal, sugar and flour in a food processor until evenly mixed together. Or whisk together in a bowl.
-Add the margarine (or butter) and pulse until sandy and there are no large lumps of margarine or butter remaining. This can also be done with a pastry cutter or two forks.
-Stir together the extracts with the flax seed mixture and pour over the top of the flour mixture and process until larger clumps form. Or stir together with a spoon.
-Place a heaping tablespoon of the dough in each tart and then evenly distribute any extra dough. Tamp down the dough with a clean, floured spice jar or use your fingers or a spoon.
-Dock the tart shells, IE prick several times with a fork. Bake for 11-13 minutes until golden brown on the edges.
-Cool and fill.

Tamped and docked tart shells before baking

Links:
Tony Tahhan
Foodbeam
So Delicious Coconut Milk Yogurt
Norpro Mini Cheesecake Pan, the pan I used.

January 9, 2009

My First Blogiversary (w/a givaway)

A year ago I started this blog after being an avid reader/lurker of other food and parenting blogs. It's been a fun year of recording favorite recipes, new experiments and thoughts but what I love most is the variety of great, creative people I've met through blogging. To celebrate my first blogiversary, I'm pulling out ten of my favorite posts and giving away some of my favorite chocolates and an apron or bag with my logo.
The chocolate is from Grocer's Daughter Chocolates, a company located in Empire, Michigan on the Leelanau peninsula where we are building our new house. A local company with great practices, their interesting chocolate combinations are hard to resist. My favorite item is their chocolate drizzled thyme pecans, pictured above on the left. The pecans are caramelized in local maple syrup and have a hint of arbole chiles, thyme and are topped with just enough dark chocolate. They are savory, sweet and chocolaty all at once and are very addictive. To round out the prize I added their gift box named Paloma's Pick which is made up of chocolate that appeals to vegans, those who wish to avoid dairy* or anyone with taste buds. It includes Grocer's Daughter Maple Nibs, a Sun Bar (dark chocolate sunflower seed butter bar, sweetened with Agave), 75% dark Ecuadorean chocolate bar, chocolate covered hazelnuts and 1/2 pint of locally produced maple syrup. In the interest of full disclosure, I am not affiliated with Grocer's Daughter and did not receive any freebies (but I do welcome them).
*Though all of the chocolates are vegan they are produced along with peanuts, tree nuts, soy and dairy and may not be appropriate for those with allergies.
In addition to the chocolates, I'm adding your pick of an apron or bag with my logo. My brother-in-law has recently set up a Cafe Press shop to make items for our company, Raptisoft Games. He also created a ton of cool (at least for me) gear with my Dog Hill Kitchen logo. The apron and bag are my favorites but I wish I had the need for the maternity shirt and bib because they are too cute!!

My favorite posts of 2008:

Vegan Snickerdoodle cupcakes, this was one of the first photos I took that I really liked and the recipe was a huge hit with my son Alex. After a long hiatus, I just made a batch of mini cupcakes two days ago and he gobbled them all up.


Buckwheat crepes with foraged ramps, finding ramps on the property we are building on was tremendously exciting. Both Alex and I like these buckwheat crepes with baked eggs, though Alex was a stinker and preferred no ramps (my six year old is not a gourmet).


Coconut curry roasted cauliflower, I love roasted cauliflower and this version has become my favorite. It's better than buttered popcorn for snacking.


Hamsterball cookie/cake, I wasn't completely satisfied with the decorating on this birthday cake for my husband John but we all loved the combination of chocolate chip cookie and chocolate cake. These are my favorite cake and cookie recipes and I have them memorized but it's nice to know I have them online in case my mind goes, the stained copies get lost or catch on fire. Around our house they are called "the cake" and "the cookies", no other description is needed.


Vegan Danish braid, joining the Daring Bakers was an unexpectedly fun part of blogging. This Danish braid recipe and my veganized version was my favorite challenge of the year.


Cincinnati chili cupcakes, I also started making cupcakes for Iron Cupcake Earth which was the reason for these whimsical cupcakes. I used ideas and a favorite dish from my father and we celebrated his birthday with the tasty results.


Hungarian plum dumplings, these are a favorite recipe that came from my father's family. They are even more important to me now because sadly my grandmother pictured in the post passed away later in the year. I wish I had a chance to eat these one more time with her.


Vegan caramel, this is definitely not a healthy recipe but I'm so proud of how great dairy-free caramels can taste. They are my son's favorite candy.


Growing mushrooms, this was my experiment growing my own mushrooms. I loved the pictures of the emerging mushrooms and the chance to try mushrooms you can't find in stores. My second harvests were meager but I have high hopes for the morel spawn we planted on our property. The whole set of posts: Day 1, Day 4, Day 5, Days 6&7, Day 9, Day 12


Autumn olive fruit leather and jam, I'm not thrilled to have a ton of this invasive species on our land in northern Michigan, but I was happy to learn that the fruit was edible and tasty. I tweaked some recipes from another blogger and made jam and fruit leather.


To enter the giveaway:
1. Leave a comment on this post before midnight January 16, 2009 and let me know if you prefer an apron or bag from the Dog Hill Kitchen Gear Store.
2. If you do not have a Blogger identity with an email address listed, please leave a blog address or drop a line to doghillkitchen{at}gmail(dot)com with your email so I have a way to contact you. 3. Since everyone is doing it, if you post about my giveaway on your blog then I'll grant you an additional entry.

Links:
Dog Hill Kitchen Gear from Creative Recap
Grocer's Daughter Chocolates
About the Grocer's Daughter company

January 5, 2009

Random things I've been up to

With the holidays and recent craziness in our lives, it's been nearly two months since we've seen our new house. Now finally I'm up north for a visit to the building site. Unfortunately there was craziness with the house as well and not a huge amount has changed but what has been done makes a big difference. The drywall has been hung which defines the rooms and makes it feel less like a pile of sticks and more like a house in the making. We spent the last two days taking hikes on our property and poking around in the house. When we came back to the lodge we are staying at I made some delicious posole.

The posole was made with a kit given to us by my parents for Christmas. They took a trip to New Mexico last year and fell in love with the food. For their Christmas gifts this year they made a posole kit (tomatoes, hominy and a homemade spice mix), pine nut brittle, biscochitos and jam and marmalade made with prickly pear cactus fruit. Everything was wonderful but my favorite part was the posole kit. I brought it with me and I made it for lunch after one of our hikes. My parents also passed on the recipes in their kit but I'm not going to post them here. My dad has been thinking about starting a foodblog of his own and I don't want to discourage him by stealing his recipes. He has a lot to share and I can attest that blogging is a lot of fun. If you'd like to see the most recent pictures of the house visit my other blog Building on Dog Hill.

A view of the icy East Grand Traverse Bay
(our lunchtime view from the lodge)

**My recent Foodbuzz browsing brought me to a great blog, All About Cakes. Rose, the author, has an impressive collection of cake recipes. She's also giving away a Betty Crocker 100 Piece Cake Decorating Kit to celebrate her 100th post. Check out how you can enter here.

January 1, 2009

New Year's Good Luck Succohash

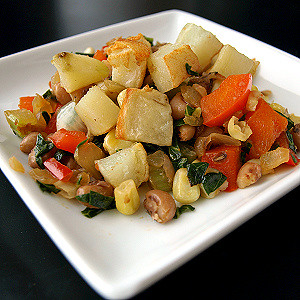
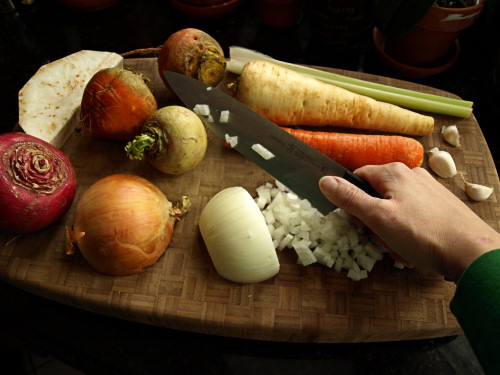
My husband is devoutly superstitious and New Year's Day always brings out the craziest food-related rules and taboos. For instance, did you know that you shouldn't eat chicken because it scratches backwards? Pork on the other hand is good because pigs root forward. The worst I endure is the pickled herring. *shudder* The first couple of years I gagged and ran to the bathroom after having it forced on me--at midnight no less and after having drink or two, NOT fun! Somehow I've learned to stomach a few pieces but it's on a very short list of foods I avoid. What I do look forward to are the "lucky" vegetable for New Year's Day, they have always been more than welcome. I love, love, love greens and beans and my father always promoted the southern tradition of lucky New Year's Day black eyed peas. Since my parents were coming for brunch I thought I'd switch up a favorite succotash recipe of mine to make it more breakfast friendly. I loved the resulting succotash/hash. I'm not counting on getting any good luck from this dish but it is a nutritional powerhouse. If this isn't your thing then take a look at this list for more traditional good luck foods. And share your superstitions for New Year's Day.

New Year's Good Luck Succohash
Makes enough for 4 generous servings

2 large baking potatoes, 1/2 to 3/4 inch cubes
neutral oil (~2 tablespoons)
1 medium sweet onion, diced
1 red bell pepper, seeded and diced
1 stalk celery, diced
1 (14 oz) can black eyed peas, drained and rinsed
6 large collard leaves
1 cup frozen corn kernels
kosher salt, cayenne pepper and black pepper to taste

-Preheat your oven to 450 degrees F.
-Toss the cubed potatoes in 2 teaspoons of oil and spread out onto a baking sheet in an even layer.
-Roast the potatoes for 15-20 minutes, turning once. Remove from the oven when golden brown and lightly sprinkle with kosher salt.
-While the potatoes are roasting, start frying the onions with a tablespoon of oil and a sprinkle of salt. Stir occasionally to prevent burning and adjust heat until the onions are lightly caramelized.
-While the onions are cooking, prep your collards. First rinse the collard leaves well in a large bowl of water, repeating until clean. Strip the stems from the leaves and roll the leaves up. Shred and then chop the leaves.
-When the onions are lightly caramelized, add the red pepper, celery, black eyed peas, and collards. Add salt, cayenne, and black pepper to taste. Cook on medium heat until the collards wilt and the other ingredients are hot. The red pepper and celery should retain some crunch.
-Add the frozen corn and allow it to cook just long enough to warm through. Taste again for seasoning and add salt and pepper if needed.
-Serve the mixed vegetables in a bowl topped with the roasted potatoes.

Have a Happy (and lucky) New Year!