October 31, 2008

Minty Mummies and their Skeleton Friends

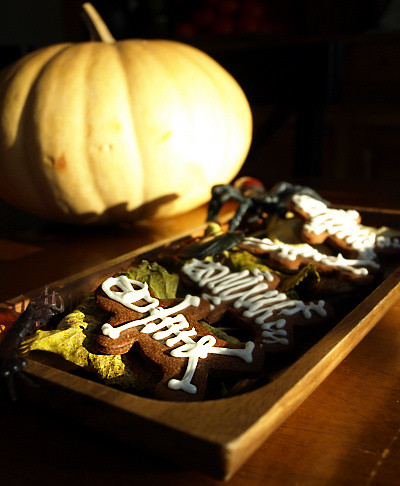
All the cool kids are doing it so I had to make a batch of Halloween cookies today. Oddly enough this meant rummaging through my Christmas decorations for my gingerbread man cookie cutters. Alex is dressing up as a mummy tonight. So, I planned on making all the cookies chocolate cut outs with mint icing, ie Mint Mummies. Shelly's skeletons (from her blog Musings from the Fishbowl ) were so cute I had to attempt a few skeletons to add to my cookie army. I used a mini gingerbread man cutter (3-inch) and a chocolate cut out cookie recipe from the blog Baking Bites. Using this recipe as a starting point, I substituted Earth Balance for the butter and replaced a half cup of the flour with whole wheat. The dough was mildly chocolatey which I liked a lot and super easy to work with. The finished cookies reminded me of chocolate graham crackers but once they were topped with the mint frosting they transformed into something reminiscent of Thin Mints. These are going to be remade as snowflakes for sure! For my icing, I skipped the egg white and made a vegan royal icing with powdered sugar, soymilk and a few drops of peppermint extract. I just added each ingredient til I had the right consistency and taste. I'll try and write down the amounts next time. When Alex and John saw them they disappeared faster than I could say Boo! Happy Halloween everyone!

Links:
Baking Bites recipe for Mummy Cookies with White Chocolate Wrapping
Musings from the Fishbowl super cute Scary Skeleton Cookies
Further credit goes to My Paper Crane for the beautifully decorated Ginger Skeletons

My spooky cookie army

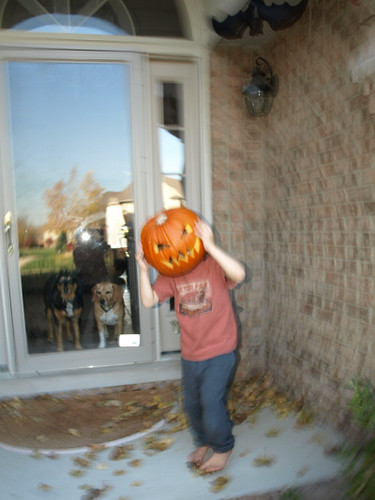
Alex made me make him a jack-o-lantern to wear.
The blur was completely unintentional and not photoshopped but I love the creepy effect.


I'm adding this to Bookmarked Recipes, an event started by Ruth's Kitchen's Experiments. Visit her site for the roundup of other bookmarked and tested recipes.

October 30, 2008

La Cense Petit Sirloin with Beurre Blanc and a giveaway


There have been a couple of offers for free foodstuffs that I've passed up since I started my foodblog but the offer of free grass-fed beef was beyond my breaking point. What intrigues me tremendously is the better heath of the animals as well as a better product that is potentially better for you. I've searched for good local grass-fed but haven't really been thrilled with what I've found in the Detroit area. Then I was contacted by the Grass-fed Party site with an offer to try their beef.

Last week I received my package. I was on my way out of town and the still solidly frozen meat transferred easily to my freezer to await my return. My trail package contained 4 burgers, 2 petit sirloins and a rib eye. This week I decided to defrost and try the whole steaks first. I knew they would be ready to go today so I made an extra special purchase at Whole Foods yesterday...REAL BUTTER. I know, this is supposed to be a dairy-free site but I just had to!

When it came time to eat I reduced the wine, shallot and a splash of champagne vinegar until syrupy and then pan seared the two sirloins. For the sauce, I followed the proportions in The Professional Chef but they are the same as the Alton Brown recipe that I'll link to at the end. The petite sirloins were both a perfect deck of card sized portion of meat which was great for me. While the steaks rested I added the butter to finish the sauce (no cream, that's cheating). The steaks were flavorful and fairly lean. John, who is the pickiest steak eater, liked his a lot. We're probably going to fight over the rib eye for a steak and egg breakfast.

Follow these links to learn more:
Alton Brown's Raymond Beurre Blanc
Join the Grass-fed Party
La Cense Beef

The Giveaway!
If you'd like to try a sample of La Cense grass-fed beef leave a comment between now and midnight Saturday November 8th with the line Where's the beef? (My grandmother Margaret loved to say that back in the day.) To be eligible you must live in the US. You'll receive: 2 burger patties and 1 petit sirloin

Update: La Cense is offering 1lb. of free Ground Steak Burger for any purchase over $75. The only way to get this offer is by visiting this link to La Cense Beef and using the code “GFP75”.

October 29, 2008

DB Dairy-free Pizza Two Ways

I've made quite a lot of homemade pizza. Originally I started doing it because it's fun and then it became a necessity with Alex's dairy allergy. With all our homemade pizza we've had a chance to try a few dairy-free cheeses over the years. There are winners like Chreese and losers like Tofutti slices (which are even more disgusting than the dairy version of plastic cheese.) We've settled on Follow Your Heart Vegan Gourmet Mozzarella as our favorite pizza "cheese". The taste is mild and it melts nicely. But I also discovered that for me cheese can be completely replaced with caramelized onions. When I found out that October's Daring Baker challenge was pizza I knew I had to have both a fake cheese and a caramelized onion version of dairy-free pizza.

As things went, I ended up waiting til the last minute to do the challenge. I added a little whole wheat flour to the dough (1/3 of the flour by weight) but otherwise followed the recipe exactly. My procrastination forced me to raid the fridge for pizza toppings. I made Alex a simple tomato sauce and fake mozzarella pizza. For my pizza I decided to use up some cooked pumpkin from the fridge. I seasoned the mashed, roasted pumpkin with a little salt, olive oil and cayenne pepper. Then I used it in place of sauce with caramelized onions, toasted pine nuts and fresh thyme. The sweetness of the onions and pumpkin were wonderful together and the pine nuts gave texture and richness.

Pumpkin, caramelized onion and pine nut pizza and a Vegan Gourmet Mozzarella pizza
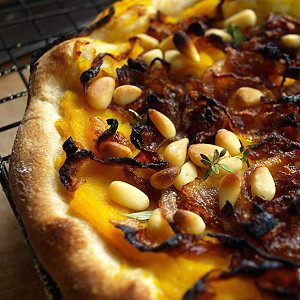
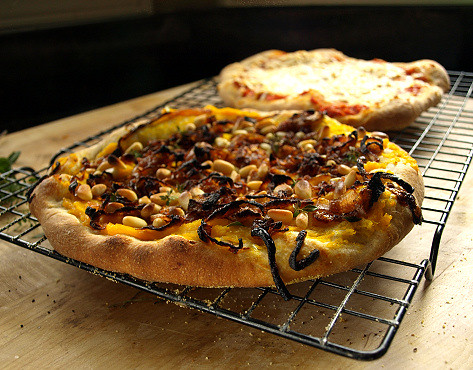
Part of this pizza challenge was attempting the tossing method. I may have given a few gentle back and forth tosses over the years but never really went all out and tried to spin it in the air. It was scary at first but I managed to not drop it. I had one or two rip a little but they patched easily and it did make the dough nice and round. Alex got to toss the last pizza and inevitably it landed on the floor. Who ever said a little cat and dog hair hurt anybody?

Tossing the dough like a pizzaiolo (sort of)
Check out the Foodbuzz apron! My poor ripped dough

This month's challenge was originally going to be co-hosted by Sherry of What did you eat? but tragically she passed away this July. Her co-host Rosa of Rosa's Yummy Yums continued on alone and used the recipe they had talked about, Pizza Napoletana from Peter Reinhart's “The Bread Baker's Apprentice”. You can visit Rosa's site for the complete recipe as well as a gluten-free version. To see the other experiences making pizza take a look at the Daring Bakers Blogroll.

October 27, 2008

Autumn Olive Jam and Leather

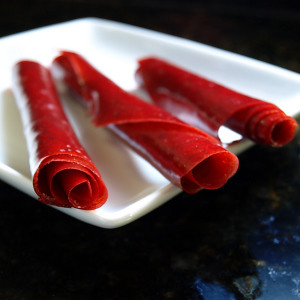
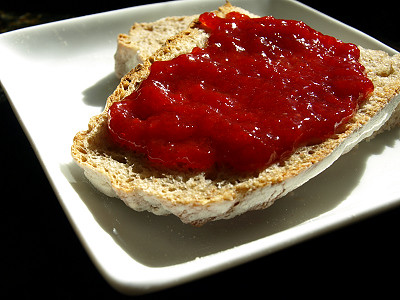
Elaeagnus umbellata (autumn olive) is a ubiquitous invasive species in Michigan but up until this year I had no idea it was edible. Then I came across this post on a blog called Tea and Food that mentioned autumn olive fruit leather. I knew immediately that I had to harvest some of the numerous bushes on our land and I've been waiting for them to ripen ever since. Alex has loved knowing there is something to nibble on while walking in the forest and has been taste testing them for me. Unfortunately he's as bad as the birds for spreading the seeds since he spits them out as he walks. I was surprised by how tasty they were the first time I tried them. The berries are tart and vaguely cranberry-like. My husband John thought they tasted like tart grapes. Finally them seemed ripe enough on our last trip so I picked a couple of bags and brought them home.

When I got home I looked around online for recipes. There was one blog called Dreams and Bones that had great information about using autumn olive berries. The writer Leslie had recipes for both jam and fruit leather. I rinsed and cooked my berries with a little water per Leslie's instructions. Then I put the pulp through a food mill to separate the seeds. I only had a packet of full sugar sure-jel left from all of my jam and jelly making this fall so I used it and the berry jam instructions included in the package for my jam. For my fruit leather I decided to sweeten the pulp with all honey instead of stevia and honey. I had some local raw honey that was light in flavor so I added just enough to balance the tartness of the berries, about 1/4 cup of honey for 2 cups of pulp. I used my food dehydrator but there is an oven dried method on Dreams and Bones that I'll link to at the end of this post.

The fruit leather is wonderfully chewy, tangy and sweet! I like Leslie's idea to cut up the leather into small bits and use them in place of dried cranberries in salads. I think the same bits would be great in bread or cookies as well. The jam is equally good. It's a beautiful, rich red color. In my reading I found out that autumn olive berries can have as much as 17 times the amount of lycopene as tomatoes and it really shows in the color of the jam. I'd love to pick some more berries and try them in savory recipes. I think they would be great in a barbecue sauce. I should have plenty of time when we move to the new house so it's probably a project for next year. The only problem is that I might get attached to these tasty invasives. I'll have to spend lots of time looking at plant and seed catalogs for natives to replace them with...
A berry laden branch of Elaeagnus umbellata (autumn olive) Washed berries ready to be smashed and cookedFinished rolls of honey sweetened fruit leather

Dreams and Bones for the recipe for fruit leather and a link to a low-sugar jam recipe
Tea and Food
Autumn olive wine recipe
Wikipedia Article on autumn olive

October 22, 2008

The Foodbuzz 24 Video

I've mentioned Foodbuzz before. I covered the Epicurean Classic and Meadowbrook Wine and Food Festival as their representative but I neglected to post about their official launch last week. To continue the momentum they've made a You Tube video about their 24, 24, 24 event. 24 Meals served in 24 Hours posted on 24 Blogs. It's an amazing array of food! Check out the video and stop by Foodbuzz.com where you can find more great culinary content and foodies galore.

October 16, 2008

Growing mushrooms Day 12 (3nd harvest)

I'm up in Traverse City, Michigan to check in on the house we're building. I couldn't bear the thought of missing the pom pom blanc mushroom's growth so I brought the log with me. Toting a mushroom log to a hotel did seem a little odd but it was worth it. To travel with them I placed the mushroom log sponge, the log and its plastic tent in a cherry picking bucket. They handled the drive up without any trouble and the coral-like clusters have been slowly increasing in size and becoming toothier.

The directions say to harvest these mushrooms when they are still creamy white and firm. When I felt them this morning the largest cluster was beginning to have a little give. I cut them from the log and gave them a smell. They gave off a rich, musty mushroom aroma similar to chanterelles. Since I've never tasted these mushrooms before I wanted to serve them simply. The directions suggested brushing them with melted butter and baking them to preserve the beautiful exterior texture. This sounded like a great idea but when it came time for dinner I didn't feel like waiting for the oven to heat up just for a handful of mushrooms. Instead, I gently ripped them into half inch florets and browned them in a little "butter" (Earth Balance margarine.)

John and I shared them (with me getting the lion's share) along with some steamed crab legs. This wasn't an intentional pairing but when I was eating them I remembered reading a description of their taste as lobster-like. Maybe it was the crab legs coloring my assessment but I did get a shellfish flavor. Their texture also had a slight stringiness that enhanced the lobster/crab impression. Whatever it was, these were wonderful mushrooms! They and the shiitakes are worth the effort of growing the logs yourself. The pom poms for the fact that they can't be purchased in stores (that I know of) and the shiitakes for their outstanding flavor. For each log I got 2-3 ounces from my first harvests. Soon I can restart each mushroom log and get a second harvest and potentially a third. And with my morel spawn planted in our forest I could have morels next spring!
The pom pom blanc mushroom log
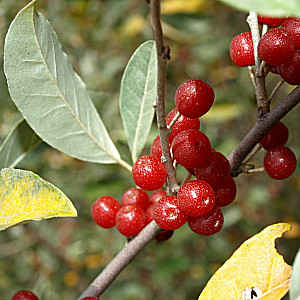
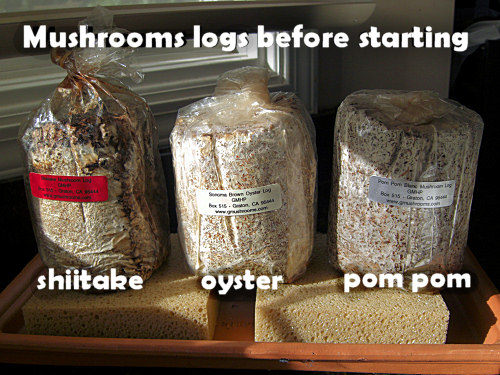
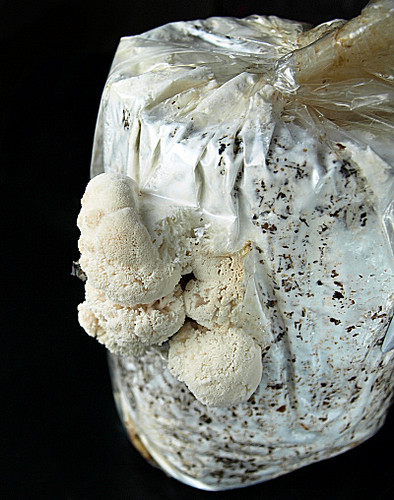
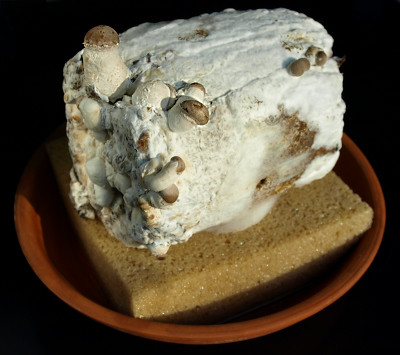
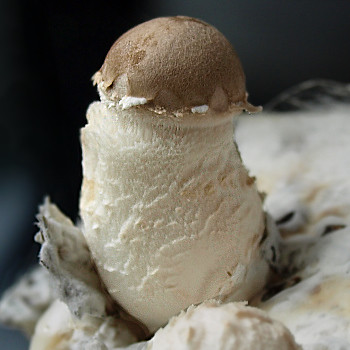
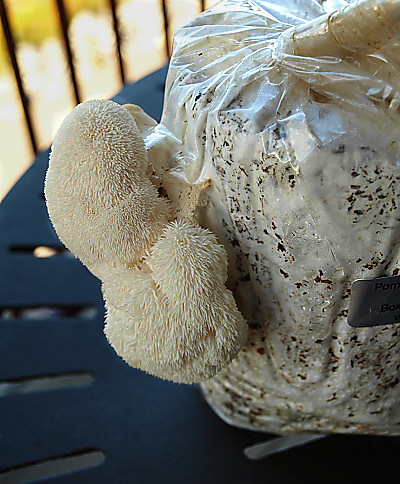
The 1st harvest of pom pom blanc mushrooms

My other mushroom posts:
Growing mushrooms Day 9 (2nd harvest)
Growing mushrooms Days 6 & 7 (1st harvest)
Growing mushrooms Day 5
Growing mushrooms Day 4
Growing mushrooms Day 1
If you are interested in growing your own mushroom logs, I purchased mine from Gourmet Mushrooms.

Visit my other blog Building on Dog Hill for pictures of my new house and woods

October 13, 2008

Growing mushrooms Day 9 (2nd harvest)

The remaining shiitake mushrooms were ready to harvest today. I found the oyster mushrooms from the first harvest just average in taste but these 11 shiitakes were small but very flavorful! They had the intense smoky, nutty flavor that I usually only find in dried shiitakes. I sauteed them in grape seed oil and ate them with a pork steak. The shiitake log must rest 10 to 14 days before it can be restarted but I have one last log that I haven't harvested yet. The pom pom blanc mushrooms started sprouting two days ago and now have 4 clumps growing that are each an inch in diameter. When they first budded they looked like cauliflower florets but as their details have grown larger they look just like coral. I have no idea what these will taste like so I'm excited to have my first try which should be in a day or two.

We'll be going up north this week and I'll be planting my forest morel patch on our land (location to be kept super secret). The morel kit is a bag of mushroom spawn that is planted in a partially shaded 4 foot x 4 foot plot. You feed it with kitchen scraps and keep it moist in the dry summer months and morels are guaranteed! I just need to find a spot that won't get destroyed by the remaining construction on our new house or by the dogs once we move it. Wish me luck!

Pom pom blanc mushroom log

Growing mushrooms Days 6 & 7 (1st harvest)
Growing mushrooms Day 5
Growing mushrooms Day 4
Growing mushrooms Day 1
If you are interested in buying your own mushroom logs, I purchased mine from Gourmet Mushrooms.

October 11, 2008

Growing mushrooms Days 6 & 7 (1st harvest)

Yesterday afternoon I got the oyster mushrooms out to take a picture and noticed that the largest was starting to shed spores. I had planned on letting them grow a day more but instead harvested them immediately per the directions. I had already eaten so I stored them in a paper bag in the fridge overnight and browsed oyster mushroom recipes online. I came across a recipe for
Sesame Crusted Fried Oyster Mushrooms and Carrot Salad on the blog Brownie Points. Fried oyster mushrooms sounded so appealing I had a hard time resisting the urge to make the recipe that night. I wanted to get a half decent picture so I forced myself to wait until this morning.

This morning I got ready to make the oyster mushrooms for lunch. First I carefully toasted some black sesame seeds. Some of the toasted sesame seeds went into the mushroom coating along with Wondra flour (instead of the original rice flour), dry polenta, smoked paprika, cayenne, and salt. The rest went into a simple salad of shredded carrots and sliced green onion dressed with rice wine vinegar, toasted sesame oil, a bit of freshly grated ginger, a pinch of sugar and salt. I noticed that the largest shiitake was also ready to harvest and so I added it to the pile of oyster mushrooms. I heated the oil, trimmed the mushrooms and got a small bowl of soy milk ready. When the oil was hot I dipped each mushroom in the soy milk, then into flour mix and into the hot oil. The mushrooms were cooked in batches until golden brown and drained on paper toweling. Then they topped the piles of carrot salad.

The carrot salad on its own was good but I'd really love to try these mushrooms on a bowl of udon and broth. They were wonderfully crispy and the sesame seeds in the coating gave a lot of toasty flavor. The oyster mushrooms were good but the shiitake cap was more flavorful and held up better to the coating. The oyster mushroom log is now getting a rest in paper towel and I can restart it in a week. There are almost a dozen little shiitake mushrooms yet to mature and the pom pom blanc mushrooms have finally begun to bud! Right now they look like miniature cauliflower florets and aren't very photogenic but I'll get a picture of them as they get bigger.

Growing mushrooms Day 5
Growing mushrooms Day 4
Growing mushrooms Day 1
If you are interested in buying your own mushroom logs, I purchased mine from Gourmet Mushrooms.
The recipe for Sesame Crusted Oyster Mushrooms with Toasted Sesame Carrot Salad
(I used Wondra flour instead of rice flour and a little less smoked paprika. I also added a pinch of sugar and a 1/2 teaspoon of grated ginger to the salad dressing.)

The shiitake log on day 6 The largest shiitake mushroom on day 6
The oyster mushroom log on day 6
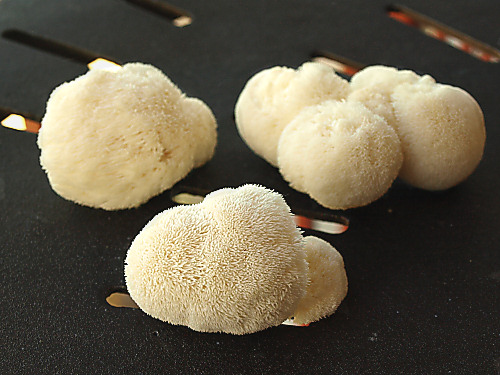
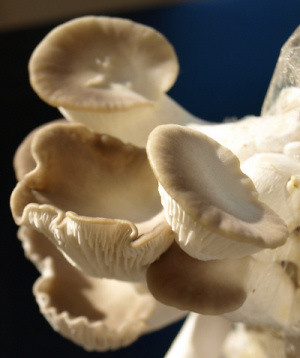
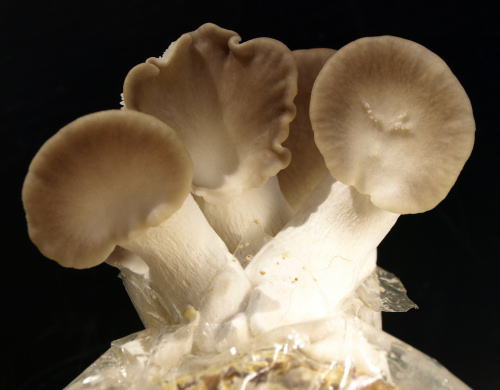
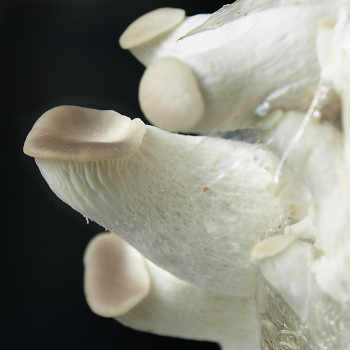
The first flush of oyster mushrooms before harvesting The oyster mushrooms on day 6
The shiitake log on day 7
The largest shiitake cap on day 7
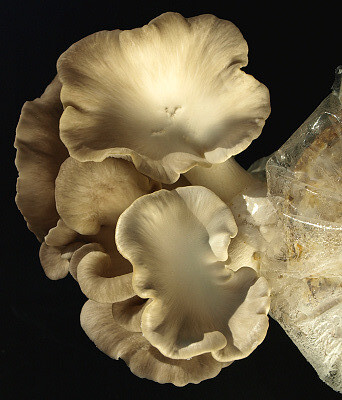
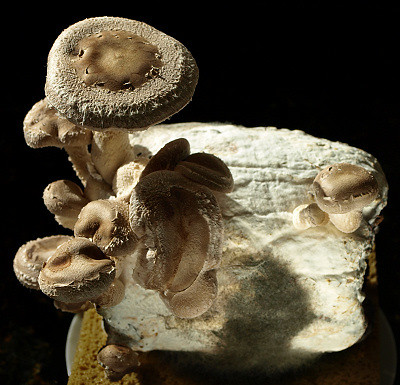
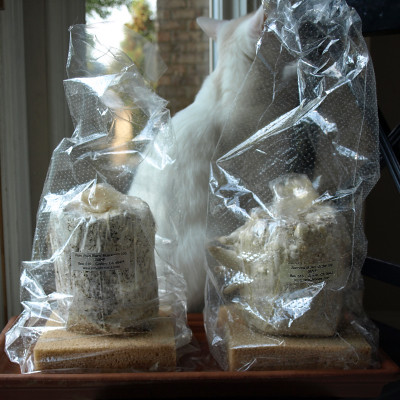
My first mushroom harvest


I'm adding this to Bookmarked Recipes, an event started by Ruth's Kitchen's Experiments. Visit her site for the roundup of other bookmarked and tested recipes.

October 10, 2008

Macaroons and Chuzzle!


Macaroons as squeaking Chuzzles! This is too cute!!
This is shameless self promotion but it IS food related. My husband's game Chuzzle is going to be available for some Japanese cell phone and our partner PopCap Games had this extremely cute commercial made for the release.

If you want to download a copy of Chuzzle visit Raptisoft.com

October 9, 2008

Growing mushrooms Day 5

We had wonderful Indian summer weather today. My son Alex was busy playing outside all afternoon and I was inside watching a pot of applesauce. I've already scorched one pot this fall so I wasn't taking any chances. Hence I had time to take a few more pictures of the mushroom logs. Both the oyster mushrooms and shiitakes have grown but still no action from the pom pom blanc log. The gills on the oyster mushrooms are much more pronounced today and the largest shiitake cap has started to flare. In anticipation of the first harvest I've begun defrosting some phyllo dough but that's as far as I've gone in planning.

Growing mushrooms Day 4
Growing mushrooms Day 1
If you are interested in your own, I purchased the logs from here.

The brown oyster log Day 5 The top of the oyster mushrooms The developing gills on the brown oyster mushrooms 
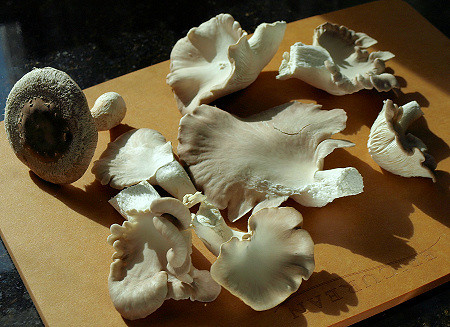
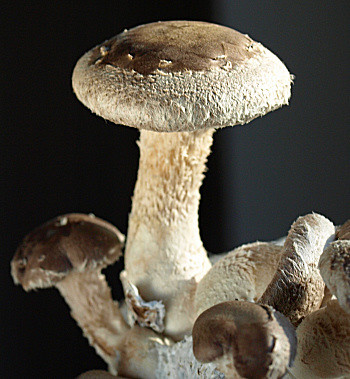
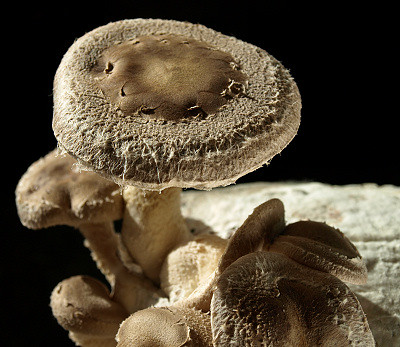
The baby shiitake mushroom, it just keeps getting cuter!
I can hardly stand how velvety the cap looks.

October 8, 2008

Growing mushrooms Day 4

I've been too busy looking at light fixtures for the new house to do much cooking but I have remembered to water my mushroom logs. They've been resting on damp sponges in their little tents for the last few days. Each day I give the oyster and pom pom mushrooms a sprinkle of water and make sure the sponges are still wet. The shiitake log has a different treatment. It sits in an inflated bag and has been growing fuzzier every day.

When I watered yesterday, I noticed that a few small bumps had formed on the oyster mushroom log. This morning those bumps had developed into 1 1/2 inch stalks with little caps on them! Then I took a closer look at the shiitake log which was supposed to still be in the preparation stage. Overnight mushrooms formed on the bottom of the log. One little mushroom was over an inch tall already! I gave the company a call to find out if I should skip ahead to the growing stage and got their ok. Since the mushrooms were sprouting on what was the bottom of the log I laid the log horizontally when I placed it on the sponge. According to the directions I should be harvesting my first mushrooms 2-7 days from now. I think it's the wonderful fall weather we're having that is causing them to grow so well.

*Abbie (my cat) was very interested in the mushroom logs. You can see her behind the logs in the first picture and she sniffed the oyster log for the longest time.

The sprouting Sonoma brown oyster mushroom logThe oyster mushrooms emerging Baby Sonoma brown oyster mushrooms The shiitake log A baby shiitake mushroom Abbie giving the oyster log a sniff Bonus Abbie shot
Growing Mushrooms Day 1

October 5, 2008

Tea at Warda's

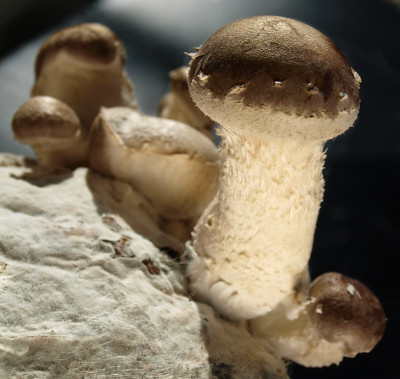
Today was my second event with the Michigan Lady Food Bloggers. Back in early September we had a fantastic potluck. Warda another member of our little circle who couldn't attend the potluck invited us to her home today for a tea. Warda's plan was to share her traditional Algerian sweets that are part of the end of Ramadan celebration.

When I arrived Warda was readying the sweet couscous for its steaming. With the couscous steaming away we moved out to her patio where an array of pastries awaited us. We enjoyed the treats with sweetened mint tea in beautiful little glasses. Everything was wonderful but for me there was a clear winner. I loved her date-filled semolina cookies! The exterior was crunchy and at the same time sticky with honey. The center was gently spiced and gooey with a molasses-like flavor. They were wonderful! It was beginning to get chilly so we moved inside when the couscous was ready. The dramatic pile of couscous was topped with walnuts and cinnamon and served with glasses of cold milk (a treat for me since I don't keep cow's milk in our house.) I was surprised at how buttery the flavor was and the extremely light texture. The raisins gave just enough sweetness though a sprinkle of sugar was also an option. Thanks again Warda for the wonderful experience!

Warda's recipe for Seffa (dried fruit and cinnamon couscous)
More of Warda's beautiful writing and food can be found at 64 sq ft Kitchen.

Also in attendance:
Shayne of fruitcake and nuts
Lisa and her husband Joe of Kitchen Chick
Sarah of Una Buona Forchetta
Other Michigan food blogs

A glass of sweetened mint tea
Peanut filled crescents Hazelnut shortbreads with coconut tarts in the background
The delicious, sticky date cookies 
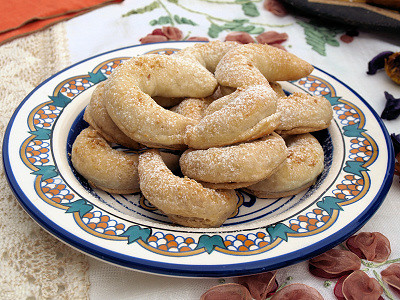
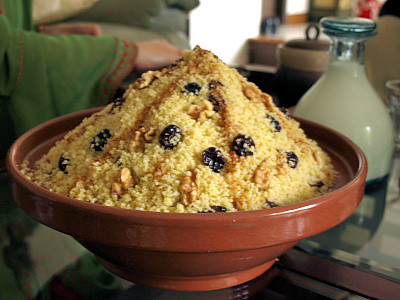
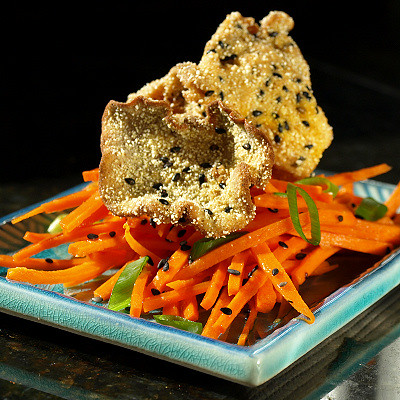
The Seffa: dried fruit couscous with raisins, cinnamon, and walnuts

October 4, 2008

Growing mushrooms Day 1

Look what was waiting for me when I returned home!

John was bugging me to order morels to plant on our land and after looking around this Morel Habitat Kit sounded pretty easy. I couldn't resist upgrading to the Gourmet's Delight Kit which also came with Shiitake, Pom Pom Blanc and Sonoma Brown Oyster logs. The morel spawn is waiting in the fridge for our next trip up north to our land and building site. The logs got their start up treatment this morning. I can't wait to see how they turn out! The shiitake mushrooms won't start producing for up to a month and the directions are pretty complicated. The oyster and pom pom mushrooms could potentially be harvestable in a week and a half. They were super easy to start, just stab and cover. I just have to remember to mist them everyday. I should be buried in mushrooms soon!

Update: Only the morels are grown in the yard in a 4'x4' spot. In my case I'm making a forest patch on the land we're building on. The three logs pictured above grow indoors. They take up less space than most houseplants.